
Connect Foundry Agent to Copilot Studio
Introduction
Connecting a Microsoft Foundry Agent from Copilot Studio is a powerful way to bring advanced, enterprise-grade AI capabilities into a low-code conversational experience. Microsoft Foundry helps developers build, deploy, and manage production-ready agents with custom models, tools, grounding data, evaluations, and observability. Copilot Studio helps makers create conversational agents for Microsoft Teams, websites, Microsoft 365, and other channels using a guided low-code experience.
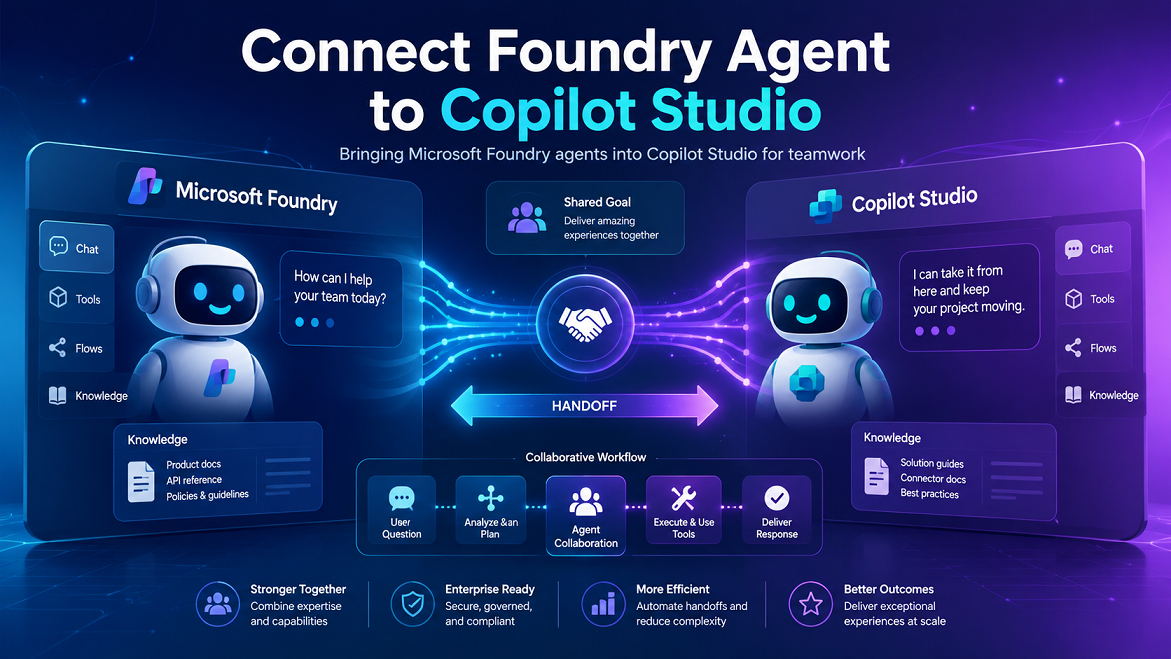
Together, these platforms allow organizations to build once in Microsoft Foundry and deliver the experience through Copilot Studio. Microsoft Foundry provides custom model orchestration, tool and knowledge grounding, evaluation, and observability, while Copilot Studio provides visual topic authoring, multi-channel publishing, and Power Platform governance.
What Is a Microsoft Foundry Agent?
A Microsoft Foundry Agent is an AI agent built using Microsoft Foundry. It can use models, tools, knowledge sources, and instructions to complete tasks. These agents are useful when the solution needs more advanced AI orchestration, custom logic, enterprise data grounding, or deeper observability.
For example, a Foundry Agent can be designed to:
- Search enterprise knowledge sources.
- Call APIs or tools.
- Use specific models for reasoning.
- Follow custom business instructions.
- Work with complex workflows.
- Be evaluated and monitored before production use.
In simple words, Microsoft Foundry is where technical teams can build a strong and controlled AI agent.
What Is Copilot Studio?
Copilot Studio is a low-code platform for creating custom copilots and agents. It allows business users, makers, and technical teams to build conversational experiences without writing complex code.
With Copilot Studio, you can:
- Design topics and conversation flows.
- Add actions and plugins.
- Publish agents to Teams, websites, and other channels.
- Apply Power Platform governance.
- Manage environments, security, and data loss prevention policies.
In simple words, Copilot Studio is where you create the user-facing conversational experience.
Why Connect Foundry Agent with Copilot Studio?
Many organizations already build advanced AI agents in Microsoft Foundry. However, business users often interact with AI through Microsoft Teams, websites, or enterprise copilots. Instead of rebuilding the same agent logic inside Copilot Studio, you can connect the Foundry Agent and reuse it.
This approach gives the best of both worlds:
- Microsoft Foundry provides deep AI capabilities, custom models, tools, grounding, and observability.
- Copilot Studio provides a simple conversational interface, low-code orchestration, Power Platform governance, and easy publishing.
High-Level Architecture
At a high level, the connection works like this:
- The user asks a question in a Copilot Studio agent.
- Copilot Studio decides when the external Foundry Agent should be used.
- Copilot Studio calls the connected Microsoft Foundry Agent.
- The Foundry Agent processes the request using its instructions, tools, model, and knowledge sources.
- The response is returned to Copilot Studio.
- Copilot Studio shows the final answer to the user.
This means Copilot Studio acts as the front-end experience, while Microsoft Foundry Agent acts as the advanced AI capability behind the scenes.
Step-by-Step: Connect Foundry Agent from Copilot Studio
Step 1: Open Your Copilot Studio Agent
- Open Copilot Studio
- Select the custom agent where you want to use the Microsoft Foundry Agent.
This will be your main user-facing agent. Users will interact with this agent through Teams, web, or other published channels.
Step 2: Go to the Agents Page
- Open the Agents tab.
- Click + Add an agent.
This as the starting point for connecting a Microsoft Foundry Agent.
Step 3: Choose Microsoft Foundry
-
Under Connect to an external agent, select Microsoft Foundry as the agent type.
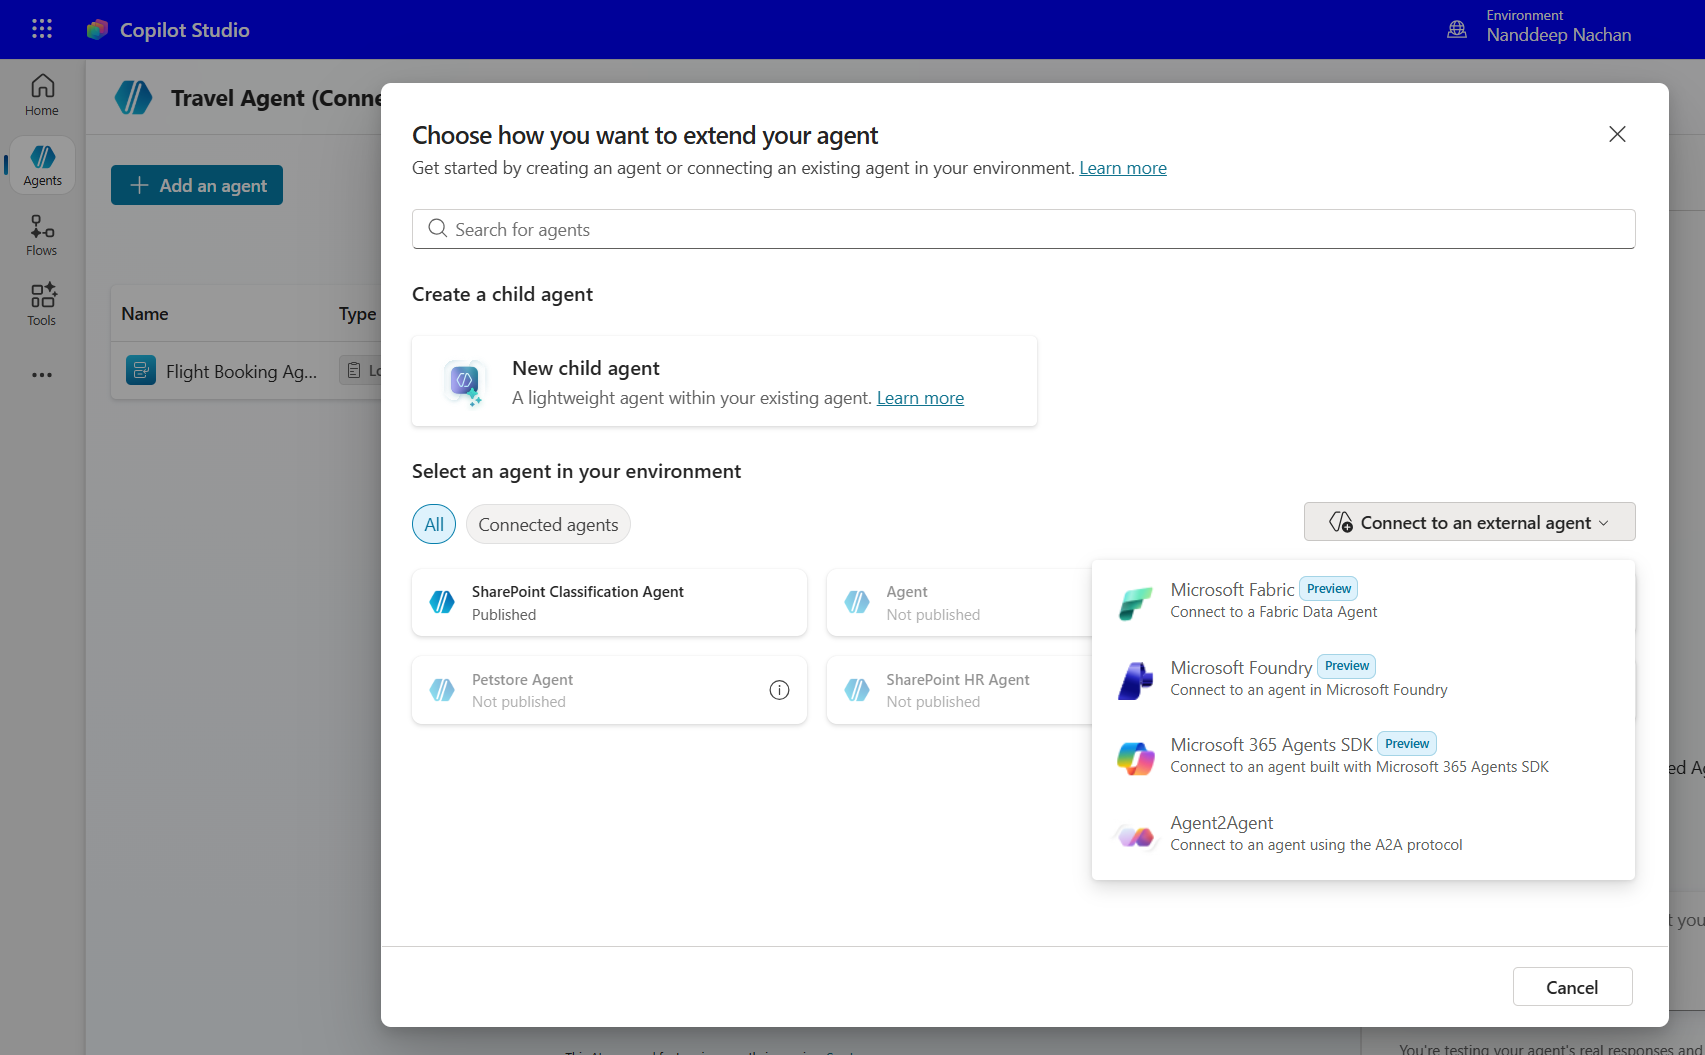
This tells Copilot Studio that the external agent you want to connect is hosted in Microsoft Foundry.
Step 4: Select or Create a Connection
-
Copilot Studio shows available Microsoft Foundry connections. You can either select an existing connection or create a new one.
-
To create a new connection, provide the Foundry project endpoint URL.
This connection allows Copilot Studio to communicate with the Microsoft Foundry project.
Step 5: Enter Name and Description
After the connection is created, enter a proper Name and Description for the connected agent.
The description is very important. Copilot Studio uses this description to understand when the Foundry Agent should be used.
For example, instead of writing:
Handles support questions.
Write something more specific:
Use this agent to answer technical support questions about product installation, configuration, known issues, troubleshooting steps, and recommended fixes.
A clear description helps the main Copilot Studio agent route the right user questions to the right connected agent.
Step 6: Enter the Microsoft Foundry Agent ID
- Next, enter the Agent ID of the Microsoft Foundry Agent you want to connect.
This tells Copilot Studio exactly which Foundry Agent should be called.
Step 7: Review the Description
Review the description again and make it more contextual if needed.
This is especially important when your Copilot Studio agent has multiple tools, actions, or connected agents. If two connected agents have similar descriptions, Copilot Studio may not always choose the correct one.
For example:
Poor description:
Answers HR questions.
Better description:
Use this agent for employee HR policy questions related to leave policy, holidays, benefits, onboarding, and employee handbook content.
Step 8: Add the Agent
- Select Add Agent to complete the connection.
Once added, the Microsoft Foundry Agent becomes available as a connected agent inside Copilot Studio.
Step 9: Test the Agent
After the agent is added, test it immediately using the Copilot Studio test pane. Microsoft documentation mentions that once the agent is created, you can test it immediately.
Test different types of questions, such as:
- Questions that should be handled by Copilot Studio directly.
- Questions that should be routed to the Foundry Agent.
- Questions that are outside the Foundry Agent’s scope.
- Questions with missing information.
- Questions involving sensitive or restricted data.
Testing helps confirm that the correct agent is being invoked and that the response quality is acceptable.
Step 10: Publish the Copilot Studio Agent
After testing, publish the Copilot Studio agent to the required channel.
For example, you can publish it to:
- Microsoft Teams
- A public or internal website
- Microsoft 365 experiences
- Other supported Copilot Studio channels
Important Configuration Considerations
Agent Description Matters
The description is not just documentation. It helps the main Copilot Studio agent understand when to call the connected Microsoft Foundry Agent. Microsoft recommends updating the description so Copilot Studio can understand when to invoke the agent.
A good description should explain:
- What the Foundry Agent does.
- What type of questions it can answer.
- What business process it supports.
- When it should not be used.
- Use the Correct Foundry Portal
The Foundry Agent should be created in the new Microsoft Foundry portal. Agents created in the previous portal are not supported for this connection and can cause a 404 - Version not found error.
Validate Security and Data Flow
When Copilot Studio calls a Microsoft Foundry Agent, data moves between agents. You should review what data is passed, how it is processed, and whether the connected agent meets your organization’s compliance needs.
Benefits of Connecting Foundry Agent from Copilot Studio
Faster Time to Value
You do not need to rebuild the same agent logic inside Copilot Studio. If the agent already exists in Microsoft Foundry, you can connect it and reuse it.
This helps teams move faster from prototype to production.
Better Separation of Responsibilities
Technical teams can build and manage advanced AI logic in Microsoft Foundry. Business makers can design user conversations and channels in Copilot Studio.
This creates a clean separation:
- Foundry: advanced AI, models, tools, grounding, evaluation.
- Copilot Studio: user experience, topics, publishing, and governance.
Enterprise-Grade AI Capabilities
Microsoft Foundry can support more advanced agent scenarios using custom models, tools, and knowledge grounding. Copilot Studio can then make those capabilities available to end users through simple conversations.
Reuse Across Experiences
A single Foundry Agent can be reused across different Copilot Studio agents or business scenarios, depending on the design.
For example, a product knowledge Foundry Agent can support:
- Sales teams
- Support teams
- Field engineers
- Customer success teams
Governance Through Power Platform
Since the user-facing agent is built in Copilot Studio, organizations can apply Power Platform environment strategy, DLP policies, lifecycle management, and governance processes.
Best Practices
-
Use Clear Agent Metadata
Give the connected Foundry Agent a clear name and description. This helps Copilot Studio decide when to use it. Avoid generic descriptions. Be specific about the agent’s purpose.
-
Keep Agent Scope Focused
Do not make one Foundry Agent responsible for everything. A focused agent is easier to test, govern, monitor, and improve. For example, instead of creating one large enterprise agent, create separate agents for:
- HR policy
- IT support
- Sales proposals
- Finance FAQs
- Product documentation
-
Test Routing Carefully
Test whether Copilot Studio calls the Foundry Agent only when needed. If the connected agent is called too often or not called when expected, improve the name and description.
-
Review Data Sharing
Before publishing, check what information Copilot Studio sends to the Foundry Agent. Make sure sensitive data is handled properly and follows your organization’s policies.
-
Monitor Both Platforms
Monitor the experience from both sides:
- Copilot Studio for conversation behavior and user interaction.
- Microsoft Foundry for agent behavior, quality, and observability.
-
Use a Sandbox Environment First
Before publishing to production, test the integration in a development or sandbox environment. This helps validate behavior without impacting business users.
-
Version Your Foundry Agent
When you update the Foundry Agent, test the updated version before exposing it through Copilot Studio. Versioning helps avoid unexpected production issues.
-
Review DLP and Environment Policies
Since Copilot Studio is governed by Power Platform, review environment-level DLP policies and connector rules before production rollout.
Security and Governance Considerations
Connecting agents should not be treated only as a technical configuration. It should also be reviewed from a governance perspective.
Important areas to review include:
- What user data is sent to the Foundry Agent?
- What knowledge sources does the Foundry Agent use?
- What tools or APIs can the Foundry Agent call?
- Are permissions properly configured?
- Are responses traceable?
- Is there proper monitoring?
- Is human review needed for sensitive use cases?
- Are DLP policies correctly configured?
- Does the integration meet organizational compliance requirements?
Summary
Connecting a Microsoft Foundry Agent from Copilot Studio allows organizations to combine advanced AI engineering with low-code conversational delivery. Microsoft Foundry is ideal for building powerful, grounded, and production-grade agents. Copilot Studio is ideal for creating user-friendly conversational experiences and publishing them across channels like Microsoft Teams and websites.
This integration helps organizations reuse existing Foundry Agents, reduce duplicate development, improve governance, and deliver advanced AI capabilities directly to business users. The most important success factors are clear agent descriptions, correct Foundry Agent ID, use of the new Microsoft Foundry portal, careful testing, and strong governance.
In simple words: Build the intelligence in Microsoft Foundry, connect it in Copilot Studio, and deliver it where users work.
Leave a comment