
Unstructured Document Processing with Microsoft Syntex
Overview
Unstructured document processing model works best for unstructured documents, such as letters or contracts which does not have any predefined format.
In this article, we will explore Unstructured document processing model and how to use it to process the Contract Renewal documents.
Unstructured document processing
Unstructured document processing model uses artificial intelligence (AI) to process documents. As the word Unstructured says, these documents does not have any predefined layout. These documents must have text that can be identified based on phrases or patterns. (e.g. Contract renewal document with text - Service start date of <date>). The identified text defines both classification and extractor for the file.
- Classifiers helps to identify and classify documents (for e.g., contract renewal) which helps to define the content type.
- Extractors extracts the information from the document (for e.g., Customer name, contract date from the document) which helps to define columns of the content type.
Business Scenario
Syntex Samples repository demonstrates patterns of unstructured document processing models. In this article, we will use the Contract Notice model.
Create a Structured document processing model
Follow the below steps to create a structured document processing model:
- Open the content center in SharePoint.
- From the top navigation, click Models.
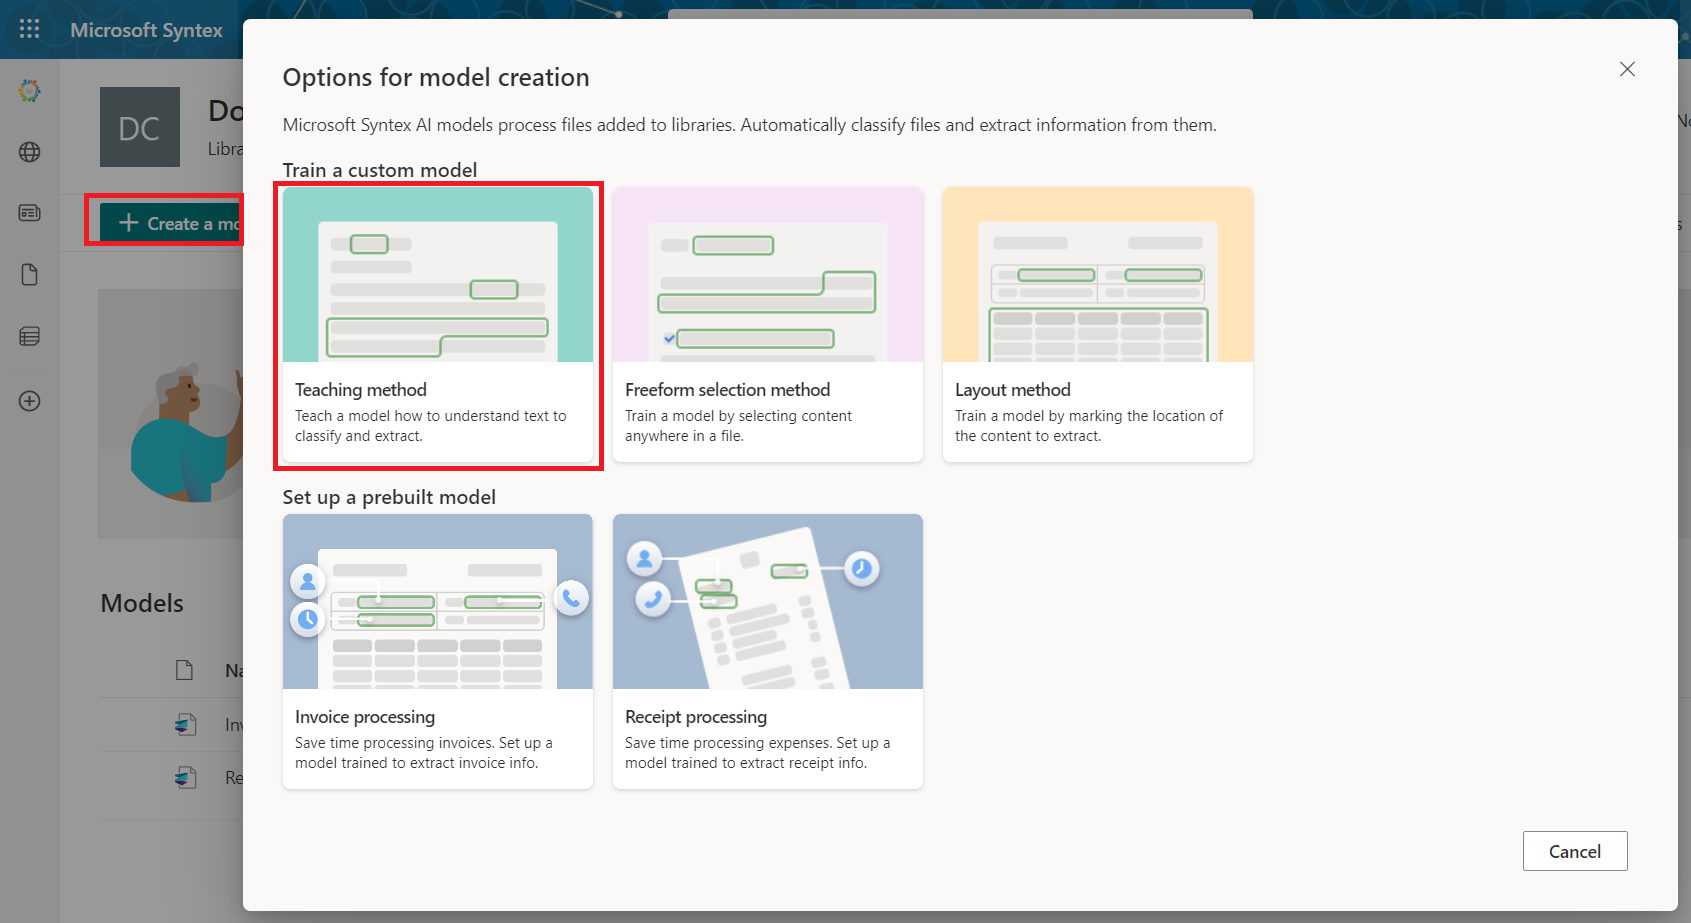
- Click Create a model.
-
Select the Teaching method.
-
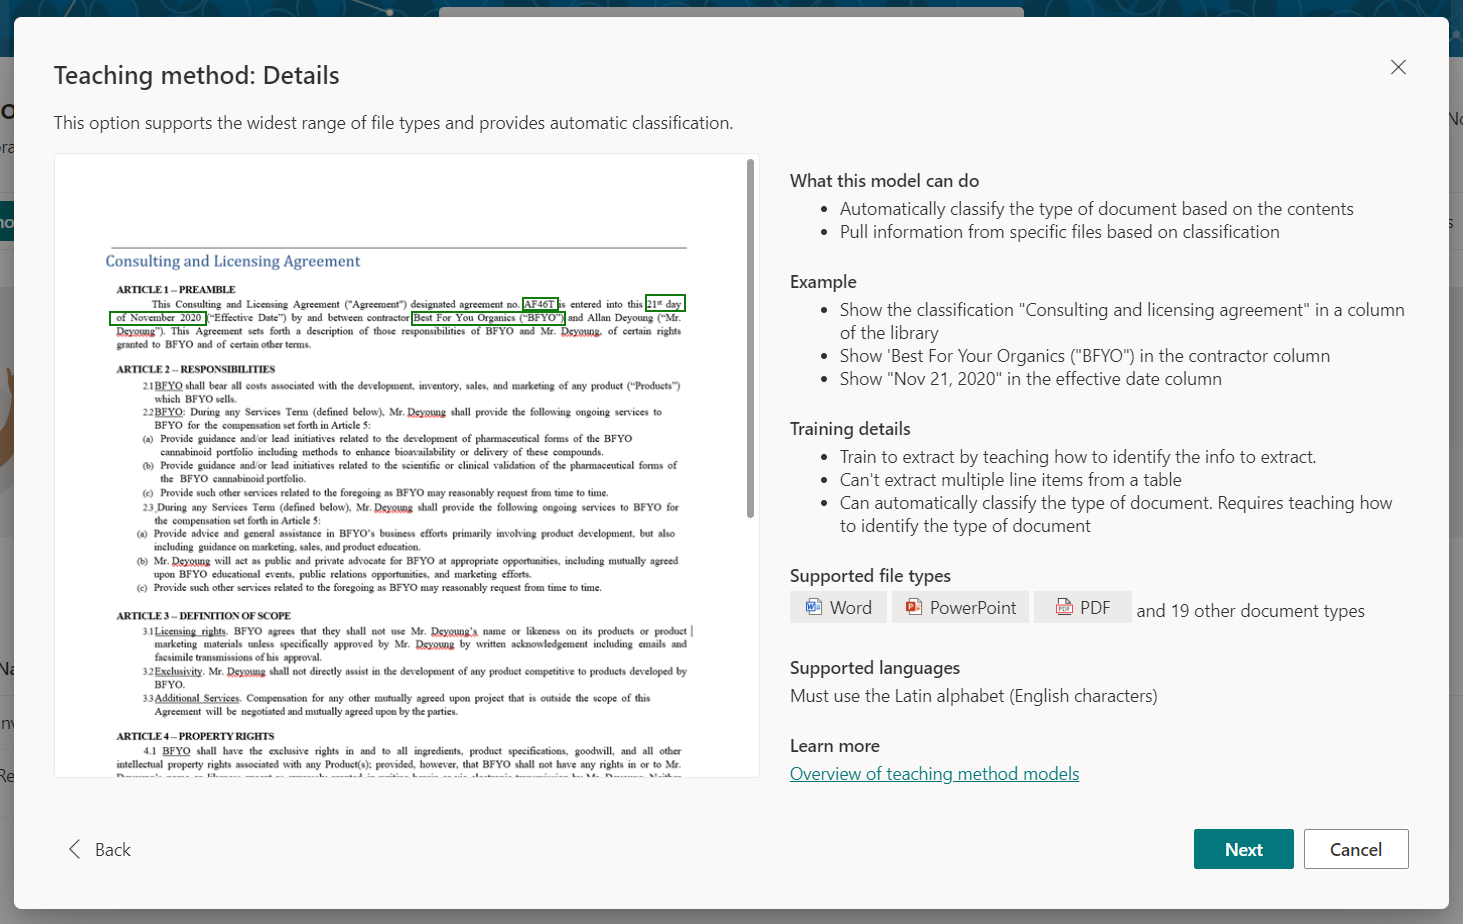
Read out the details to understand the model better. Note, you can use this model on Word, PowerPoint, and PDF files and we must use the Latin alphabet (English characters).
-
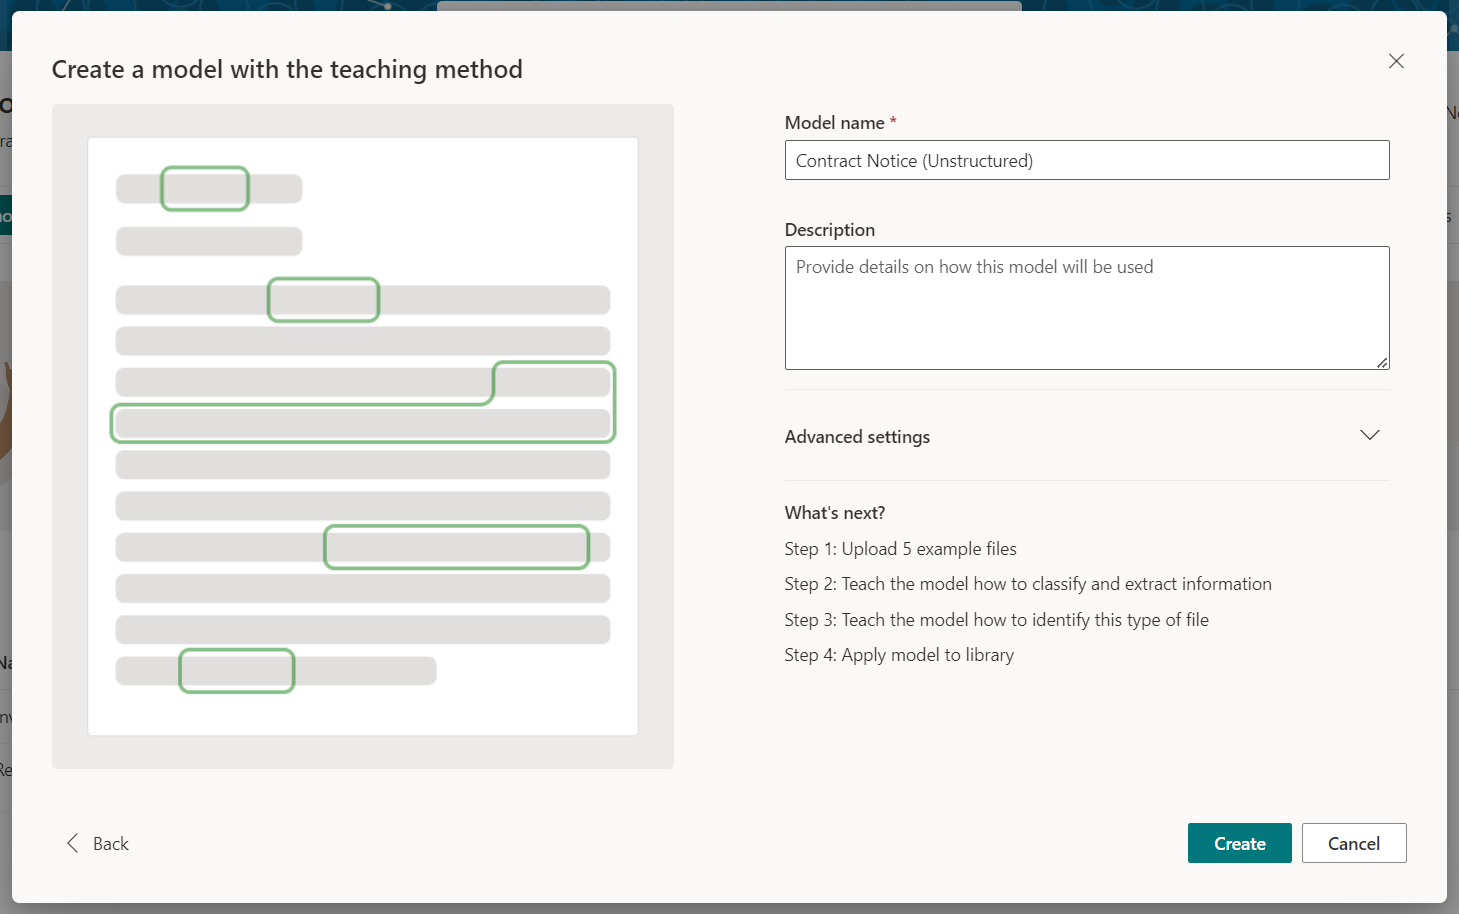
Name your model. Click Create.
Add example files
We need to upload positive and negative file examples.
- Positive example: Contains strings and information that will always be in this type of document. Upload at least five positive examples.
- Negative example: Any other document that does not represent the document you want to classify. Upload at least one negative example.
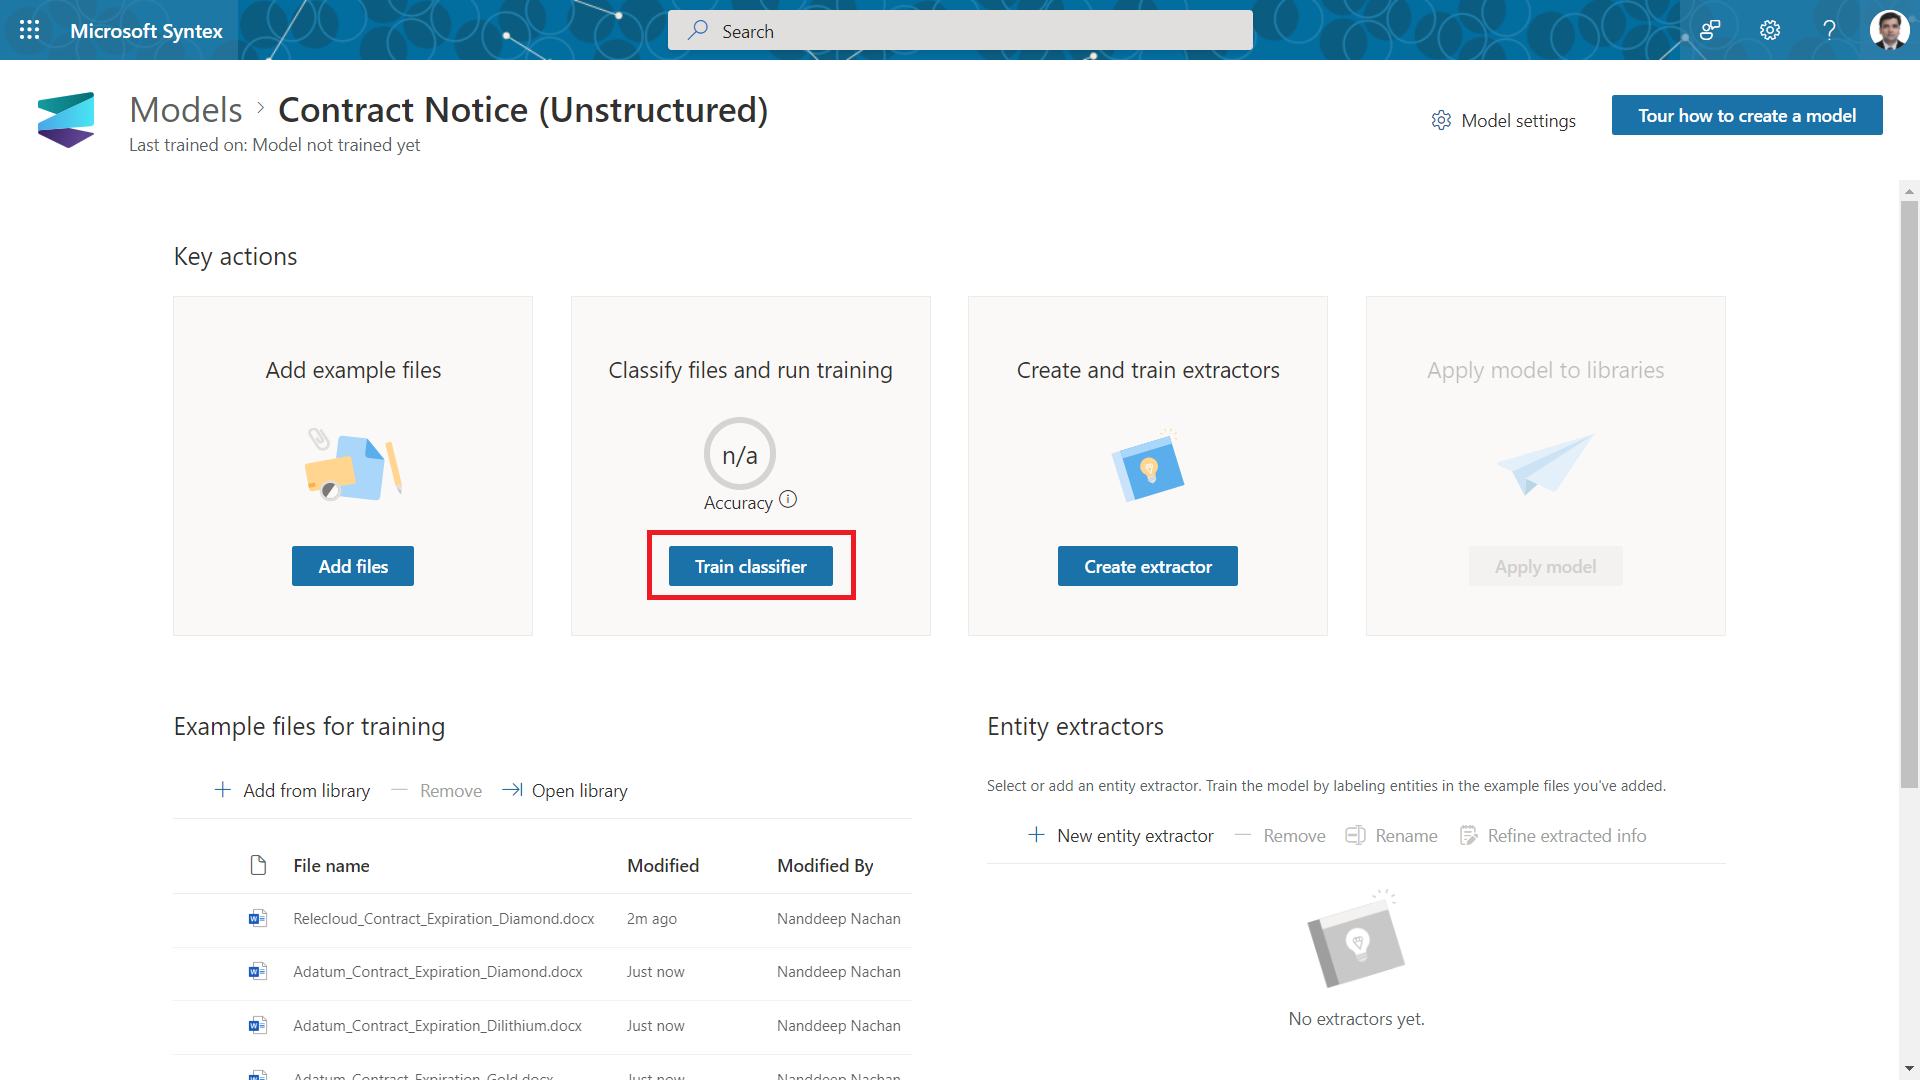
Train Classifier
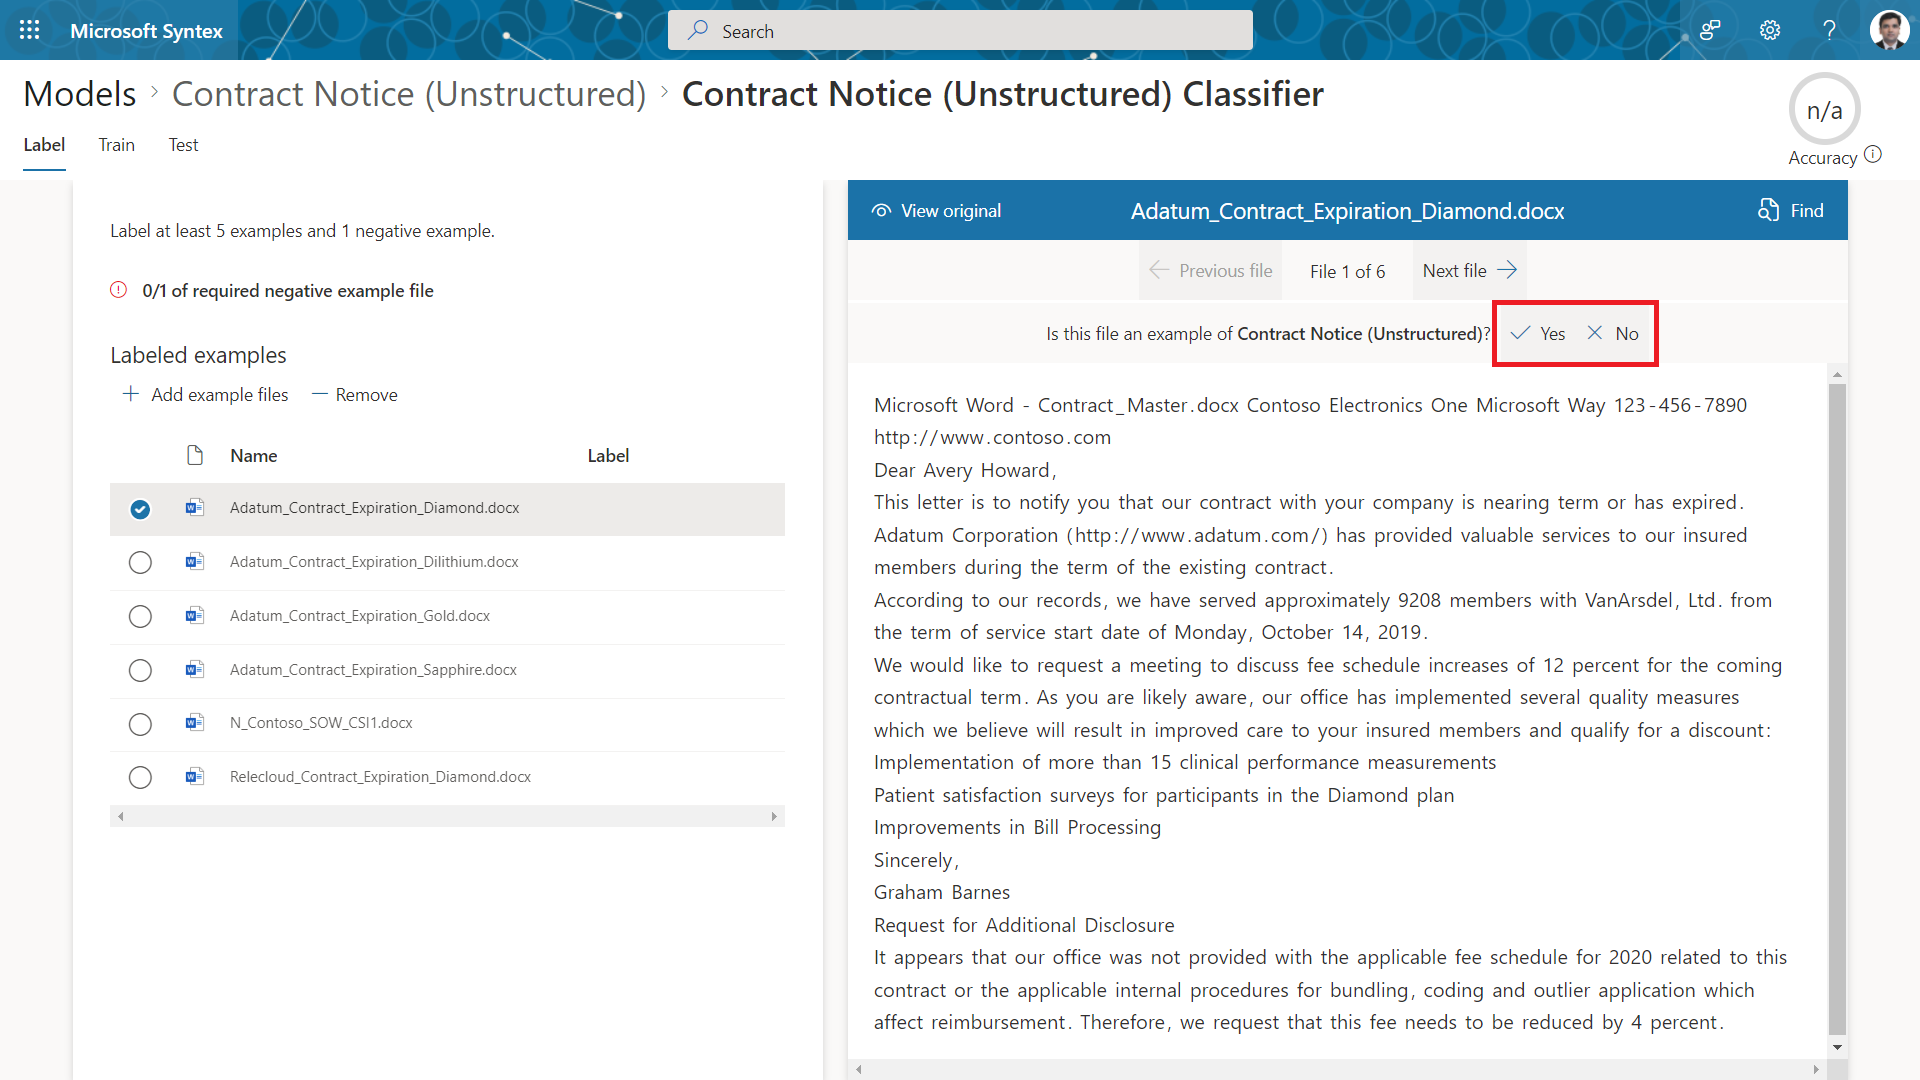
After adding the files, we need to label them as either positive or negative by clicking Train Classifier.
From the viewer, click Yes if example is positive or No otherwise.
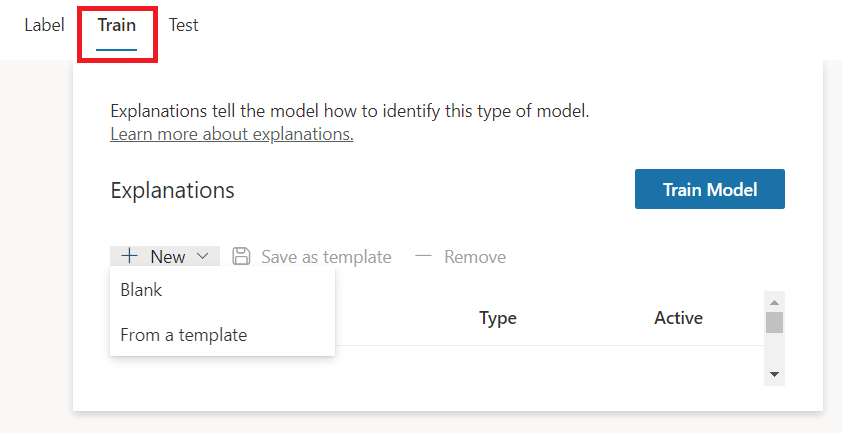
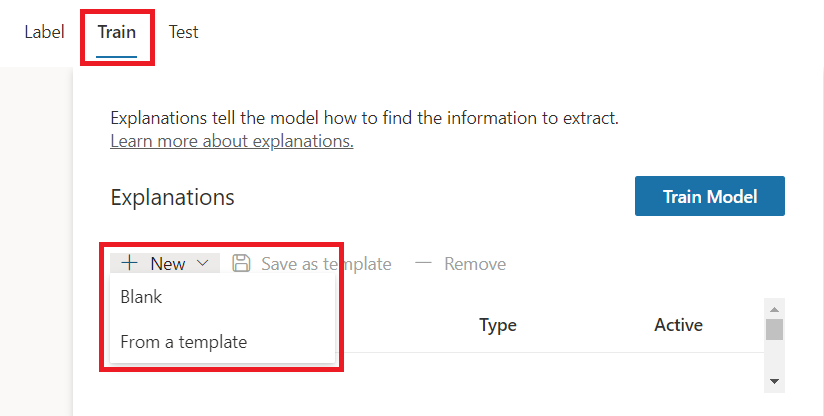
Create an Explanation
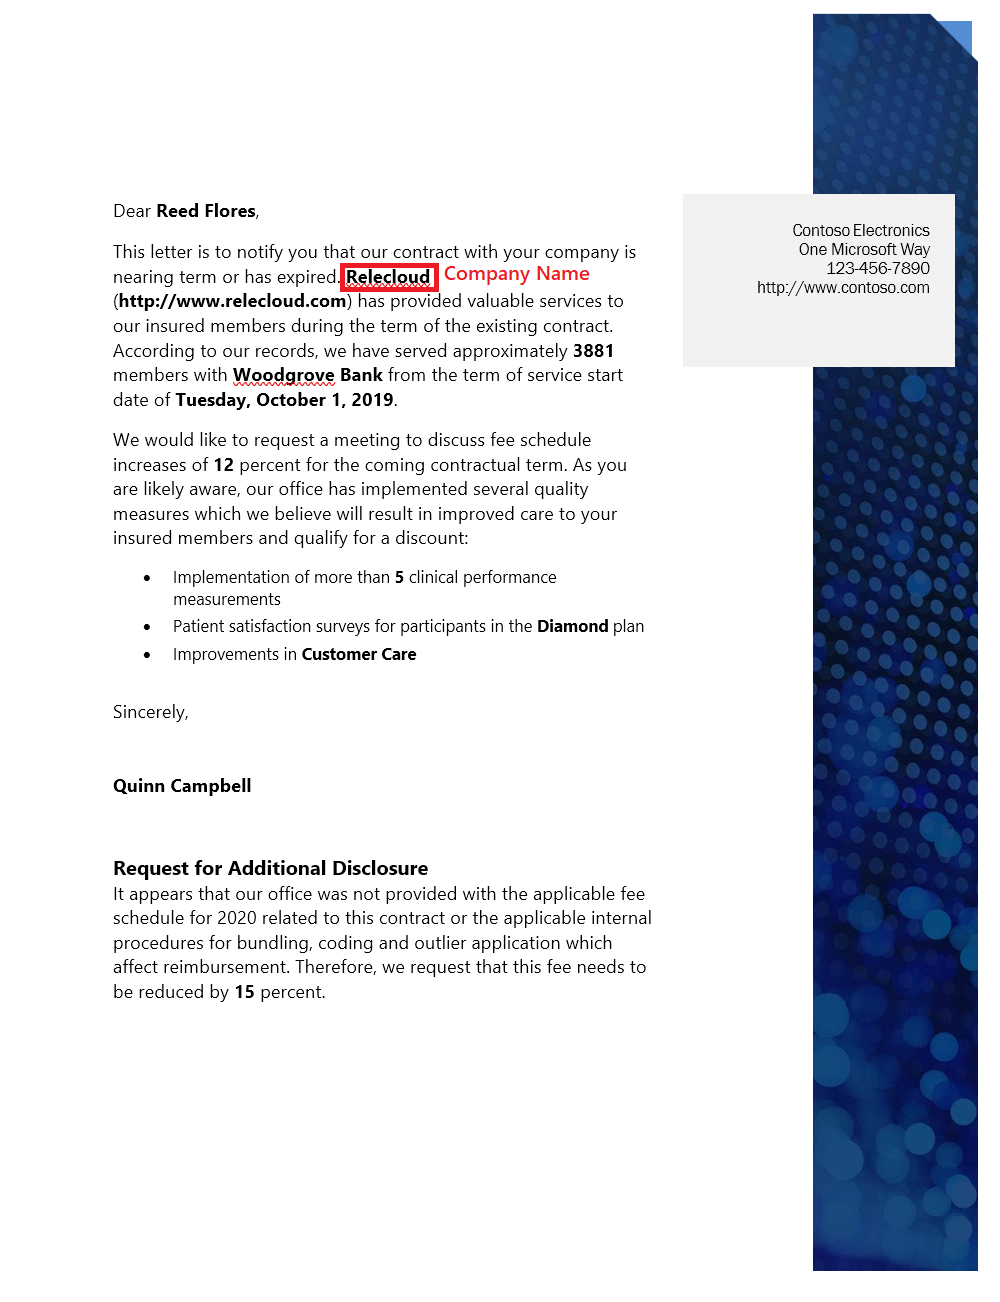
Explanation helps to recognize the document. For e.g., Contract renewal document will always contain a text Request for additional disclosure.
On the Train tab, under Explanations, click New.
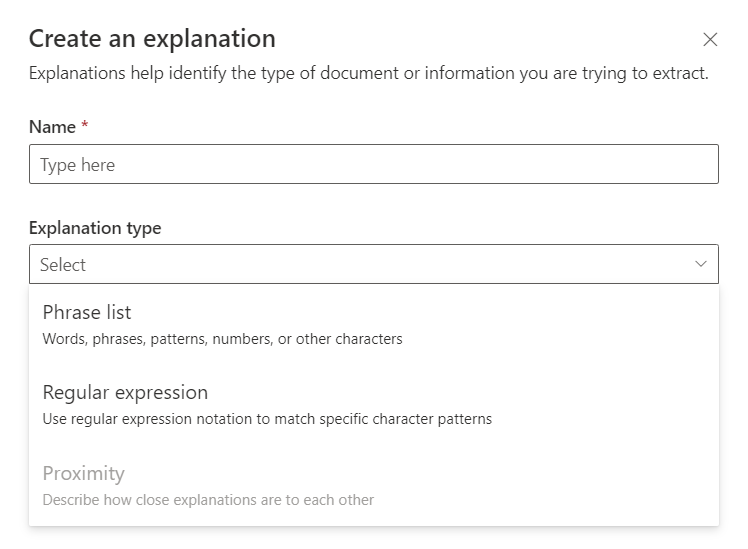
Blank
Under Blank, we can choose Phrase list or Regular expression.
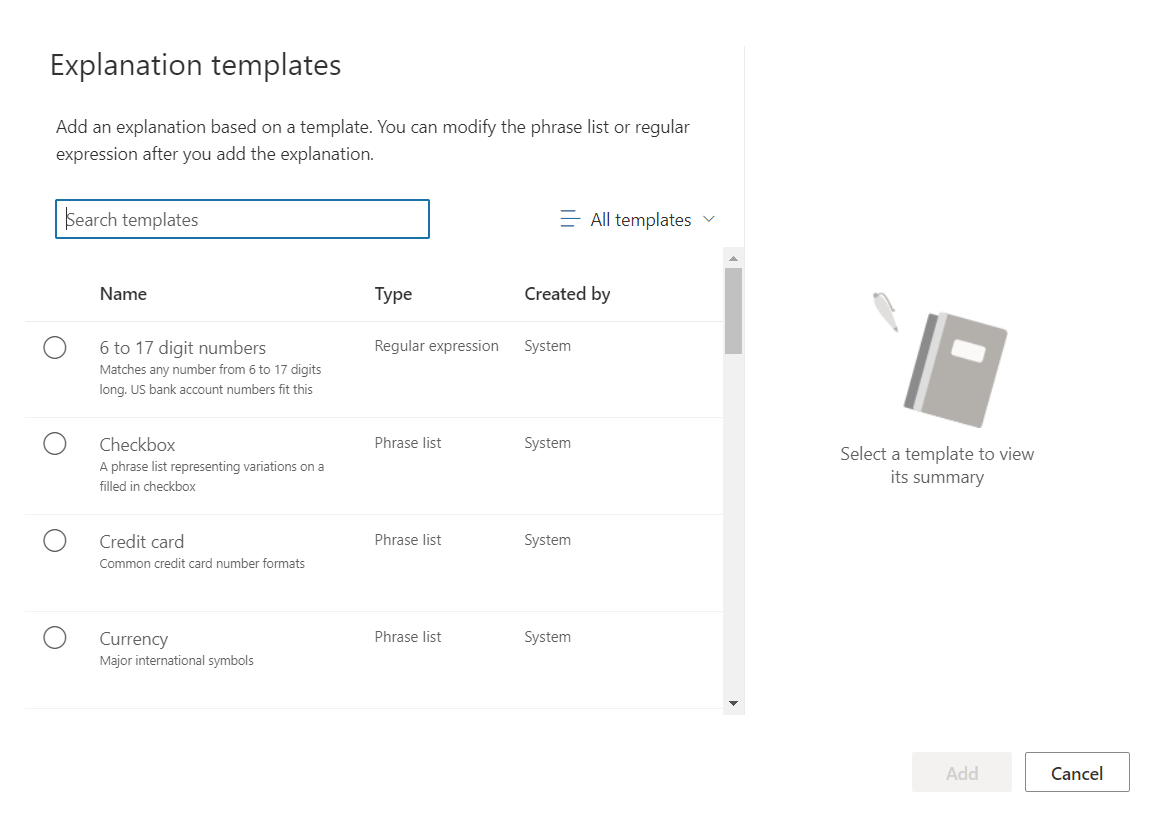
From a template
This helps to identify the type of document based on predefined Regular expression or Phrase list.
In our case, Contract Notice documents will always contain a text Request for additional disclosure. We will define the extractor as Blank explanation as follows:
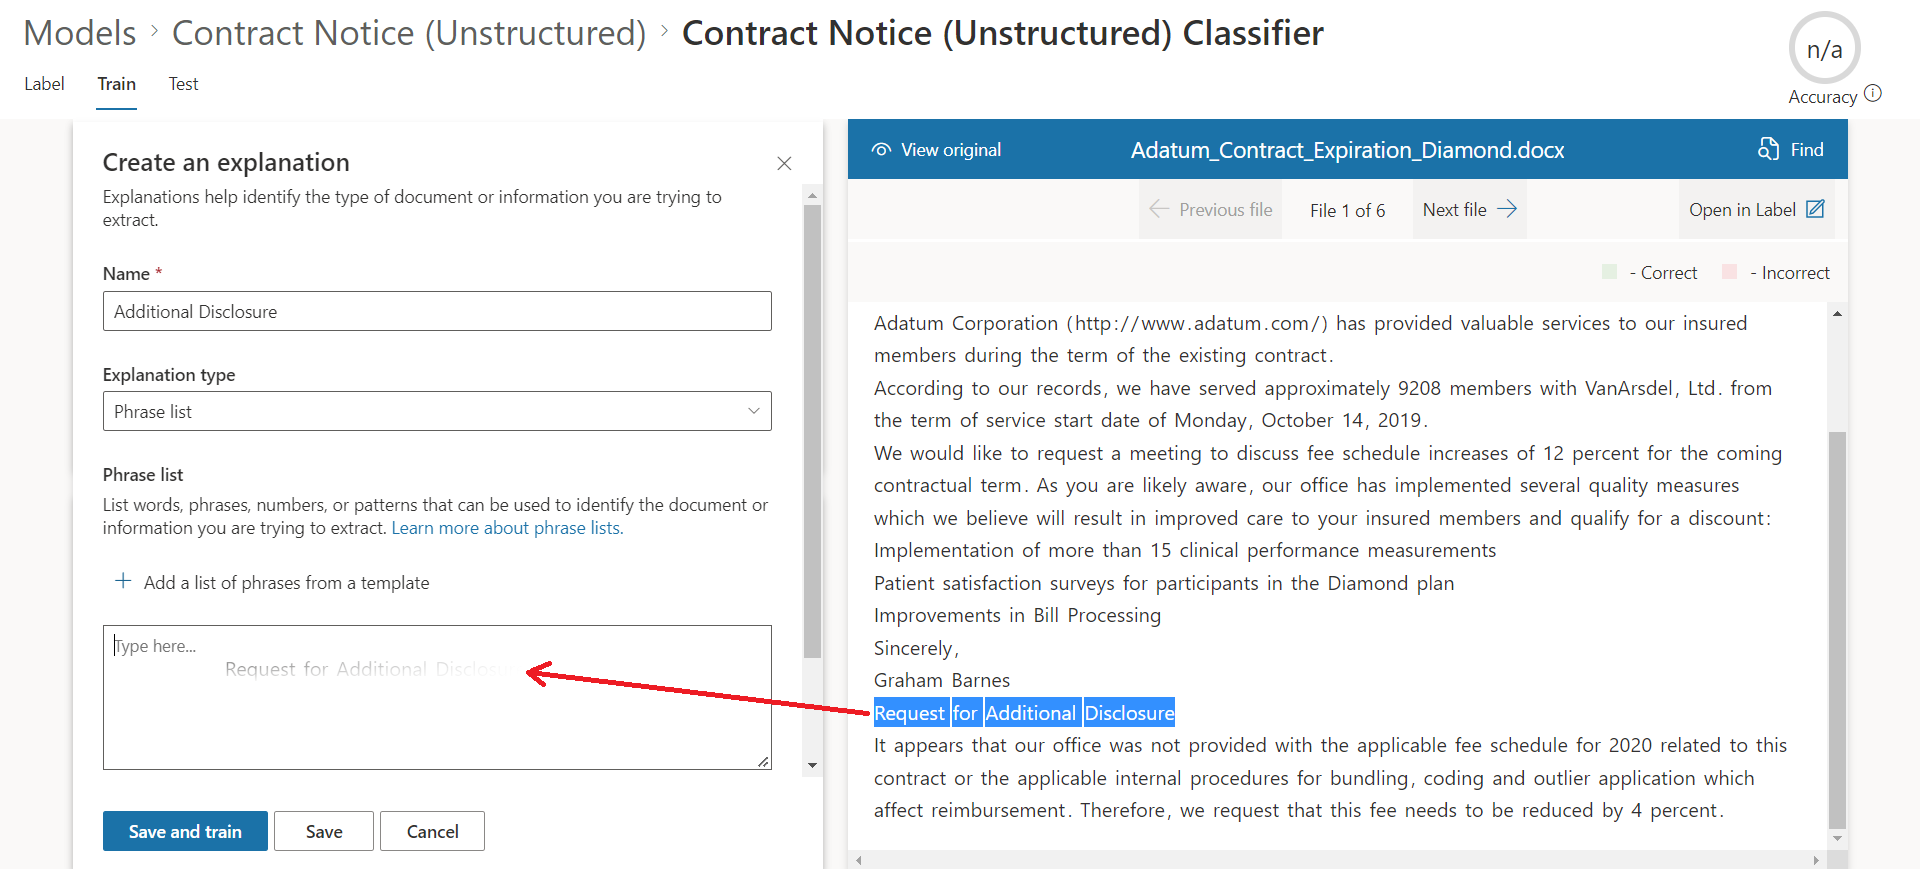
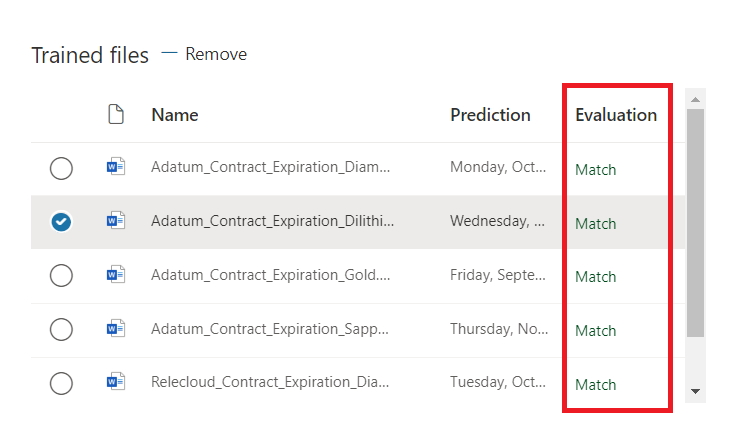
Click Save and train to see if the explanation is enough to identify positive and negative documents.
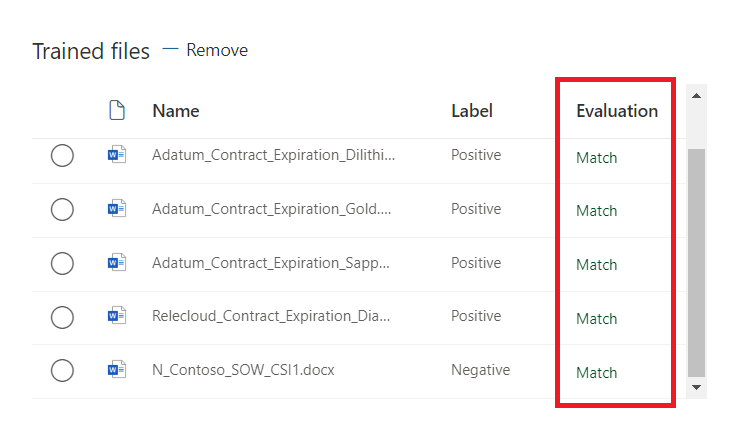
If the evaluation does not match, consider creating additional explanation(s).
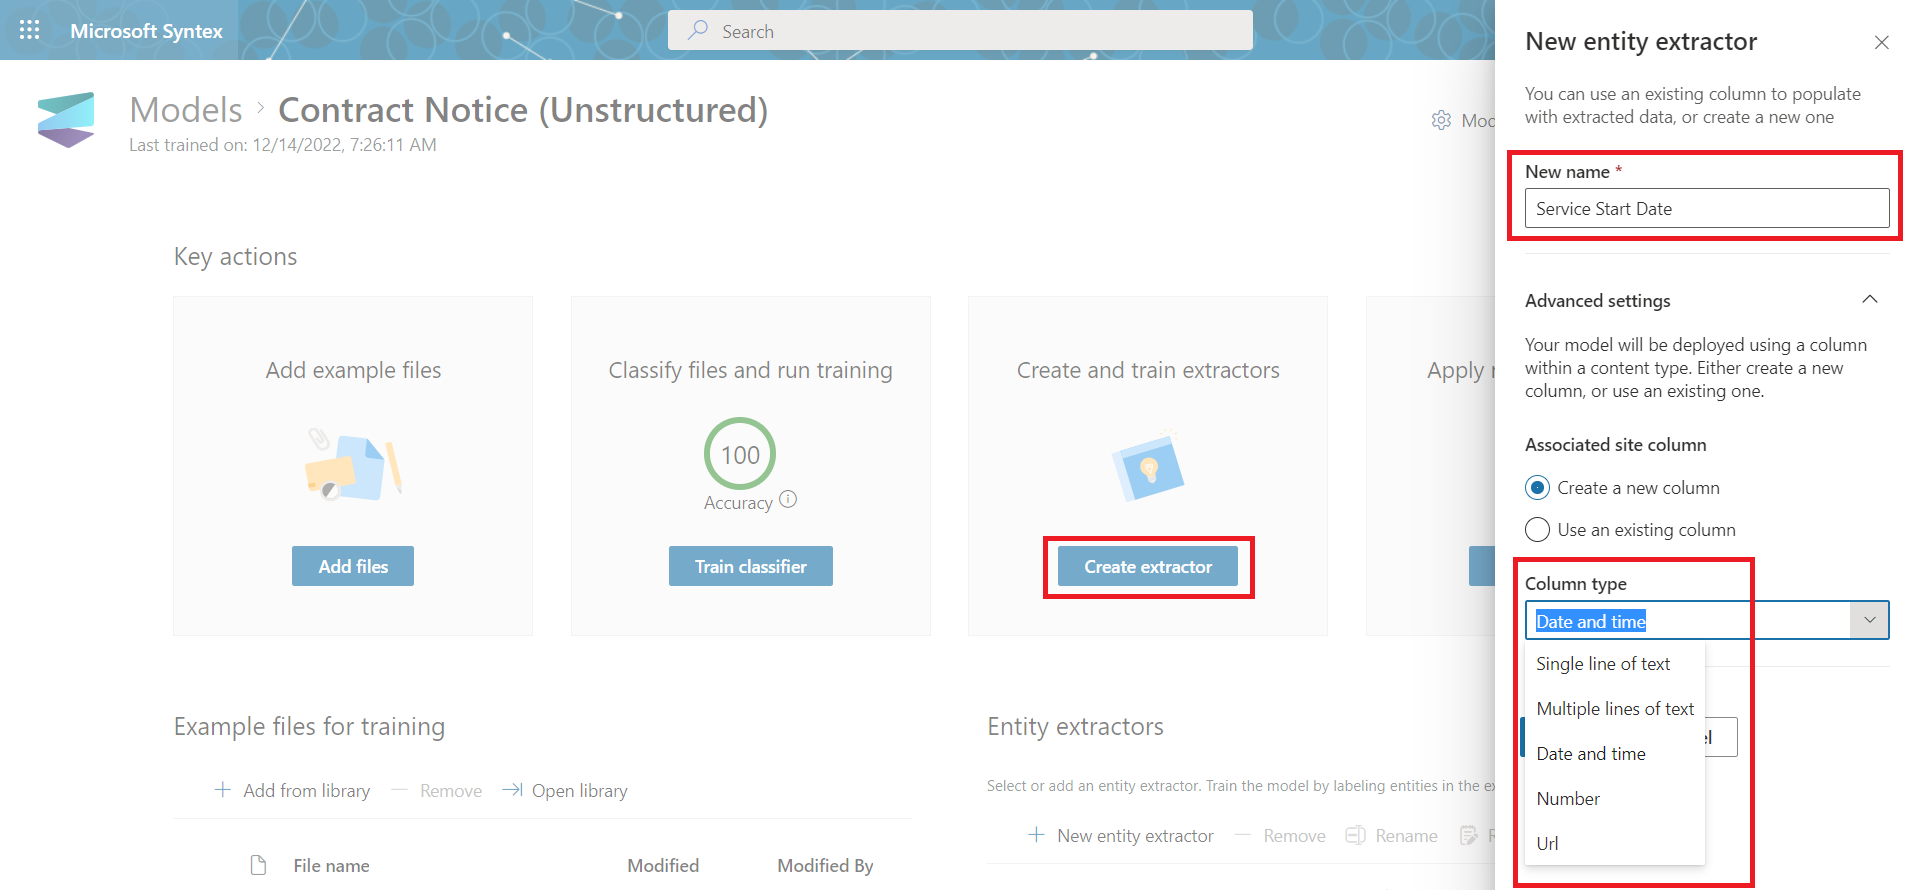
Create an extractor
Extractor helps to extract information from positive documents. We need to define extractor for each entity, we want to extract from the document. For e.g., Service Start Date.
Add a label
As a next step, we need to label the entity to extract. From the viewer, select the data to extract.
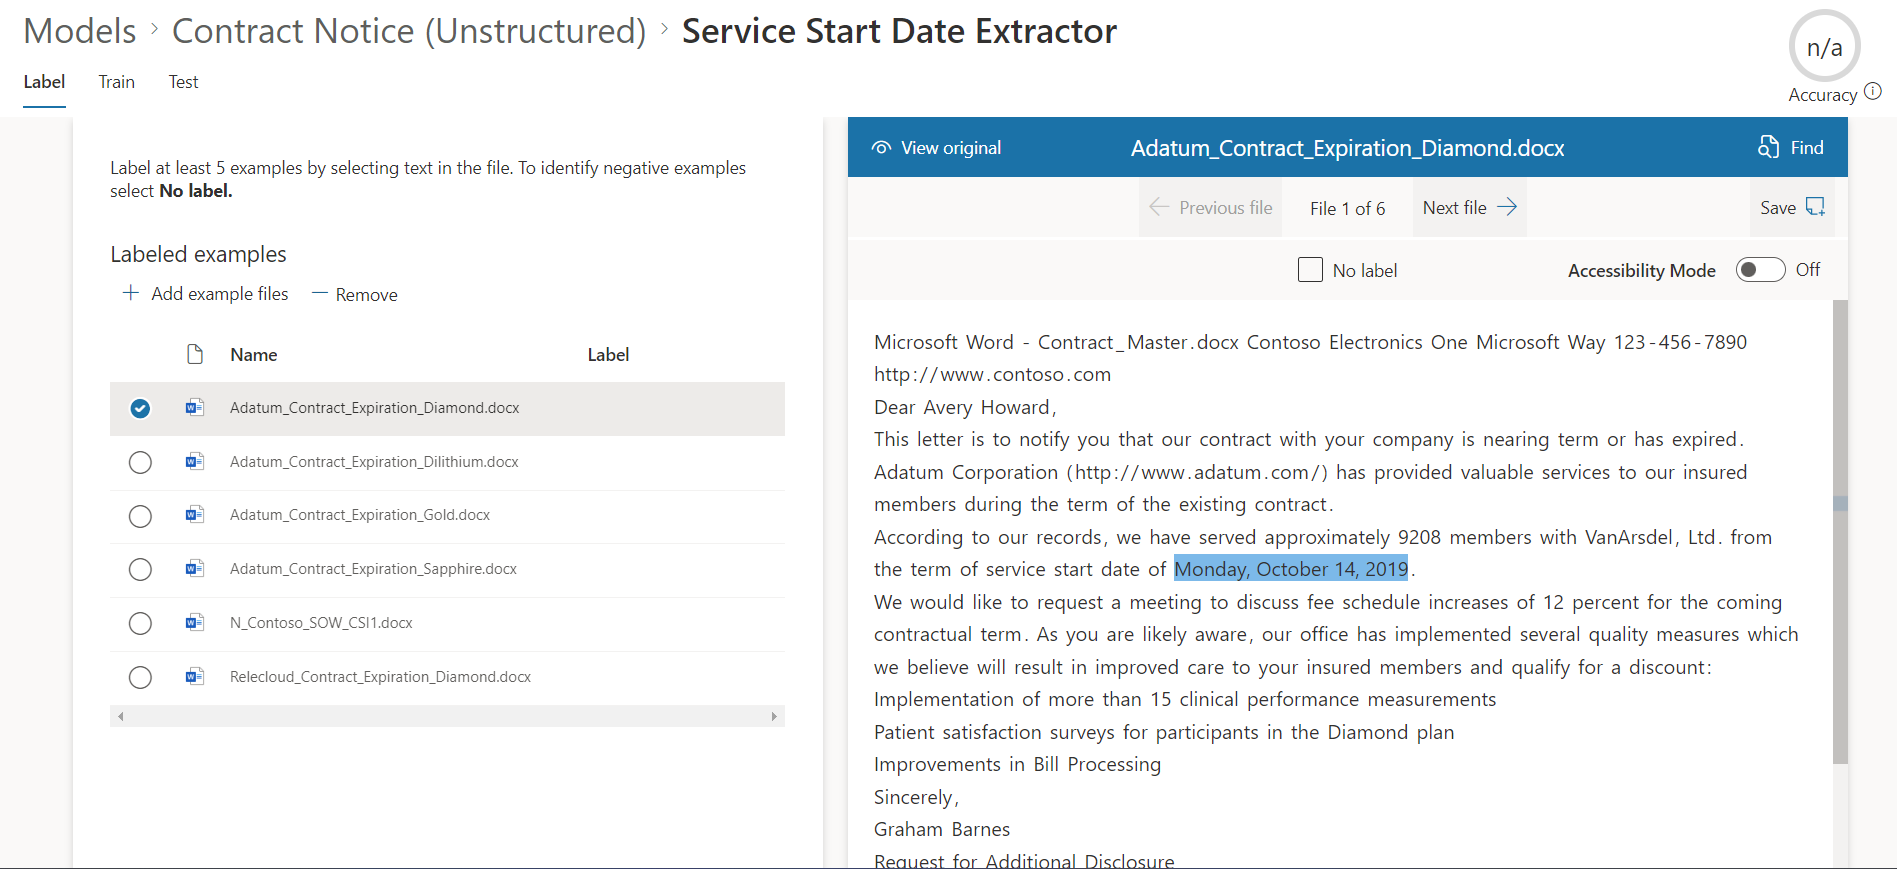
For the negative example files, select No label from the top.
Add an explanation
Using explanation, we can provide hint about the entity format. On the Train tab, click New to create the explanation.
Follow the below steps to identify the Service Start Date , which can appear in any date format after a phrase service start date of.
- Click New > From a template.
-
Select Date template.
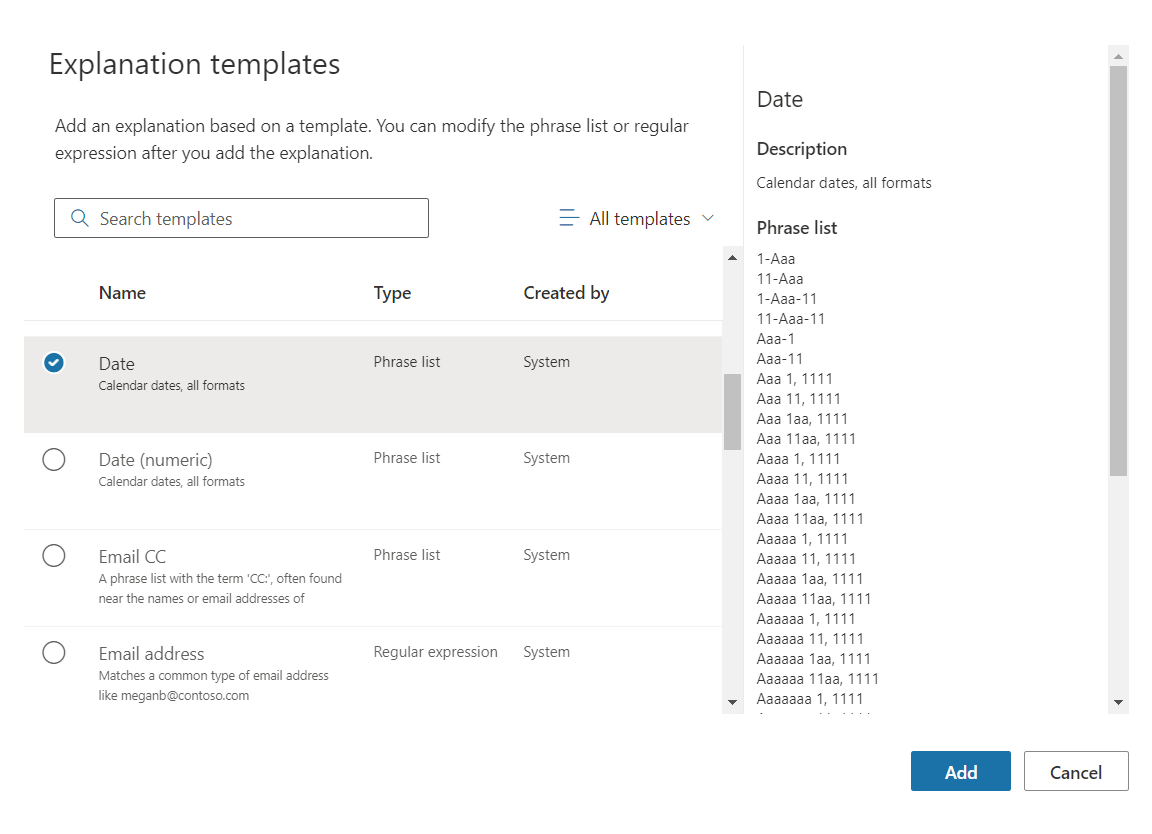
- Click Add.
- Click Save.
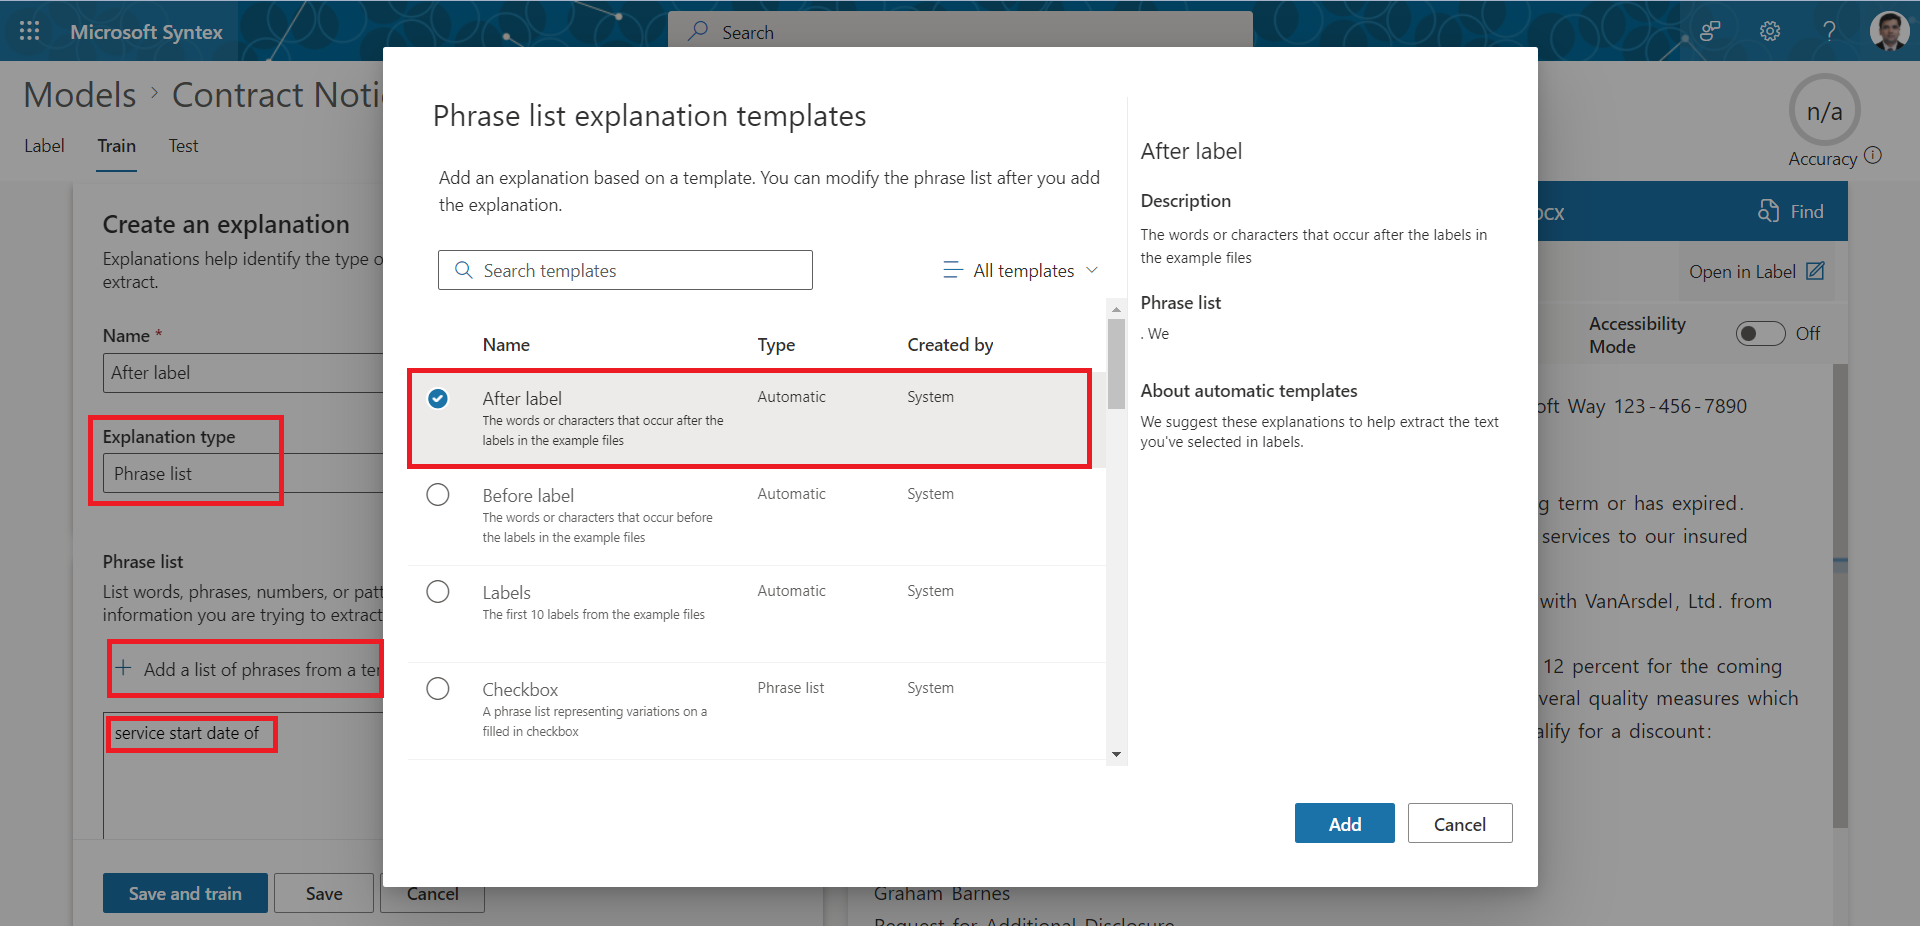
- Add another explanation as New > From a template, select After label.
- Select Explanation type as Phrase list.
- Enter the text as “service start date of”.
-
Add the text “service start date of” under Phrase list.
- Click Save and train.
Verify the evaluation matches.
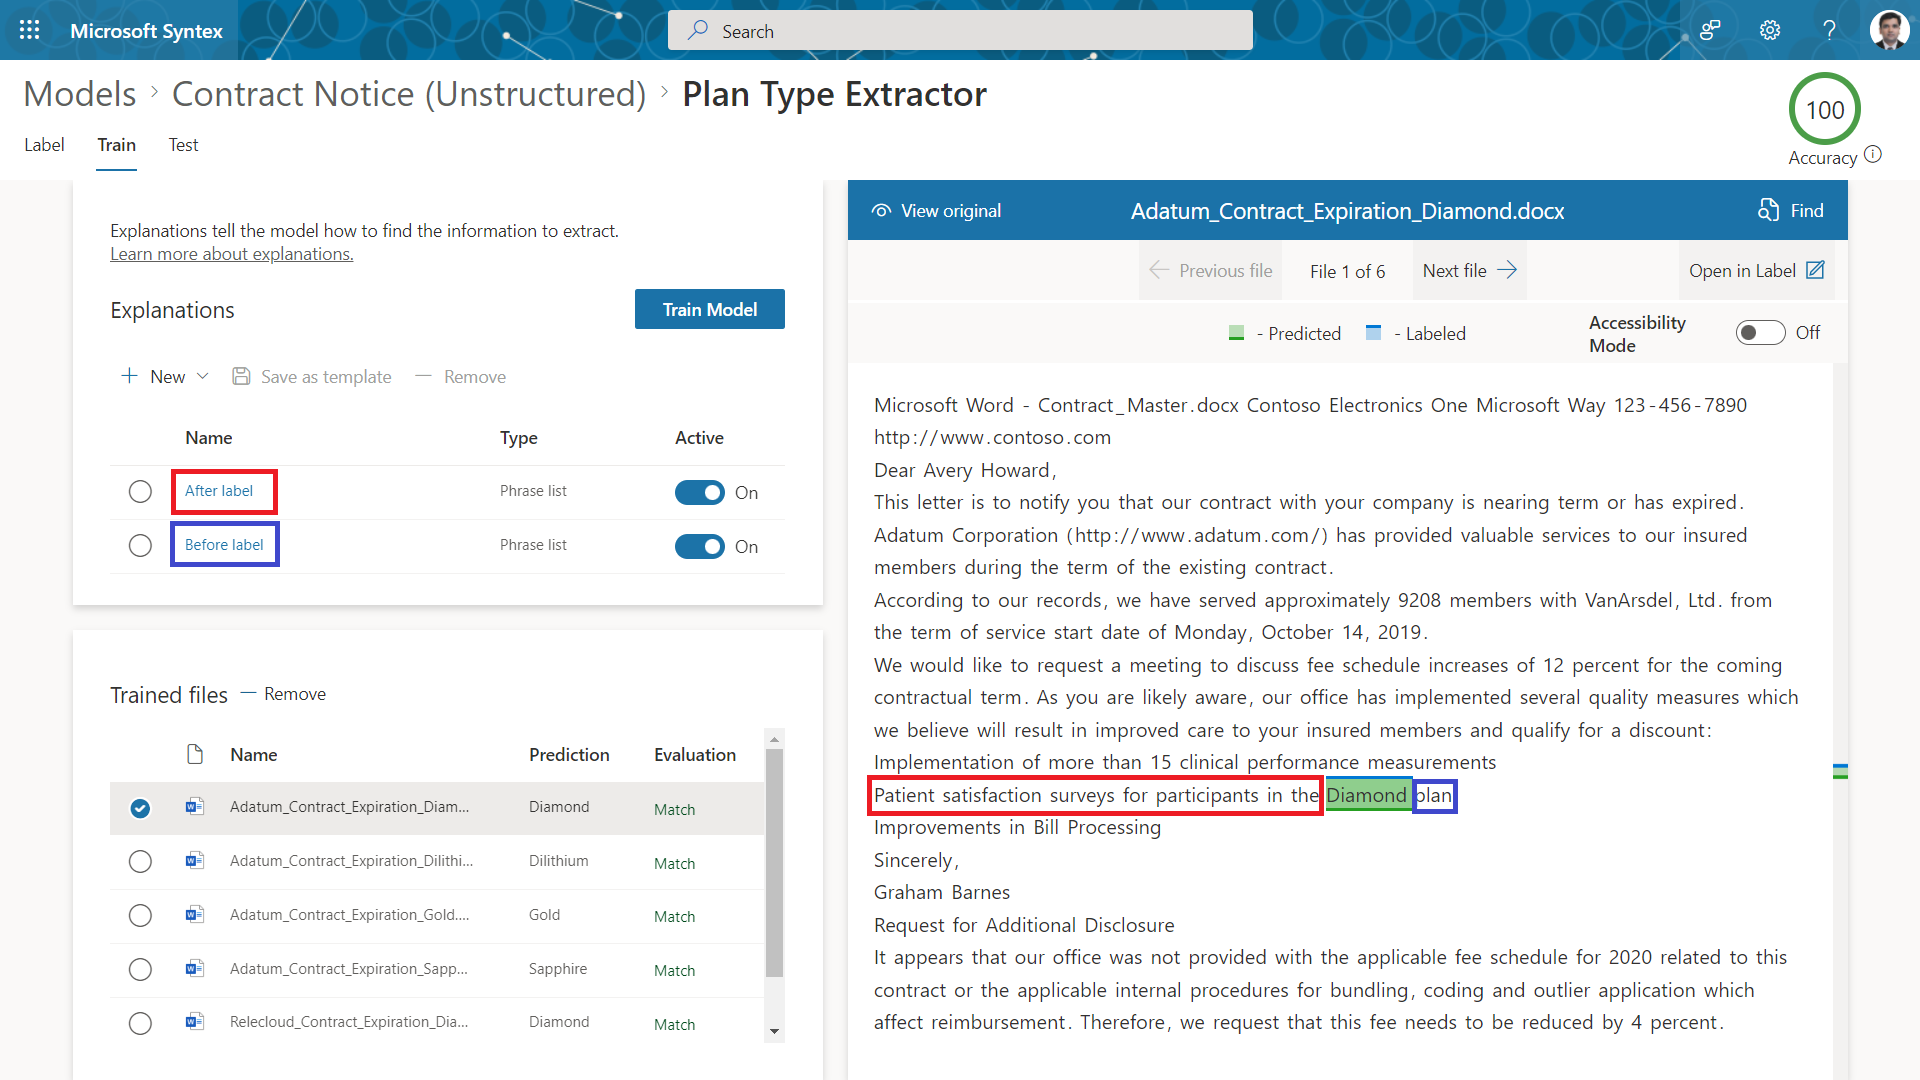
Plan Type
We can extract the plan type by applying before and after labels as shown below:
Apply the model
As a next step, we need to apply the model to a document library to start processing files automatically.
- Click + Add library
-
Select SharePoint site and document library.
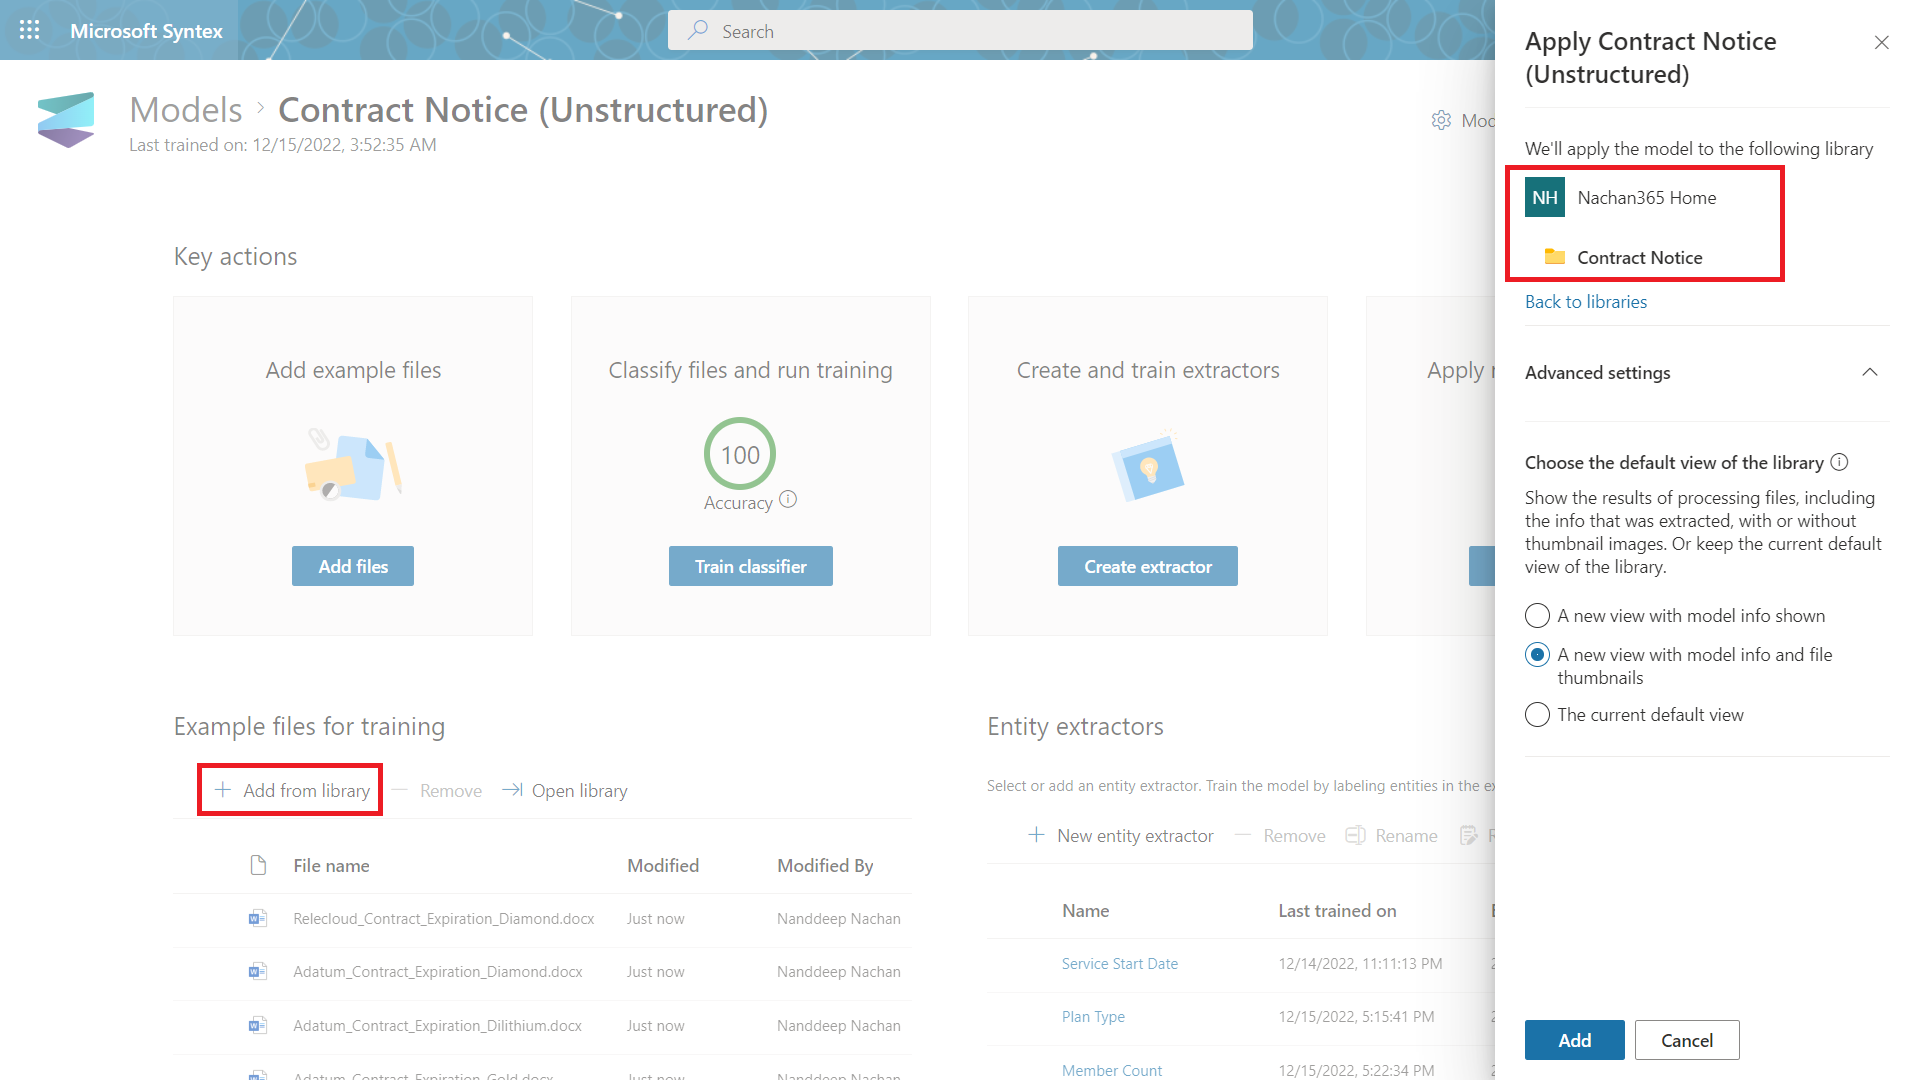
- Click Add.
End User Experience
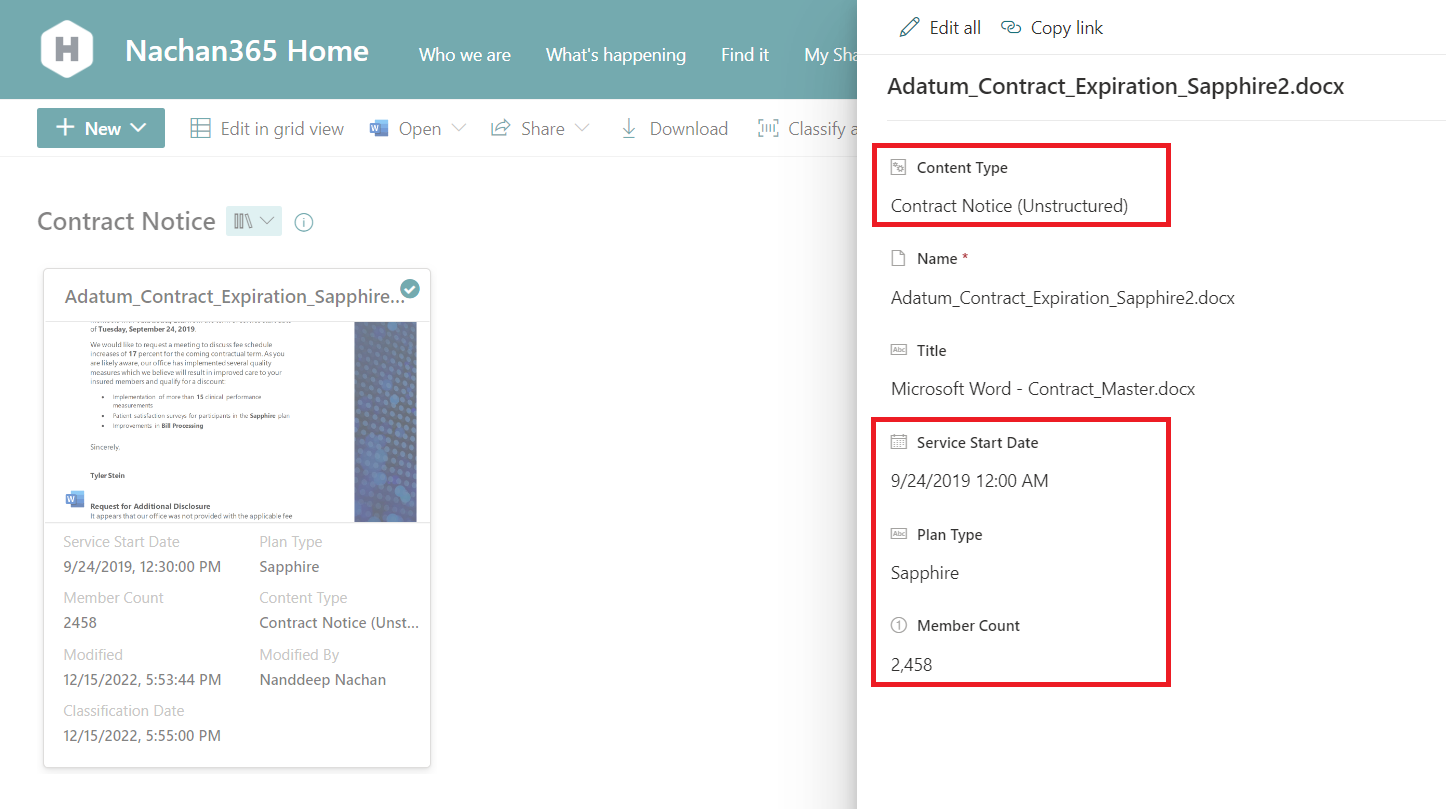
Once the documents are uploaded to the designated document library, the custom model will be applied on it to extract the information.
The result will look as follows:
Summary
Unstructured document processing model works best for unstructured documents, such as letters or contracts which does not have any predefined format. Unstructured document processing model uses artificial intelligence (AI) to process documents.
References
- Overview of unstructured document processing in Microsoft Syntex
- Overview of Microsoft Syntex
- Create a document processing custom model
- Use sample data to do document processing
- Overview of model types in Microsoft Syntex
- Create an enterprise model in Microsoft Syntex
- PnP - Syntex Samples repository


Leave a comment