
Calling Graph API from Power Automate Flow
Overview
Microsoft Graph API offers a single endpoint to connect to data from various services. Power Automate (earlier MS Flow) enables to design powerful workflows. Calling the Graph API from Power Automate Flow opens a wide range of possibilities. One scenario could be to get the things done with application permissions, which otherwise cannot work under user delegated permissions.
In the article, we will explore a scenario of calling Graph API from Power Automate Flow.
Prerequisites
Before we proceed, make sure you have below permissions:
- Administrative access to Azure AD of Office 365 tenant
- Permissions to create flow in Power Automate (prior MS Flow)
Create an application in Azure AD
We will start by registering an application in Azure AD. Follow the below steps to create an application in Azure AD:
- Login to Microsoft 365 Portal (https://portal.office.com)
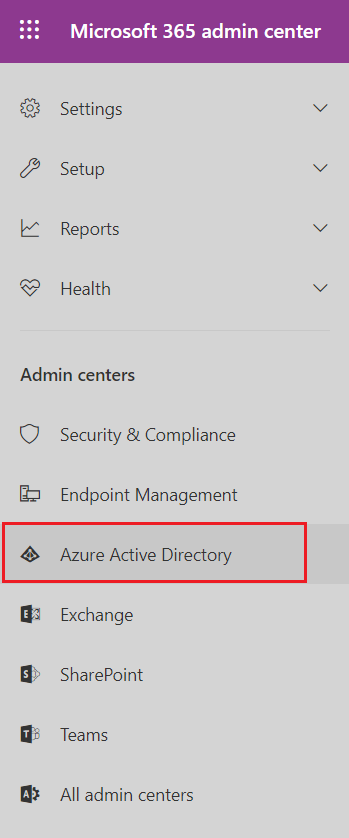
- Open Microsoft 365 admin center (https://admin.microsoft.com)
-
From the left menu, under Admin centers, click Azure Active Directory.
- From the left menu, click Azure Active Directory.
-
Click App registrations.
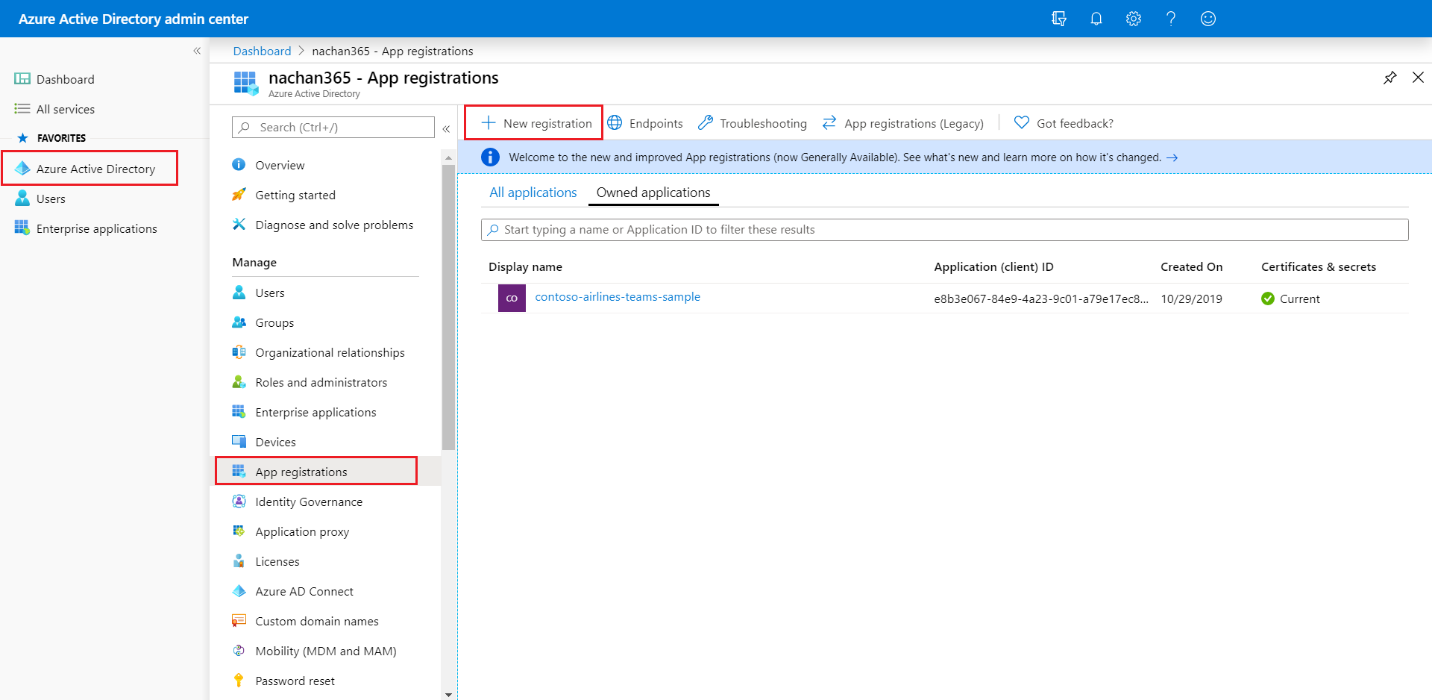
- Click New registration.
-
Provide the application name, supported account type and leave the Redirect URI blank.
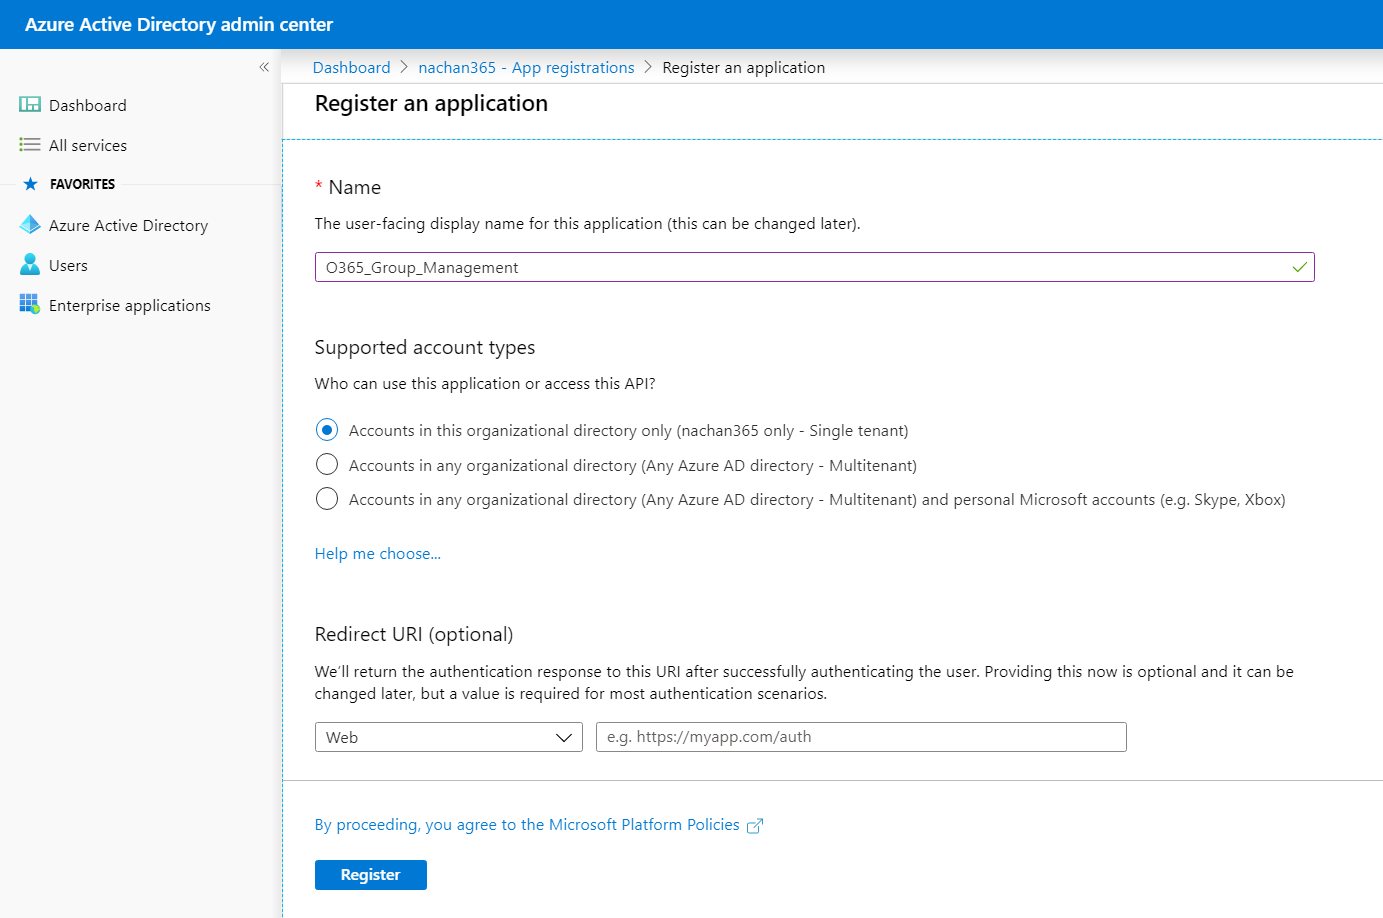
- Click Register.
-
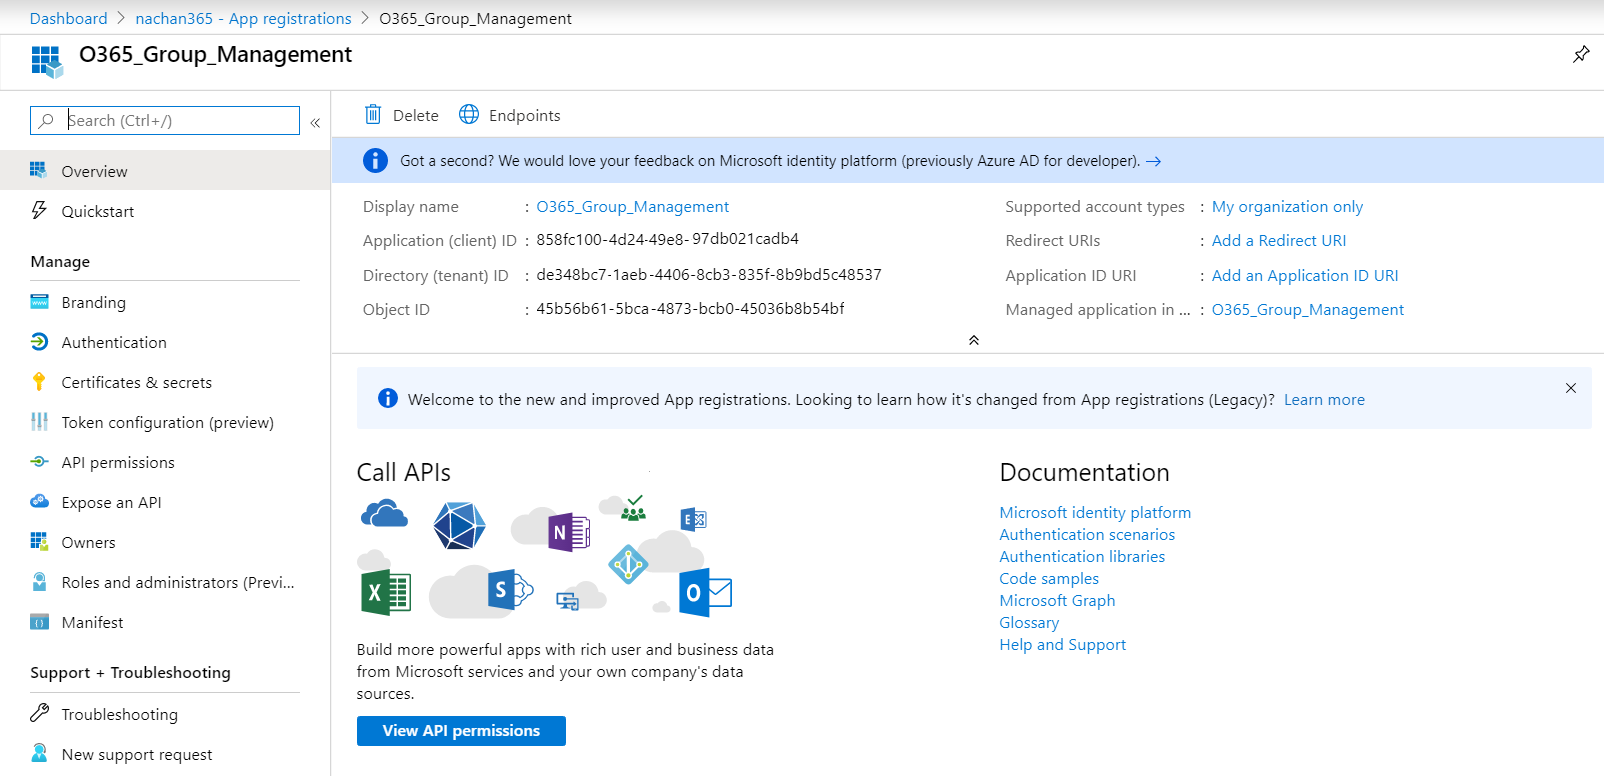
Note down Application and Directory IDs to use later in the flow.
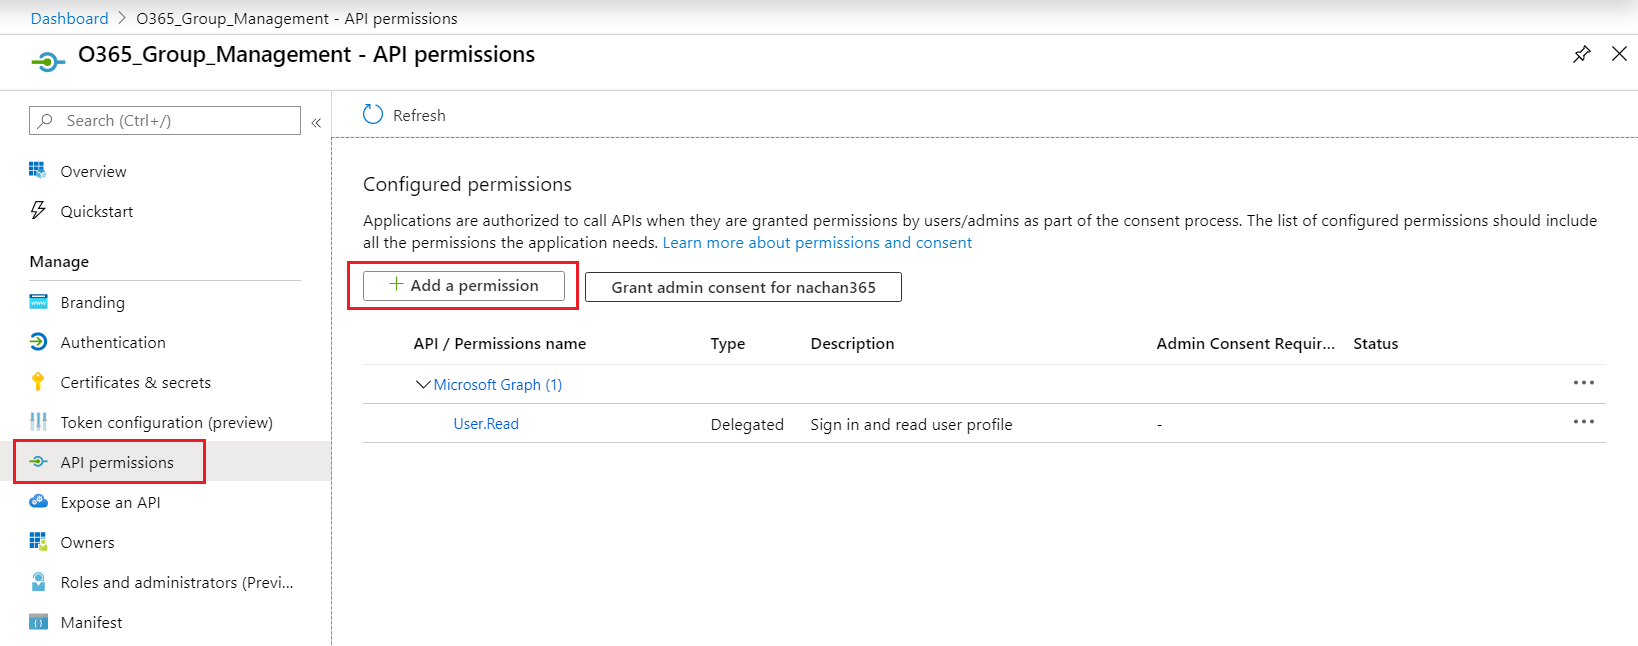
- From the left menu, click API permissions to grant some permissions to the application.
-
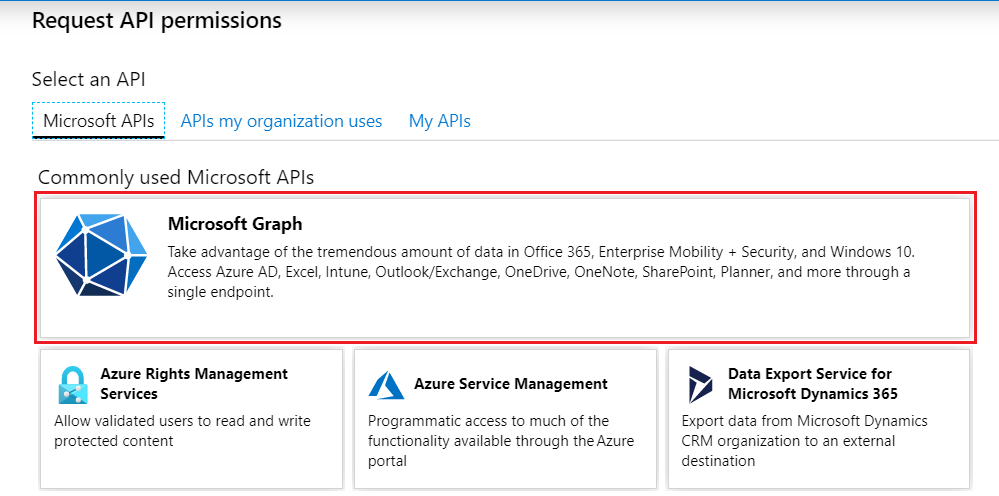
Click + Add a permission.
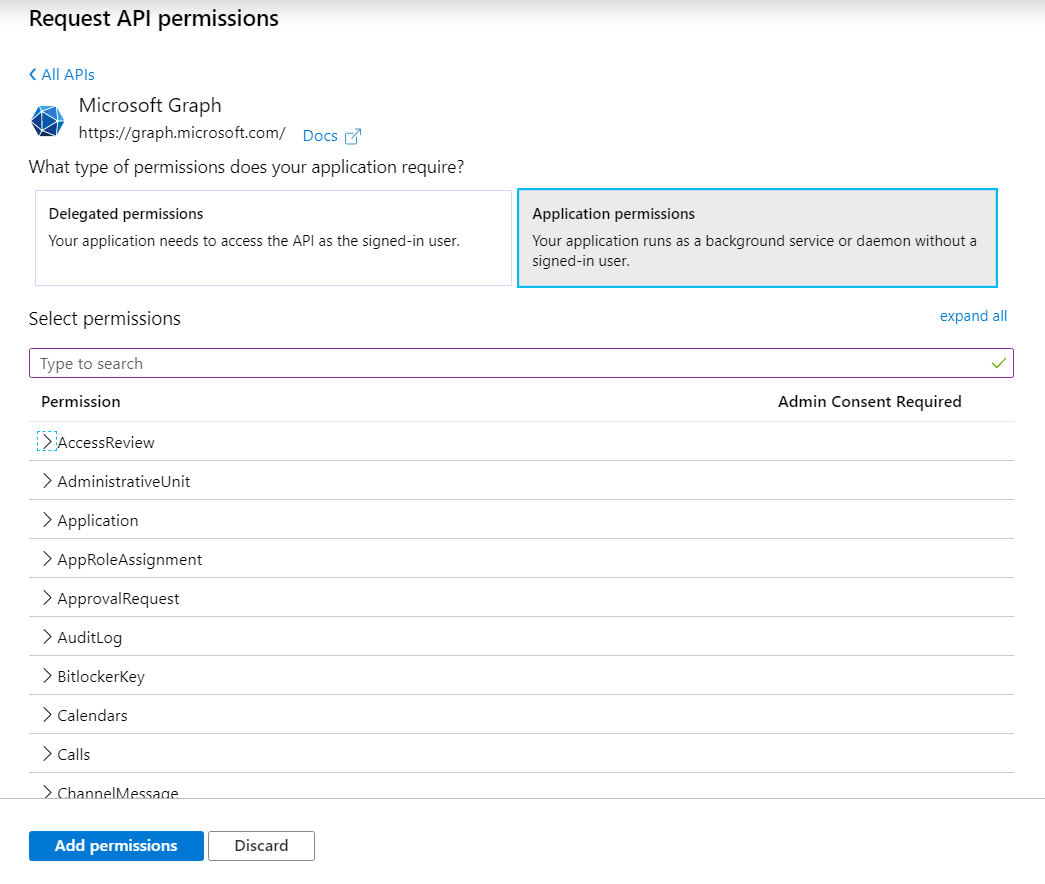
-
Select Microsoft Graph.
- Select Application permissions.
- Grant the needed permissions.
-
Click Add permissions.
Below are examples of the needed application permissions to perform the operations.
| Action | Application permissions |
| List owners | Group.Read.All, User.Read.All, Group.Read.All, and User.ReadWrite.All |
| Add member | GroupMember.ReadWrite.All, Group.ReadWrite.All, and Directory.ReadWrite.All |
Grant required permissions to the application
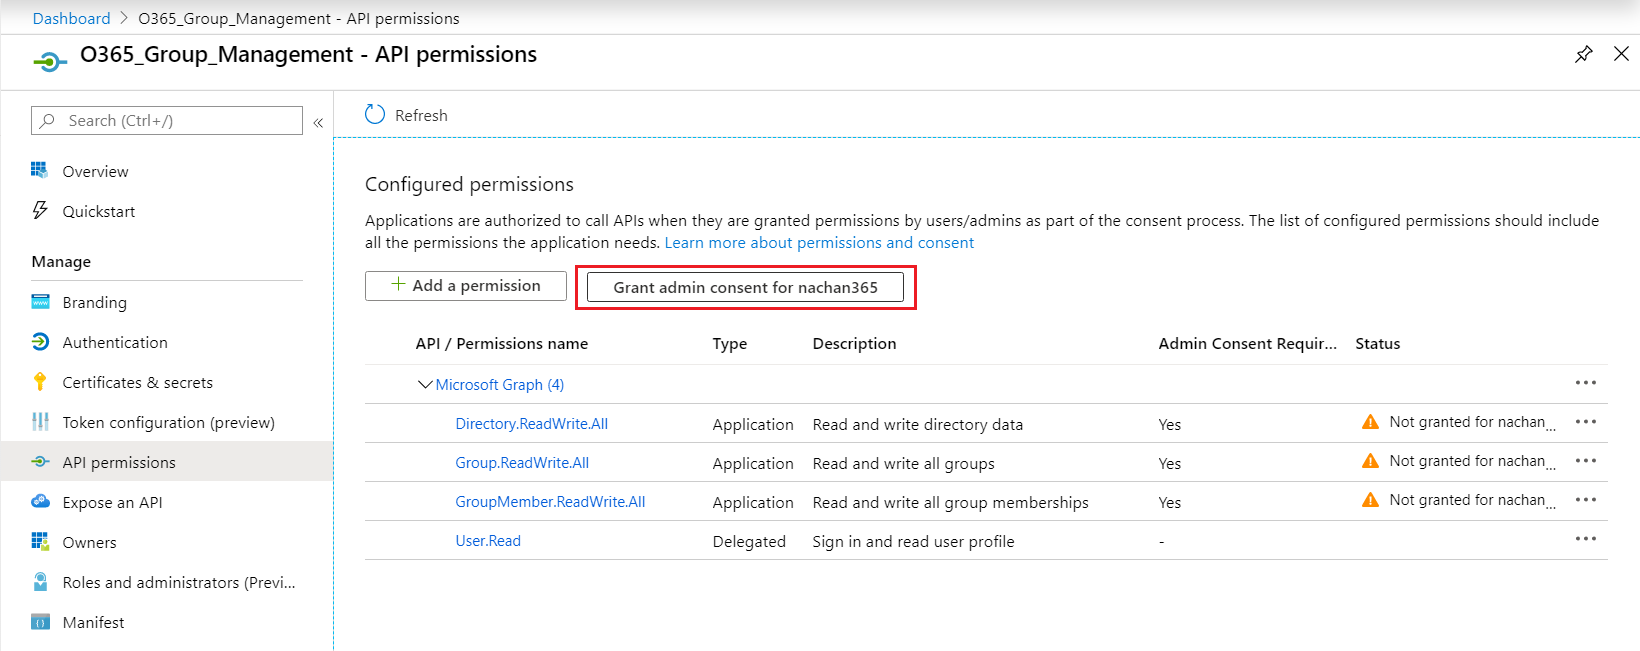
After creating the permissions, we need to grant consent to the application to allow the application to access Graph API without a consent screen.
-
Click Grant admin consent for …
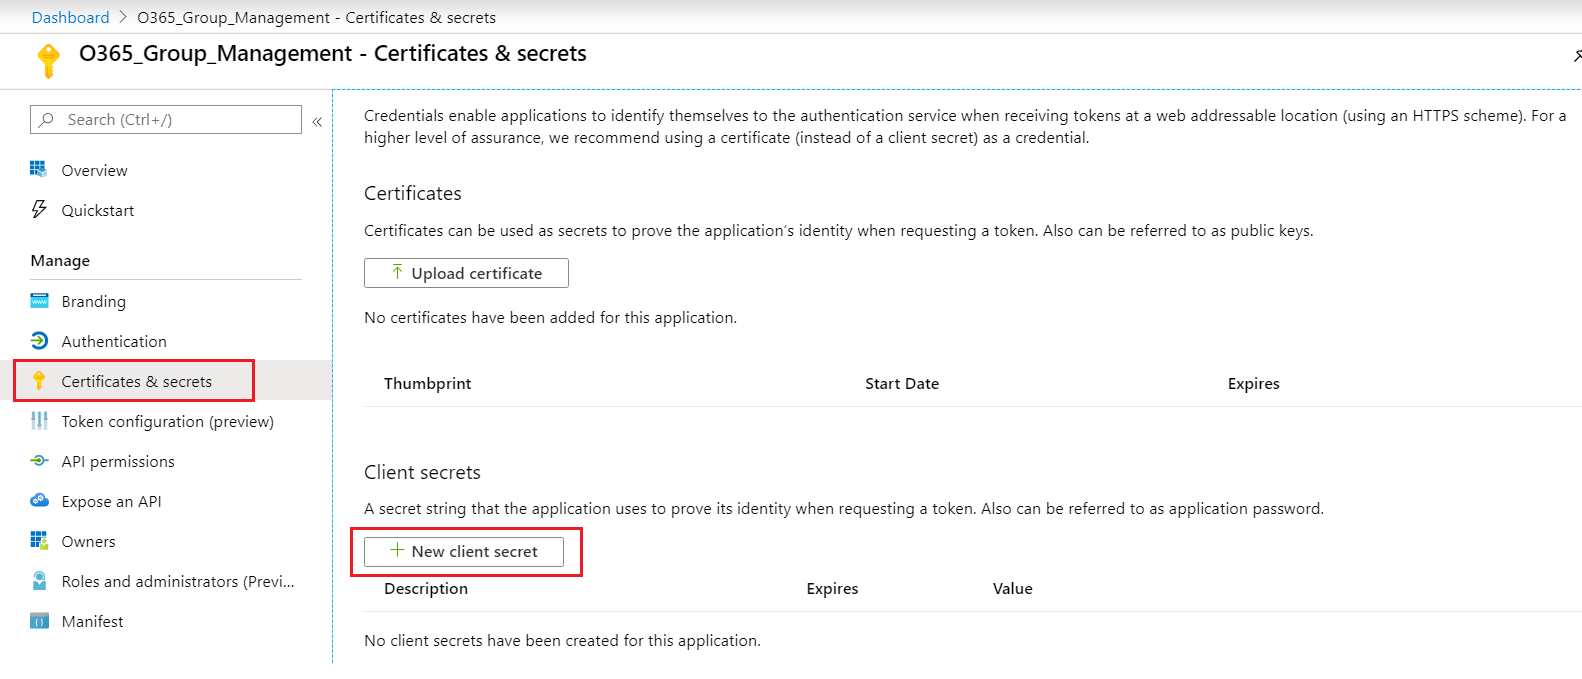
- From the left menu, click Certificates & secrets.
-
Under Client secrets, click + New client secret.
-
Provide a description and select an expiry time for the secret.
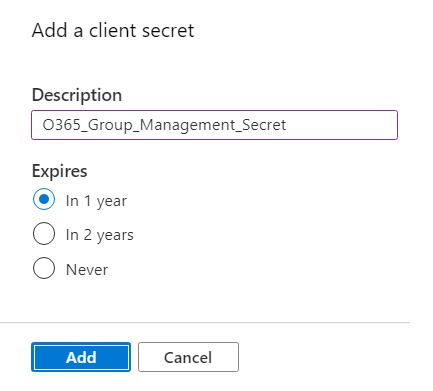
- Click Add.
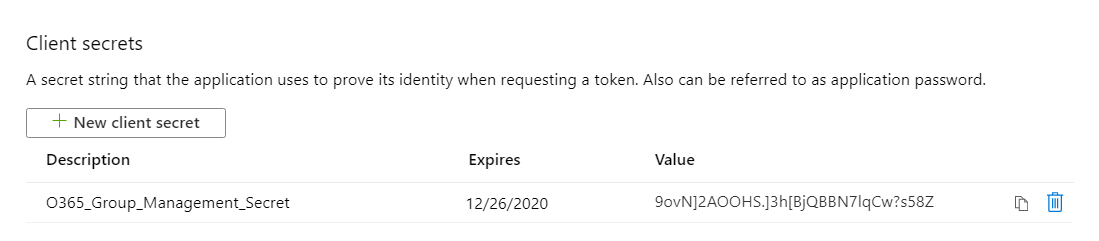
- Make a note of the secret value.
Build Power Automate Flow
We will start by building a flow.
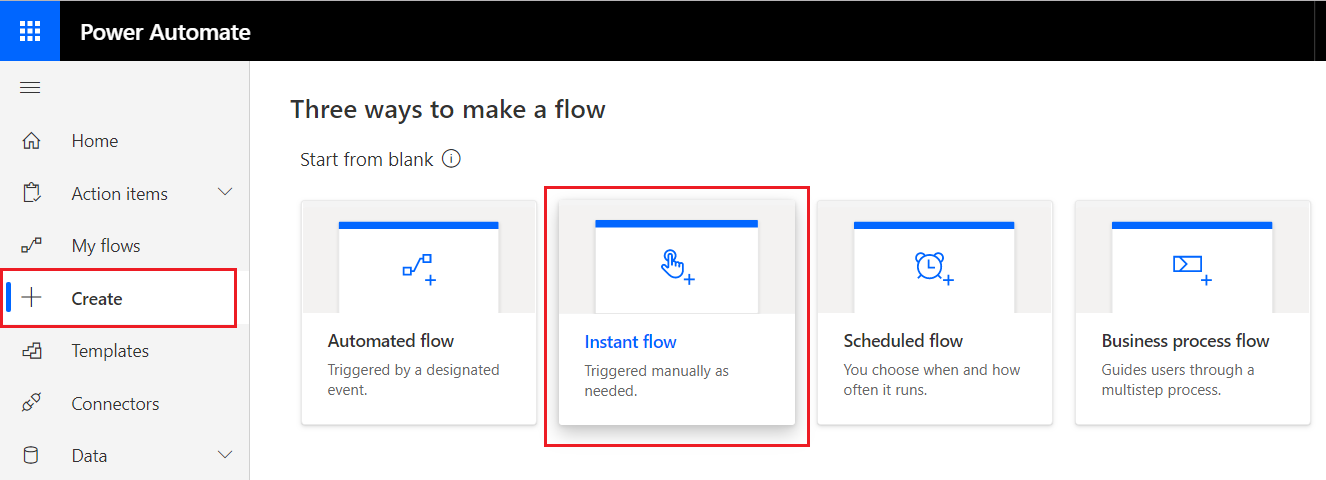
- Navigate to Power Automate in Office 365.
- From the left menu, click Create.
-
Select Instant flow.
- In the modal dialog, specify the flow name (e.g. Join Private Group).
-
Select the trigger as When an HTTP request is received.
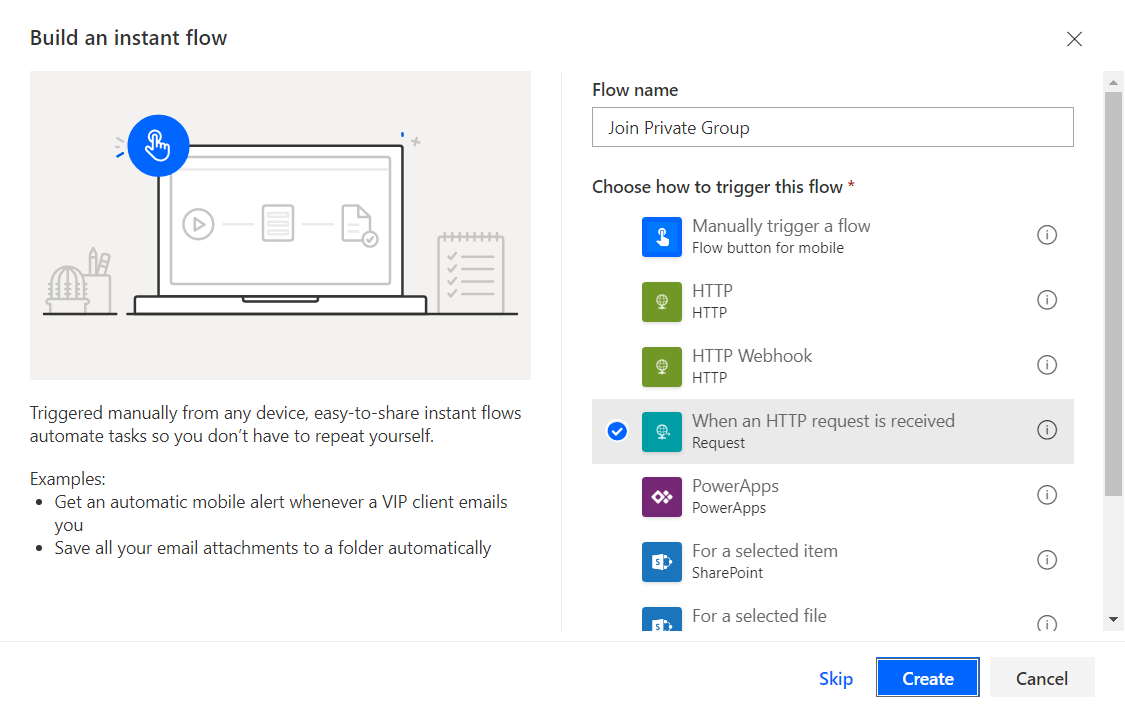
- Click Create.
-
The flow should get created as below.
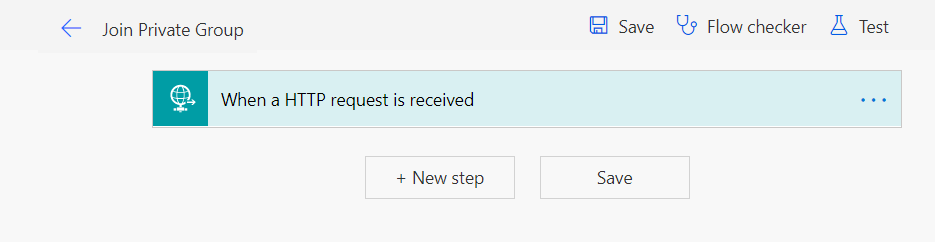
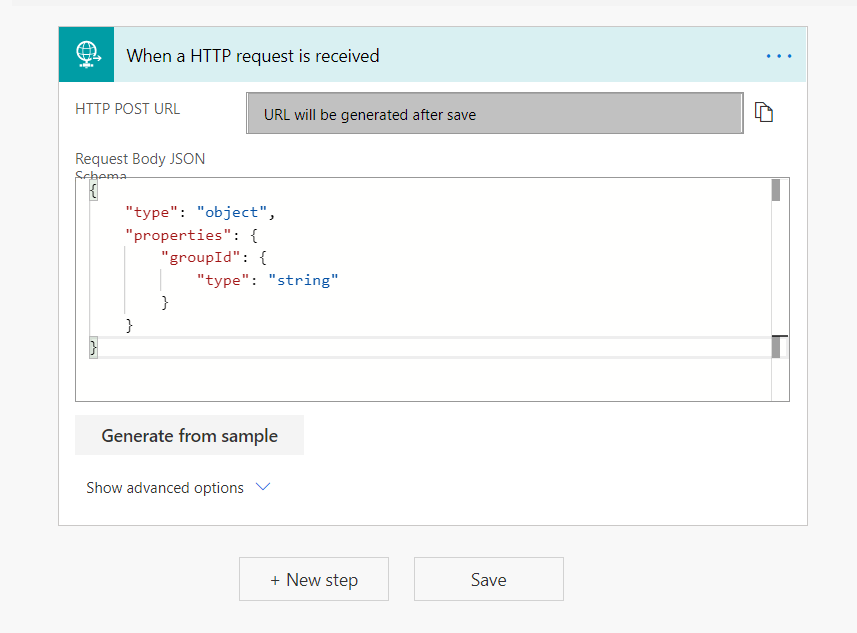
- Expand the activity When a HTTP request is received.
- Click Generate from sample.
-
In the popup, add the above request body JSON schema.
{ "groupId":"07c00c4d-6a21-4c51-9545-f2921b4109b0" } - Click Done.
-
The request body json schema will be generated.
-
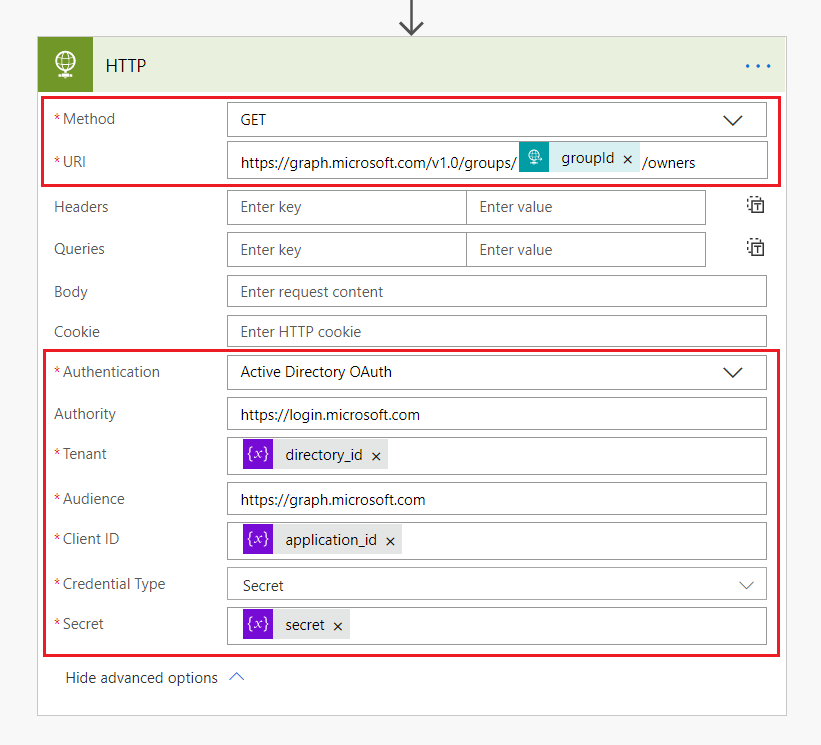
Initialize the variables client id, directory (tenant) id and secret generated from the previous step.
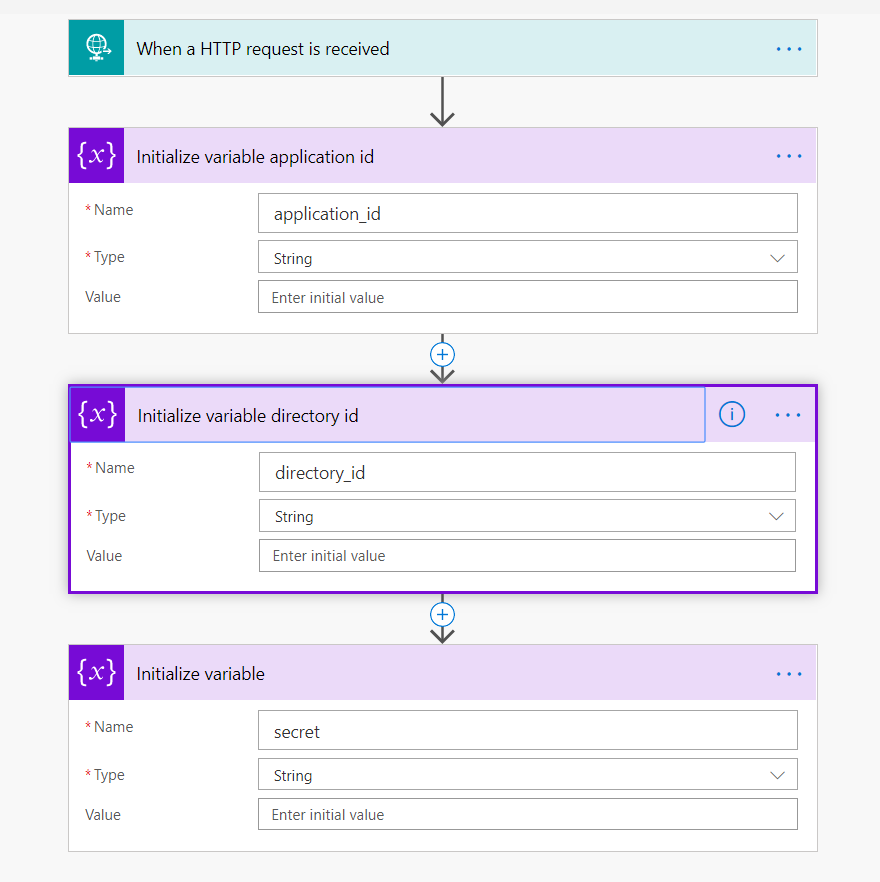
These variables then can be used to make an MS Graph API call.
- Add the HTTP activity.
Test Flow with Soap UI
Download the SoapUI from https://www.soapui.org/
- Select Method as Post.
- Specify the endpoint as HTTP POST URL.
- Specify the header as Content-type with value application/json.
-
In the Body, specify the JSON.

- Click Send.
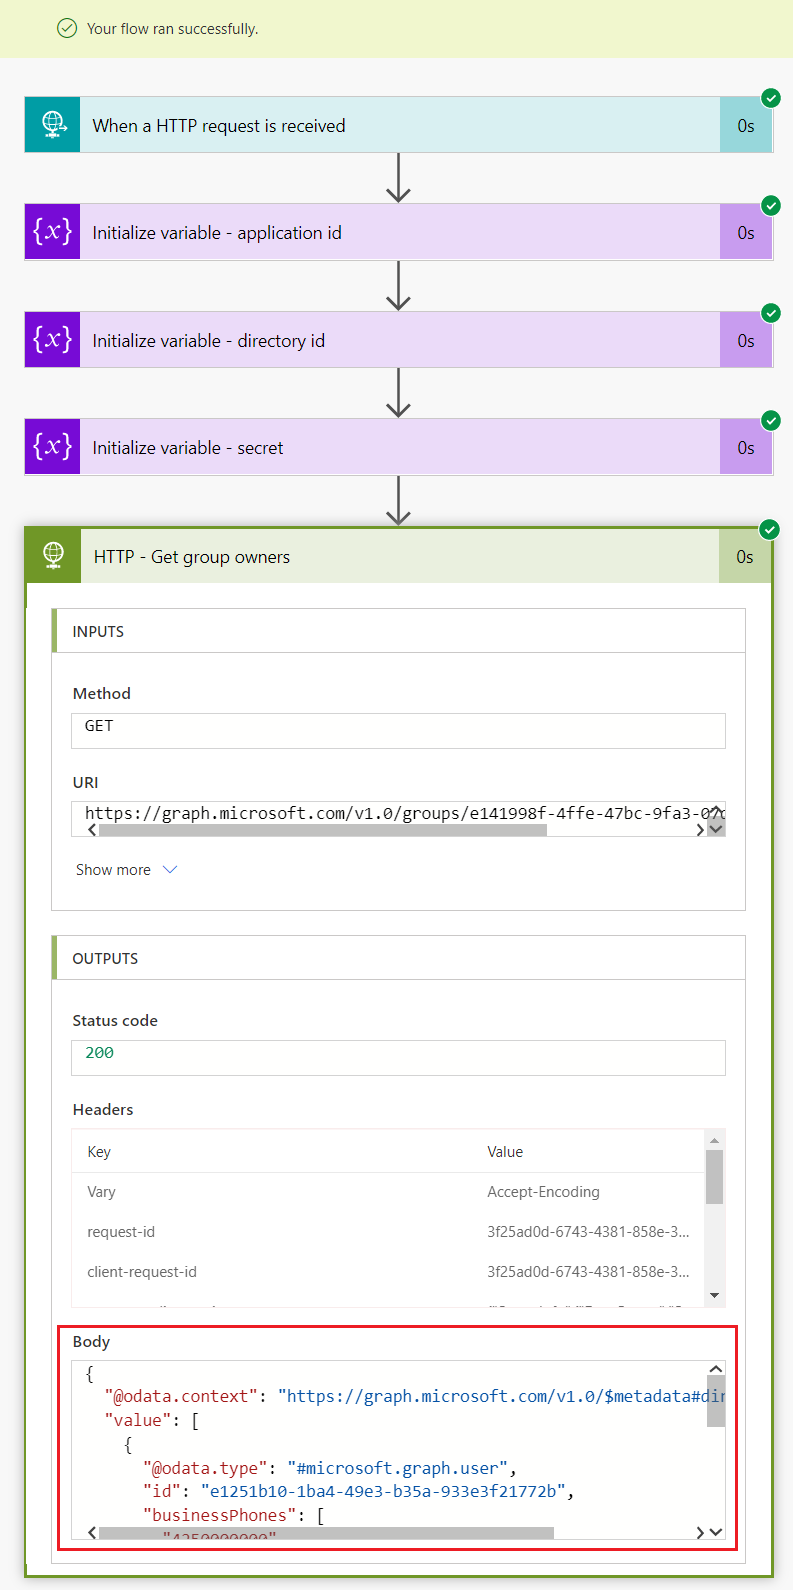
- Observe the run history of flow.
Summary
Calling the Graph API from Power Automate Flow opens a wide range of possibilities. One scenario could be to get the things done with application permissions, which otherwise cannot work under user delegated permissions. Power automate flow then can be called from an SPFx solution to build more advanced scenarios.
Please refer to my previous article - Execute Power Automate Workflow from SPFx for more details.
This content was originally posted here.


Leave a comment