
Execute Power Automate workflow from SPFx
Overview
In many cases, we want the flow to be triggered by an event, such as an item added or updated. However, few times we would like to trigger the flow programmatically from our SPFx web part. For example, trigger an email from web part on a button click.
In this article, we will explore how we can trigger Power automate (formerly MS Flow) workflow from SPFx web part.
Build Power Automate Workflow
We will start by building flow to send out an email. Later we will trigger it from SPFx web part using REST API call.
- Navigate to Power Automate in Office 365.
- From left menu, click Create.
-
Select Instant flow.

- In the modal dialog, specify the flow name (e.g. QuickMailSend).
-
Select the trigger as When an HTTP request is received.
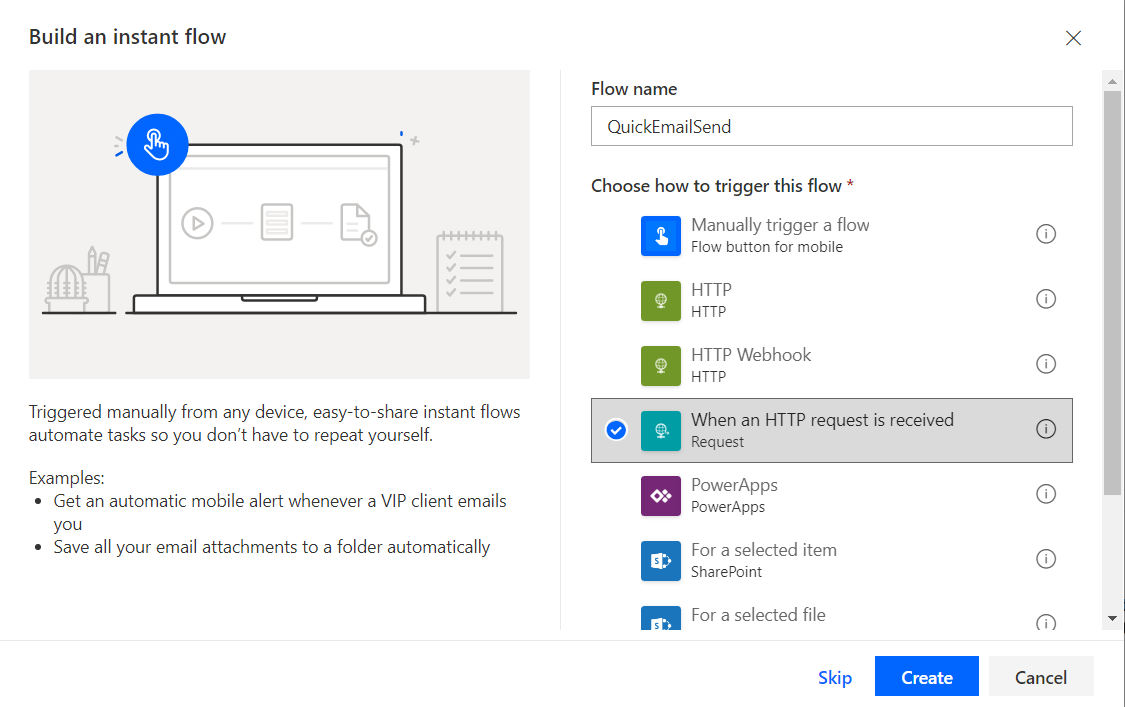
- Click Create.
-
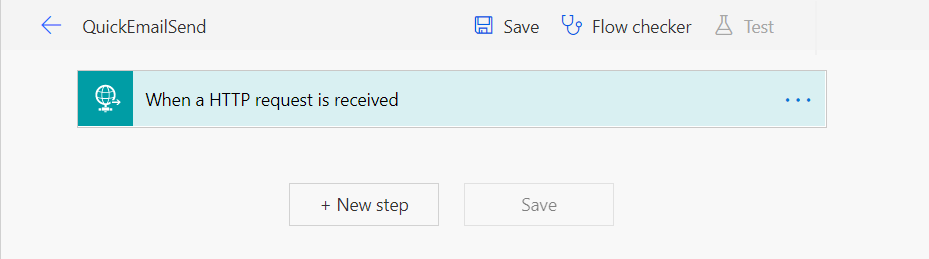
The flow should get created as below.
-
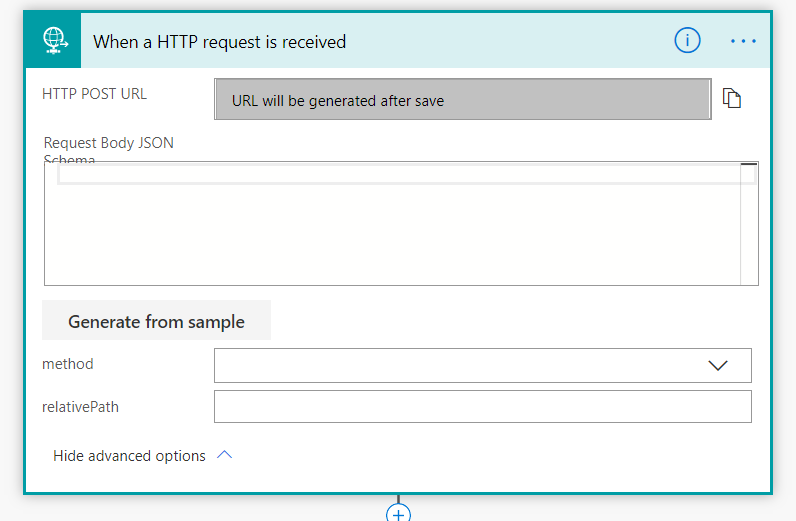
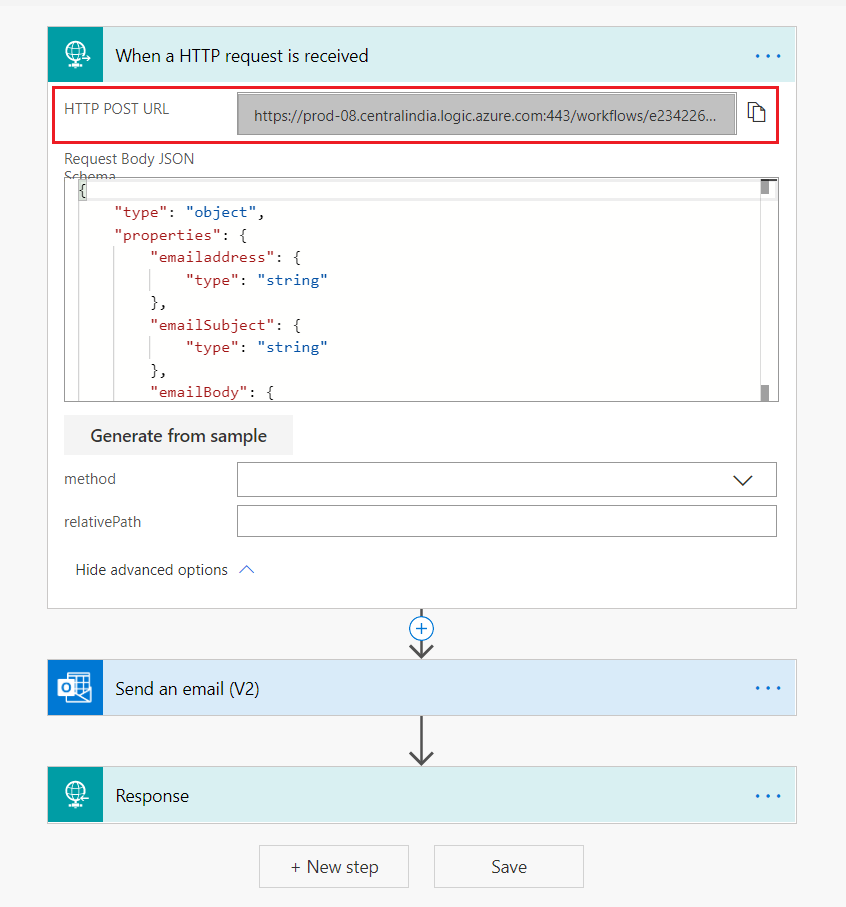
We want to compose email with information about email address, subject, and body. Our request body will look like as below:
{ "emailaddress":"someone@contoso.com", "emailSubject": "Hello", "emailBody": "Hello from Power Automate flow" } - Expand the activity When a HTTP request is received.
-
Click Generate from sample.
-
In the pop up, add the above request body JSON schema.
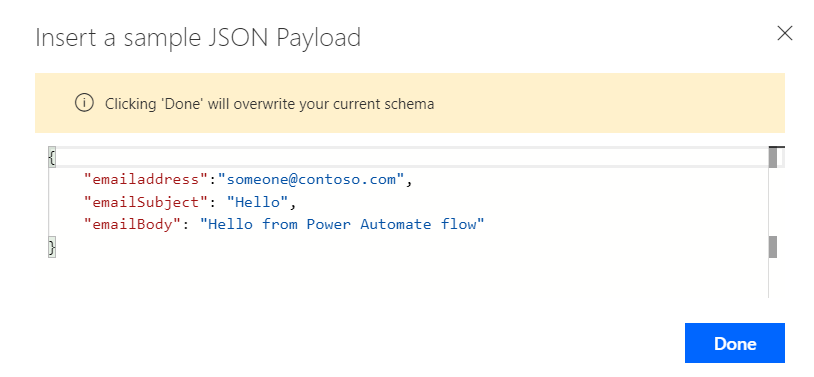
- Click Done.
-
The request body json schema will be generated.
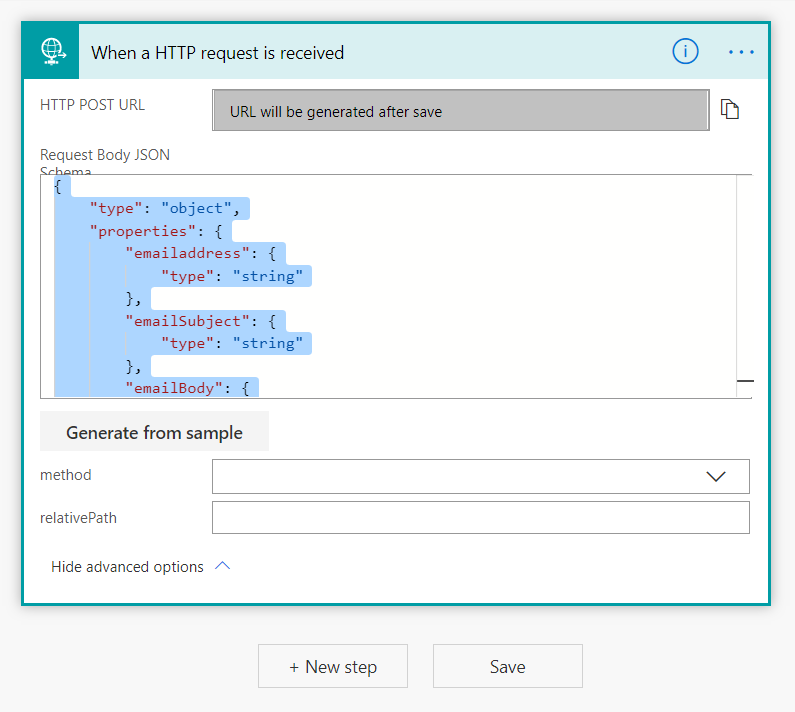
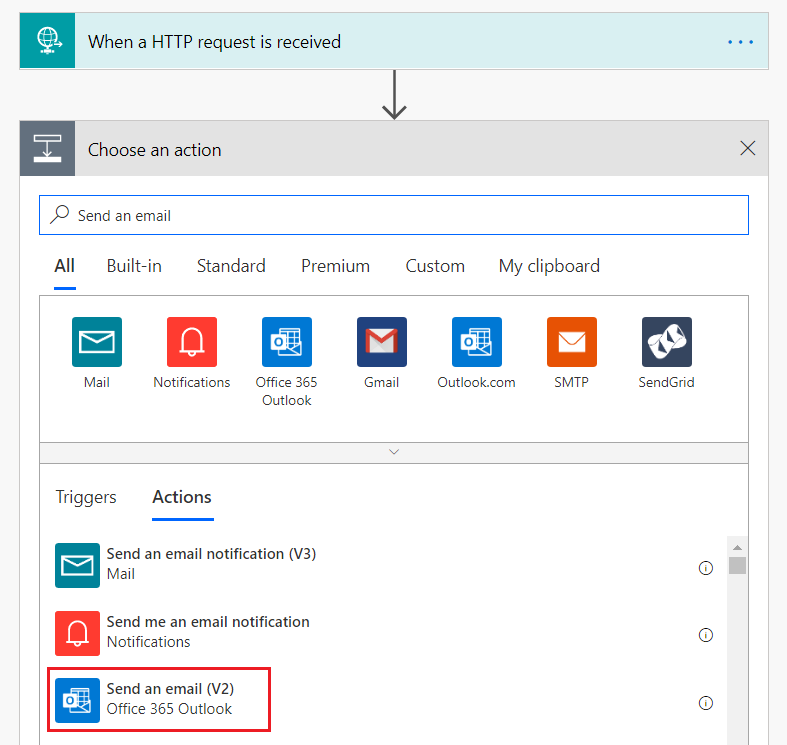
- Click + New step.
-
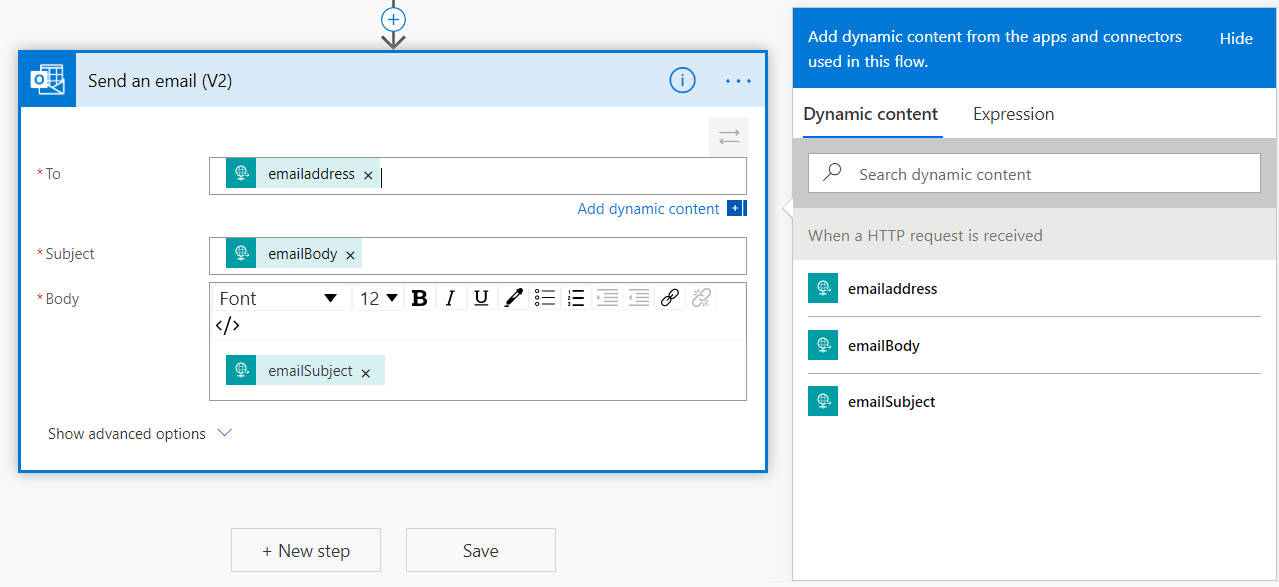
Find and add an action Send an email.
-
Click on the field in the form, to add JSON parameters (from the schema).
- Click + New step.
-
Choose action Response.
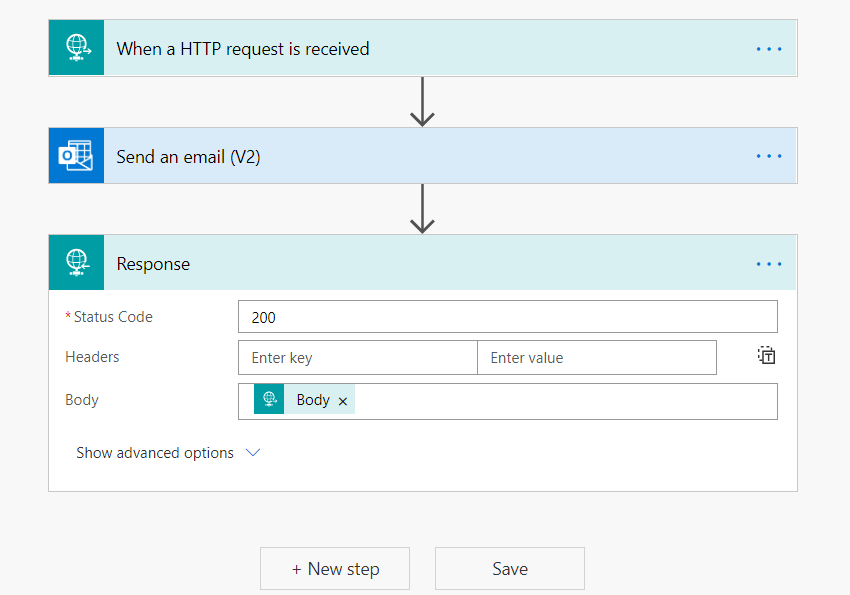
- Click Save.
- Note down the HTTP POST URL.
Test Flow with Soap UI
Download the SoapUI from https://www.soapui.org/
- Select Method as Post.
- Specify the end point as HTTP POST URL.
- Specify the header as Content-type with value application/json.
-
In the Body, specify the JSON.
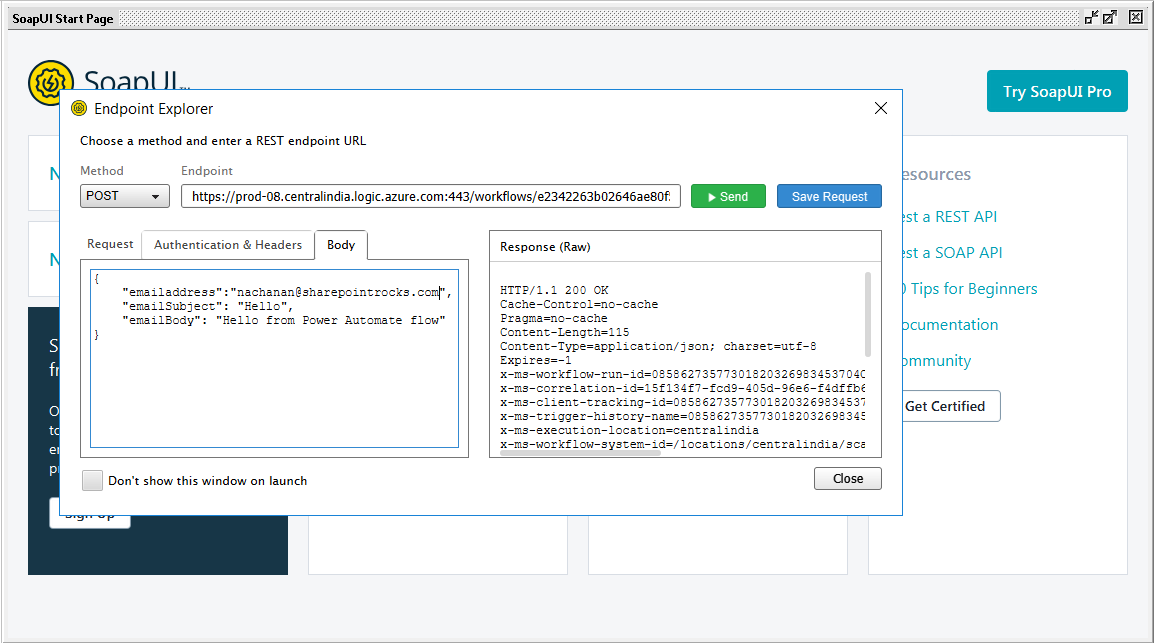
- Click Send.
- The email should be sent out to specified email.
Develop SPFx Web Part to execute Power Automate Flow
-
Open a command prompt. Create a directory for the SPFx solution.
md spfx-flow-email -
Navigate to the above created directory.
cd spfx-flow-email -
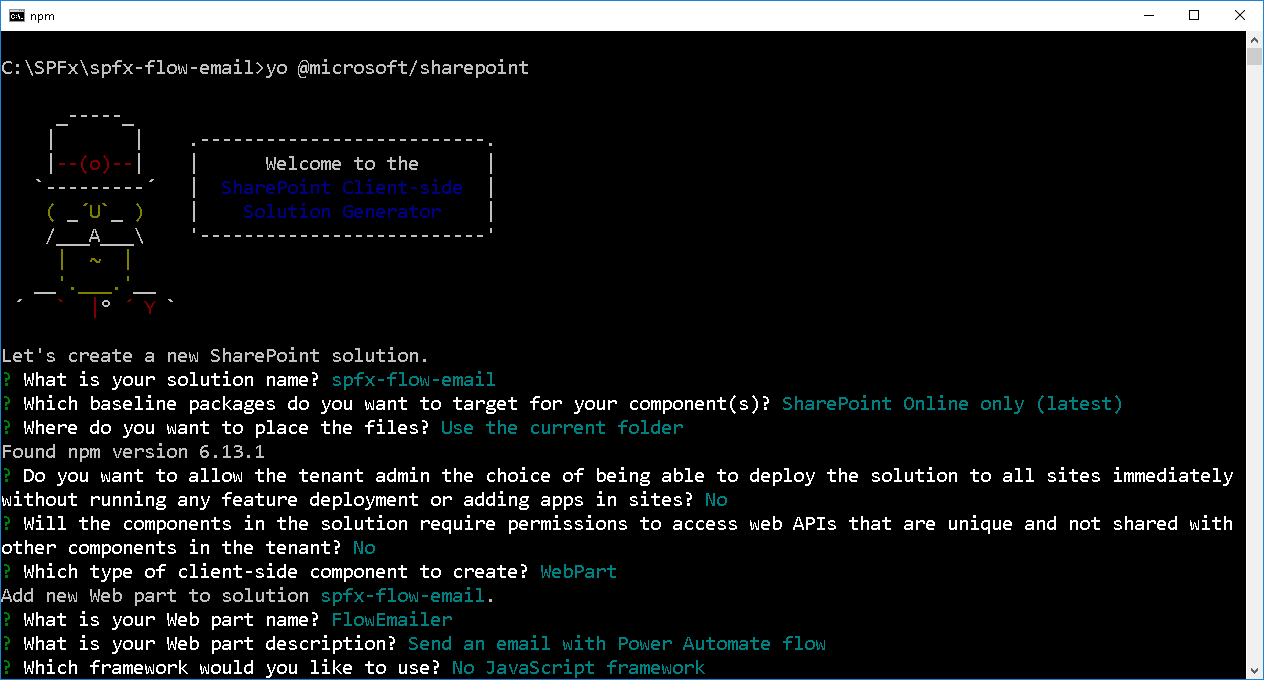
Run the Yeoman SharePoint Generator to create the solution.
yo @microsoft/sharepoint -
Yeoman generator will present you with the wizard by asking questions about the solution to be created.
-
Once the scaffolding process is completed, lock down the version of the project dependencies by running below command.
npm shrinkwrap -
On the command prompt type below command to open the solution in the code editor of your choice.
code .
Code the web part
- Open the web part file at “src\webparts\flowEmailer\FlowEmailerWebPart.ts”.
-
Add below imports.
import { IHttpClientOptions, HttpClientResponse, HttpClient } from '@microsoft/sp-http'; -
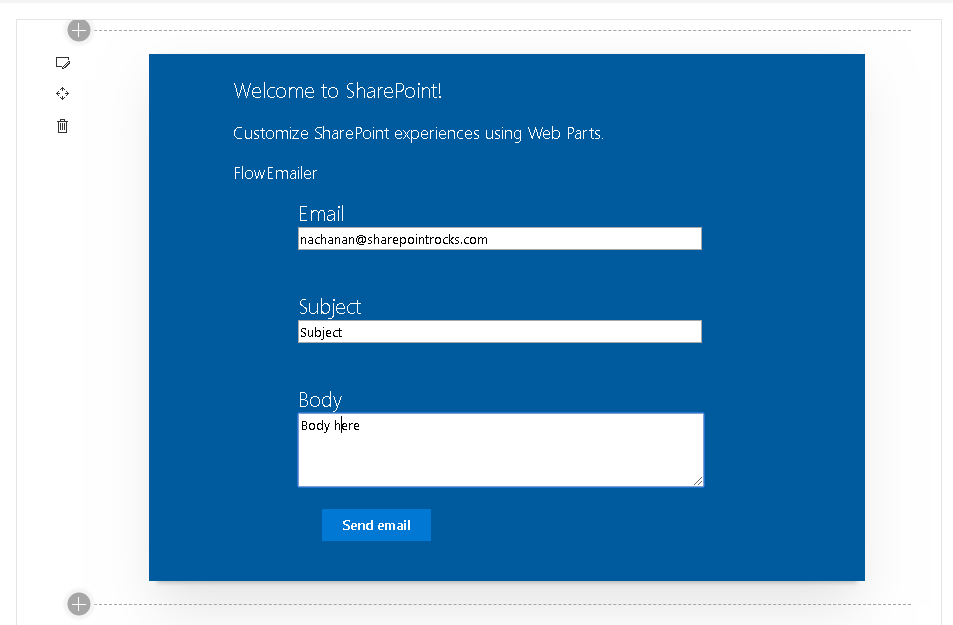
Update render() method to include basic controls to input email address, subject, body, and button to send email.
public render(): void { this.domElement.innerHTML = ` <div class="${ styles.flowEmailer }"> <div class="${ styles.container }"> <div class="${ styles.row }"> <div class="${ styles.column }"> <span class="${ styles.title }">Welcome to SharePoint!</span> <p class="${ styles.subTitle }">Customize SharePoint experiences using Web Parts.</p> <p class="${ styles.description }">${escape(this.properties.description)}</p> <div class="ms-Grid-row ms-bgColor-themeDark ms-fontColor-white ${styles.row}"> <div class="ms-Grid-col ms-u-lg10 ms-u-xl8 ms-u-xlPush2 ms-u-lgPush1"> <span class="${styles.fixedTitle}">Email</span> <input type='textbox' name='txtEmail' id='txtEmail' class="form-control" value="" placeholder="" > </div> </div> <div class="ms-Grid-row ms-bgColor-themeDark ms-fontColor-white ${styles.row}"> <div class="ms-Grid-col ms-u-lg10 ms-u-xl8 ms-u-xlPush2 ms-u-lgPush1"> <span class="${styles.fixedTitle}">Subject</span> <input type='textbox' name='txtSubject' id='txtSubject' class="form-control" value="" placeholder="" > </div> </div> <div class="ms-Grid-row ms-bgColor-themeDark ms-fontColor-white ${styles.row}"> <div class="ms-Grid-col ms-u-lg10 ms-u-xl8 ms-u-xlPush2 ms-u-lgPush1"> <span class="${styles.fixedTitle}">Body</span> <textarea rows="4" cols="50" name='txtBody' id='txtBody' class="form-control"></textarea> </div> </div> <div class="ms-Grid-row ms-bgColor-themeDark ms-fontColor-white ${styles.row}"> <div class="ms-Grid-col ms-u-lg10 ms-u-xl8 ms-u-xlPush2 ms-u-lgPush1"> <button class="${styles.button} email-Button"> <span class="${styles.label}">Send email</span> </button> </div> </div> </div> </div> </div> </div>`; this.domElement.querySelector('button.email-Button').addEventListener('click', () => { this._emailButtonClicked(); }); } - Implement button click event to read user inputs and send an email.
private _emailButtonClicked(): void {
  let emailAddress: string = (<HTMLInputElement>document.getElementById("txtEmail")).value;
  let emailSubject: string = (<HTMLInputElement>document.getElementById("txtSubject")).value;
  let emailBody: string = (<HTMLInputElement>document.getElementById("txtBody")).value;

  this.sendEmail(emailAddress, emailSubject, emailBody);
}

private sendEmail(emailAddress: string, emailSubject: string, emailBody: string): Promise<HttpClientResponse> {
  const postURL = "<Specify Power Automate Flow URL>";

  const body: string = JSON.stringify({
    'emailaddress': emailAddress,
    'emailSubject': emailSubject,
    'emailBody': emailBody,
  });

  const requestHeaders: Headers = new Headers();
  requestHeaders.append('Content-type', 'application/json');

  const httpClientOptions: IHttpClientOptions = {
    body: body,
    headers: requestHeaders
  };

  console.log("Sending Email");

  return this.context.httpClient.post(
    postURL,
    HttpClient.configurations.v1,
    httpClientOptions)
    .then((response: HttpClientResponse): Promise<HttpClientResponse> => {
      console.log("Email sent.");
      return response.json();
    });
}
Test the Web Part
- On the command prompt, type gulp serve -nobrowser.
- Open SharePoint site.
- Navigate to /_layouts/15/workbench.aspx
-
Locate and add the web part (named FlowEmailer) to page.
- Provide the email, subject, and body.
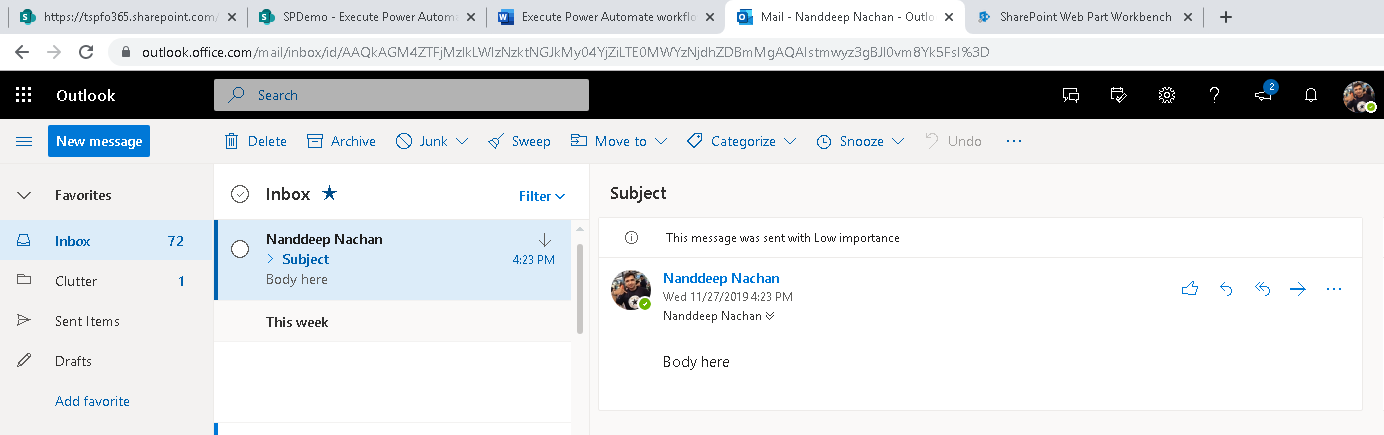
- Verify the email from outlook.
Summary
In this article, we explored the practical use case of triggering the Power Automate workflow from SPFx web part. The HTTP POST URL exposed by Power Automate flow can be triggered from SPFx web part using HttpClient.
This content was originally posted here.

Leave a comment