
Build SharePoint Copilot with Microsoft Copilot Studio
Overview
Over the past 2 decades, SharePoint has been serving as a main building block for businesses working together and managing information. The role of SharePoint for generating answers in the Microsoft Copilot Studio is not just supportive but foundational.
This article is all about how we use SharePoint to find answers in Microsoft Copilot Studio. Doing this well means organizing content smartly and knowing how SharePoint and Copilot Studio’s advanced AI work together.
Why SharePoint as data source?
SharePoint’s integration as a data source in Microsoft Copilot Studio is a game-changer for organizations. It helps them use all their knowledge better and make decisions faster. SharePoint has been the preferred content management solution for various Organization that helps to collate the information at one place. Copilot Studio can use this information to give accurate answers.
From project documentation and reports to internal communications and collaborative content, SharePoint houses diverse data. By indexing this data, Copilot Studio can perform advanced searches across the SharePoint ecosystem, ensuring that the answers generated are not only accurate but also reflect the latest updates and insights.
Moreover, SharePoint’s robust security and compliance features ensure that sensitive data remains protected while being utilized by Copilot Studio. This is particularly important for enterprises that operate in regulated industries or handle confidential information.
In essence, SharePoint as a data source empowers Microsoft Copilot Studio to act as an intelligent assistant, capable of providing informed answers and suggestions.
Sample SharePoint Content
For the demonstration purpose of this article, I have set up a SharePoint communication site named “Margie Travels” for a travel agency. The standard out of box “Documents” library is populated with brochures of places where they provide the travel arrangements.
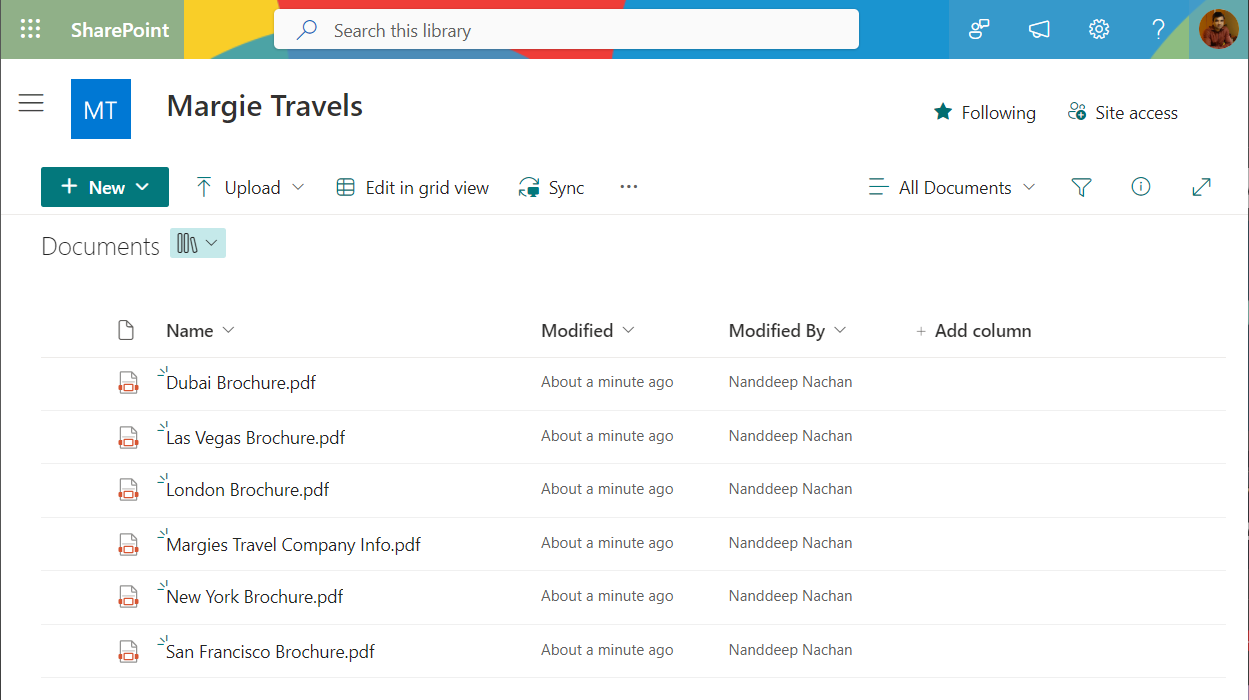
Each brochure represents a city travel and hotel accommodation information.
Create a Copilot in the Microsoft Copilot Studio
Follow the below steps to set up a Copilot:
- Navigate to Microsoft Copilot Studio at https://copilotstudio.microsoft.com.
-
Create a new Copilot named “Travel Copilot”.
You may enter the SharePoint site URL in the below highlighted textbox while you set up the Copilot.
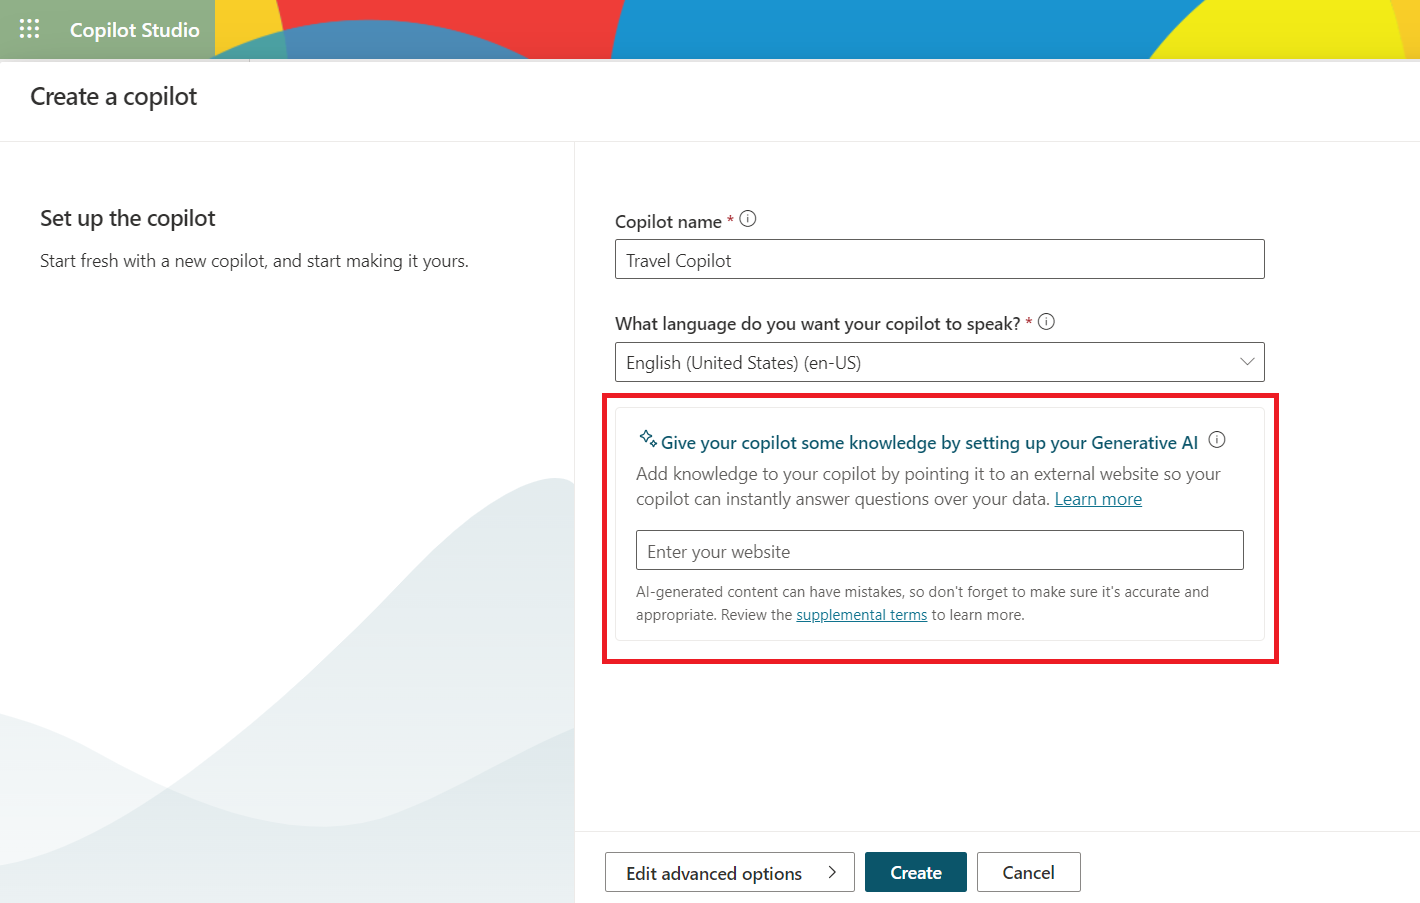
There are 2 options while you set up the SharePoint website:
- Specify the SharePoint Site URL and the Copilot will surface the information from all document libraries.
-
Specify the URL to document library and Copilot will surface the information only from the specific document library. I will leave this textbox empty as of now and we will configure the SharePoint source later.
- Click Create.
Set SharePoint Site as source for Generative AI
Follow the below steps to enable the Generative AI and specify SharePoint as data source for the Copilot:
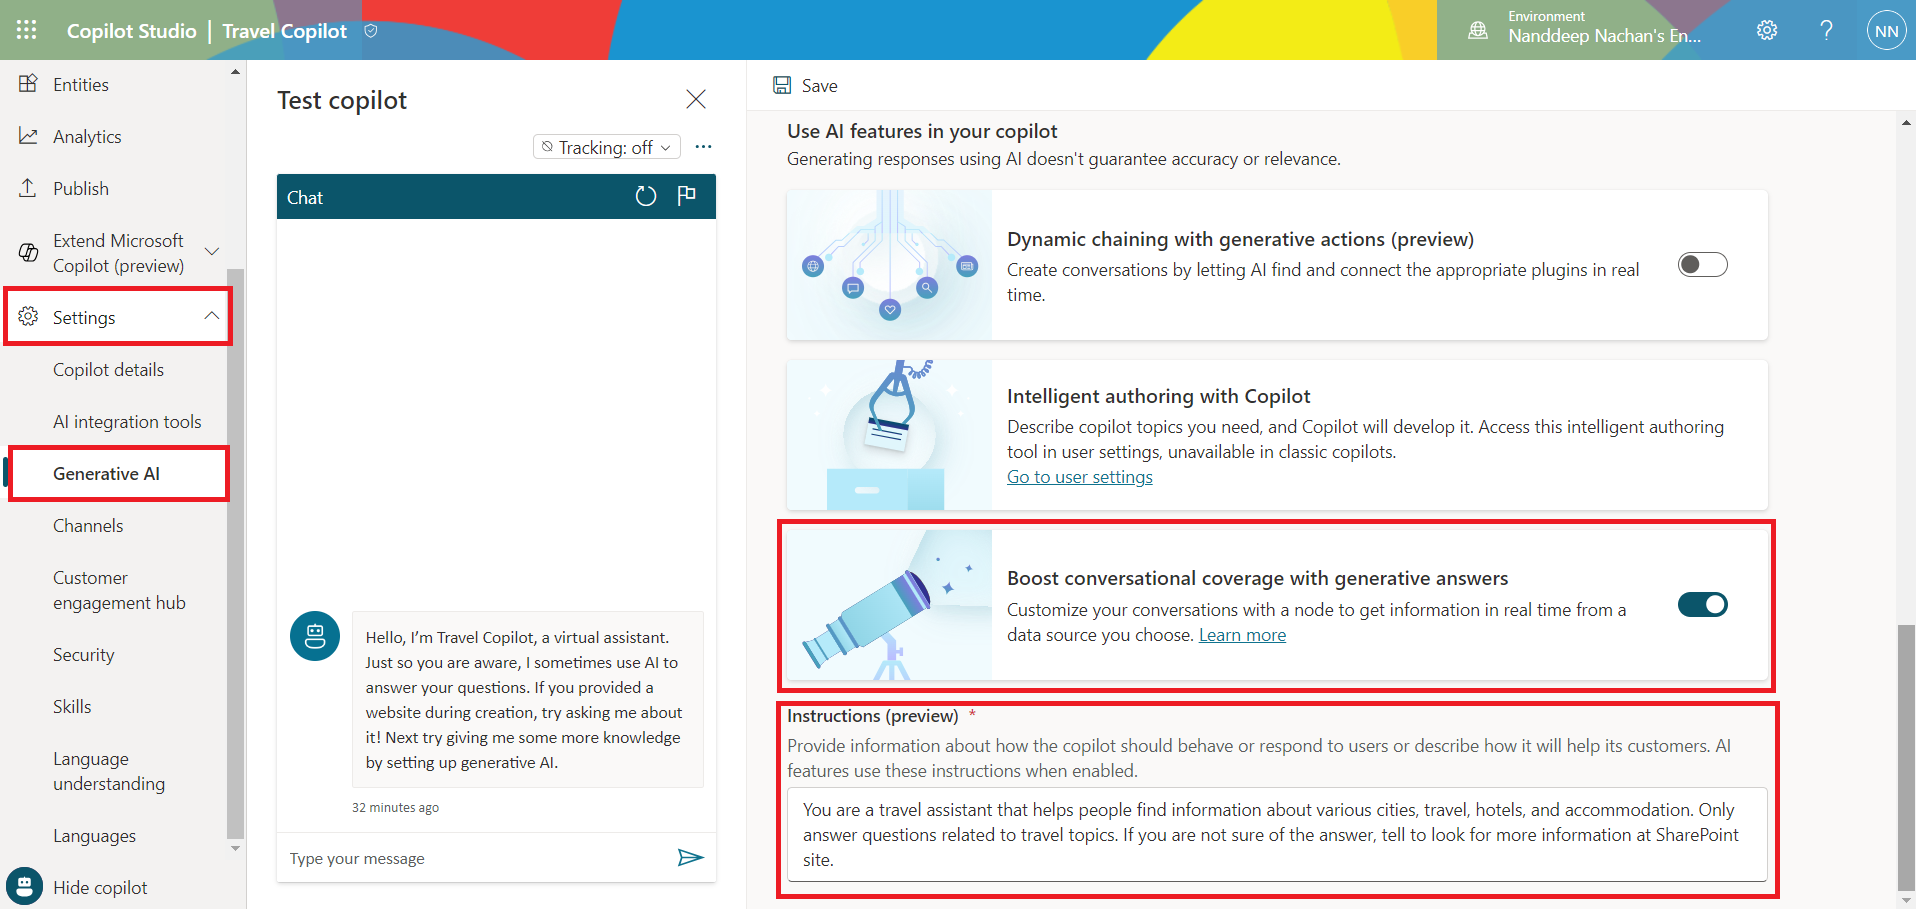
- From the left menu, under Settings, click Generative AI.
- Under Use AI features in your copilot, enable Boost conversational coverage with generative answers.
-
In the Instructions box provide information about how the copilot should behave or respond to users. For example: You are a travel assistant that helps people find information about various cities, travel, hotels, and accommodation. Only answer questions related to travel topics. If you are not sure of the answer, tell to look for more information at SharePoint site.
-
On the same page, scroll up to specify the SharePoint site or URL to SharePoint document library. Note, the URL cannot be more than two levels deep.
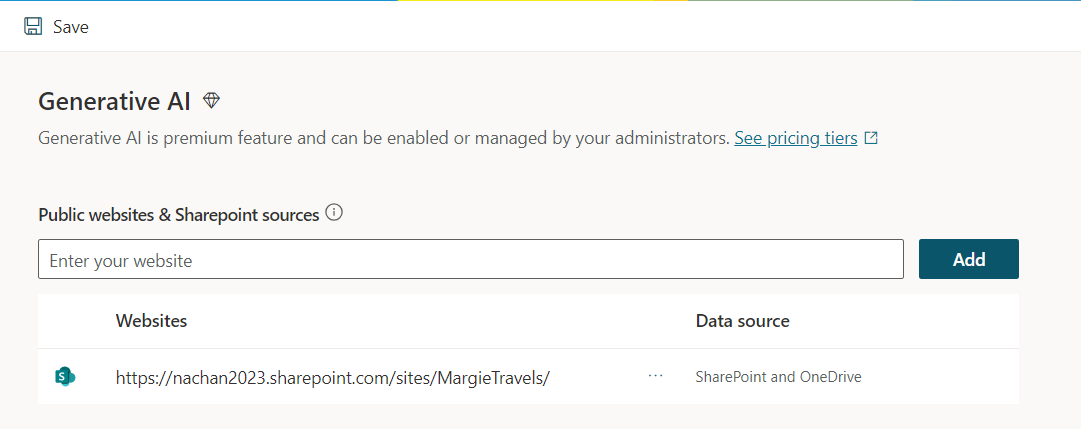
- Click Save.
-
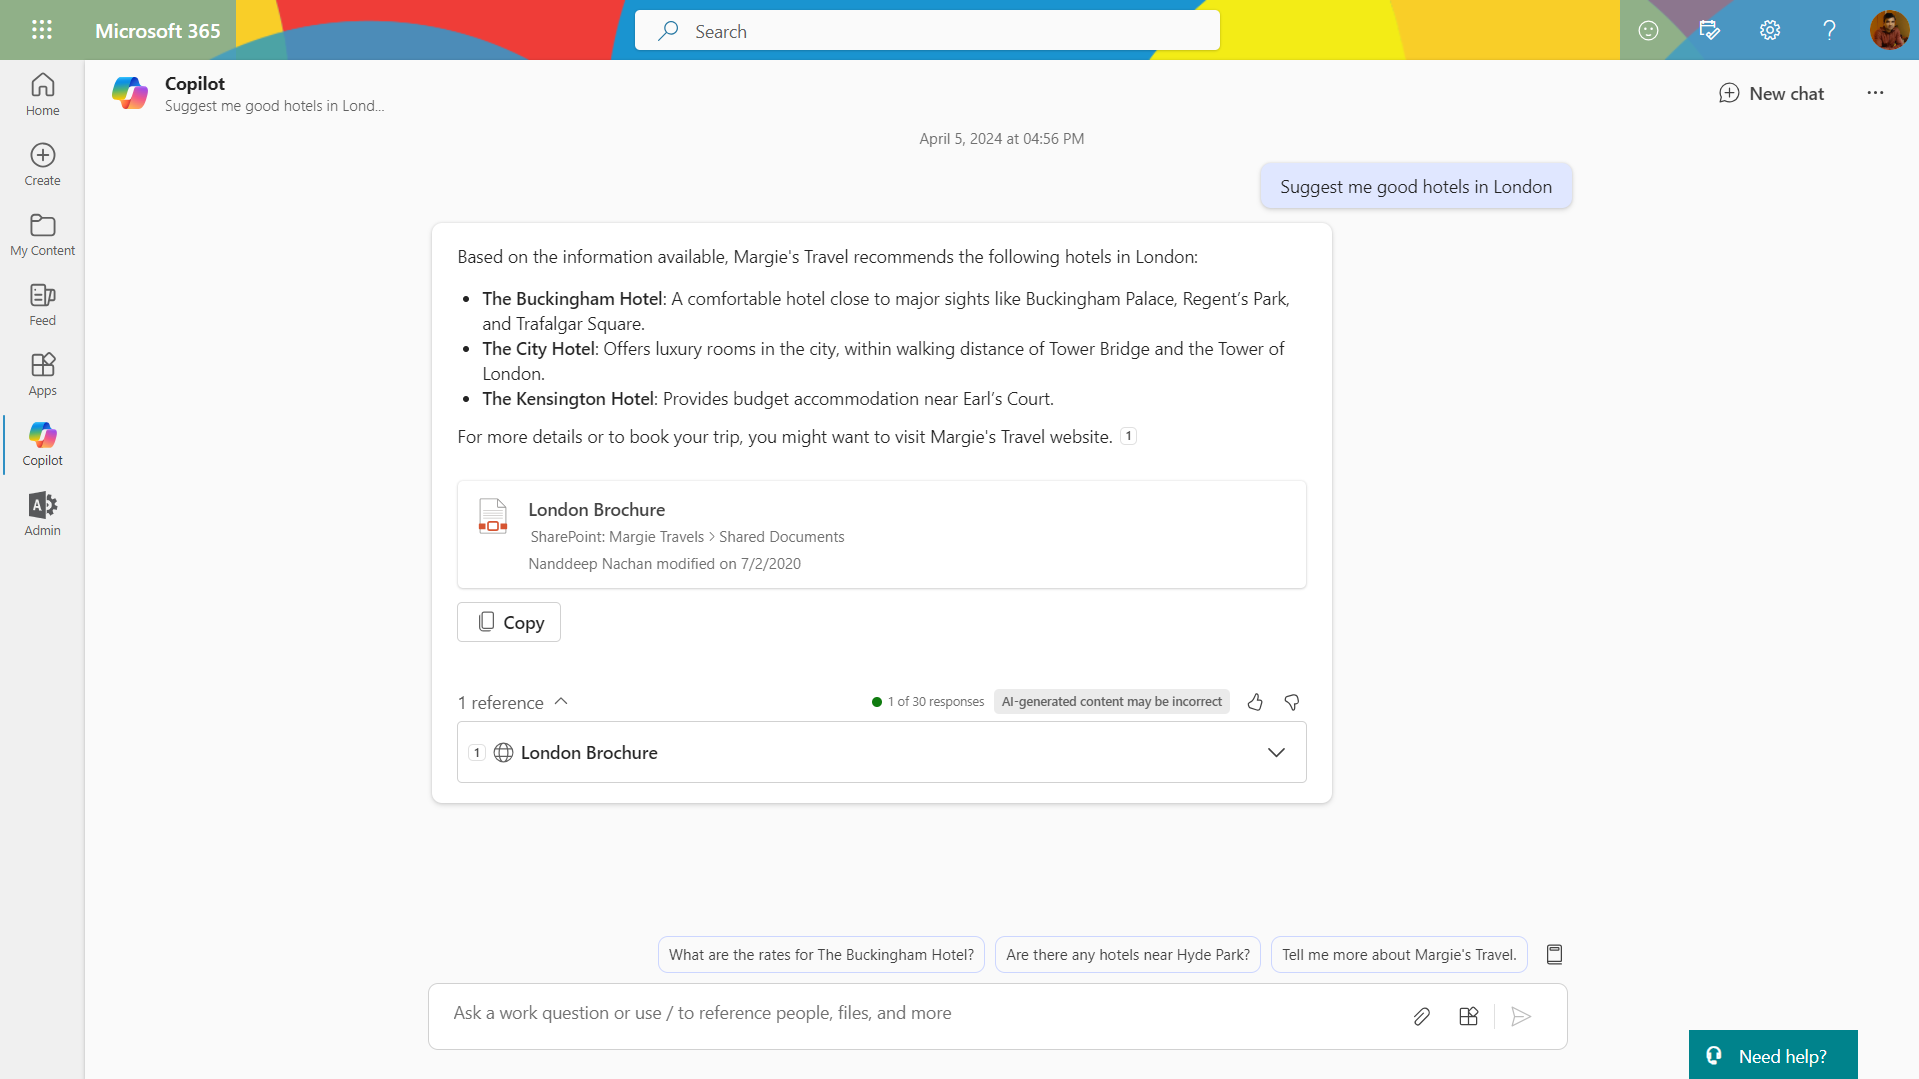
Ask a travel related question to the Copilot and it can answer from SharePoint.
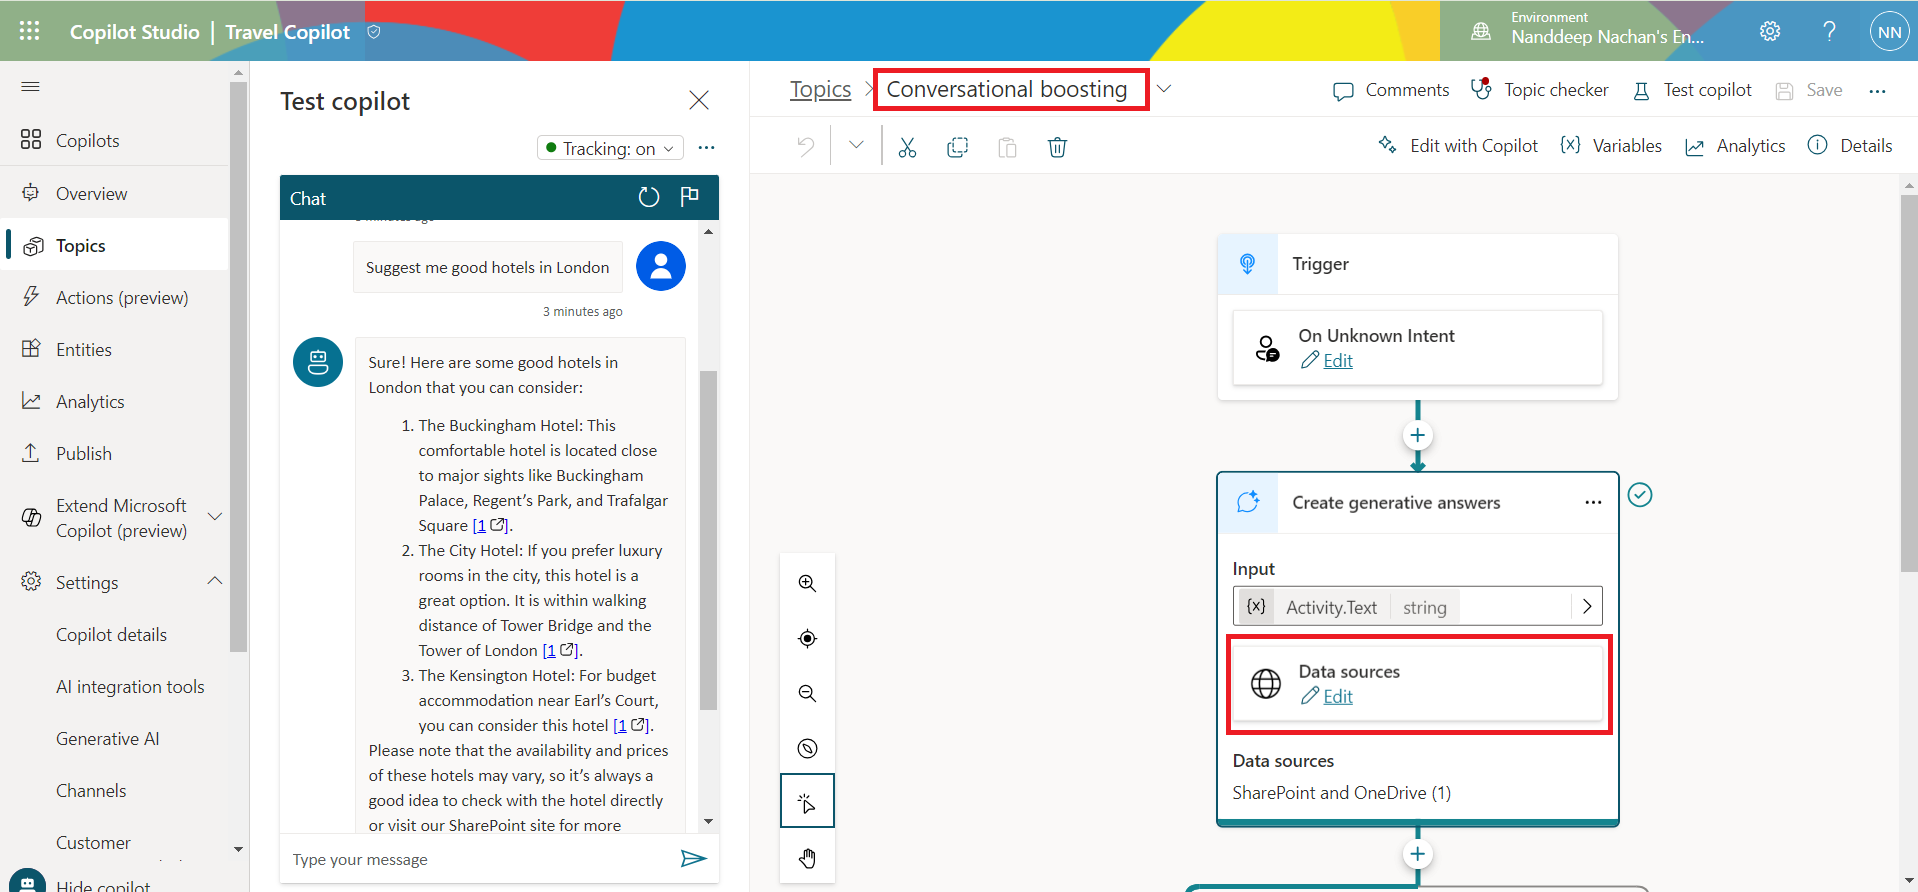
If you set the tracking on, you will observe the answer is generated from a topic called “Conversational boosting”.
Conversational boosting topic
Conversational boosting topic enhances the Copilot responses with contextual answers from websites, SharePoint sites, documents, etc.
Although everything seems to work perfectly, if you open up the topic, you will notice an error at the top in the Topic checker.

The error talks about the AuthenticationInputNotEnabled (authentication input not enabled).
Let us fix this by enabling the authentication with below steps:
- Go to Settings > Security.
- Click Authentication.
-
Select Authenticate manually.
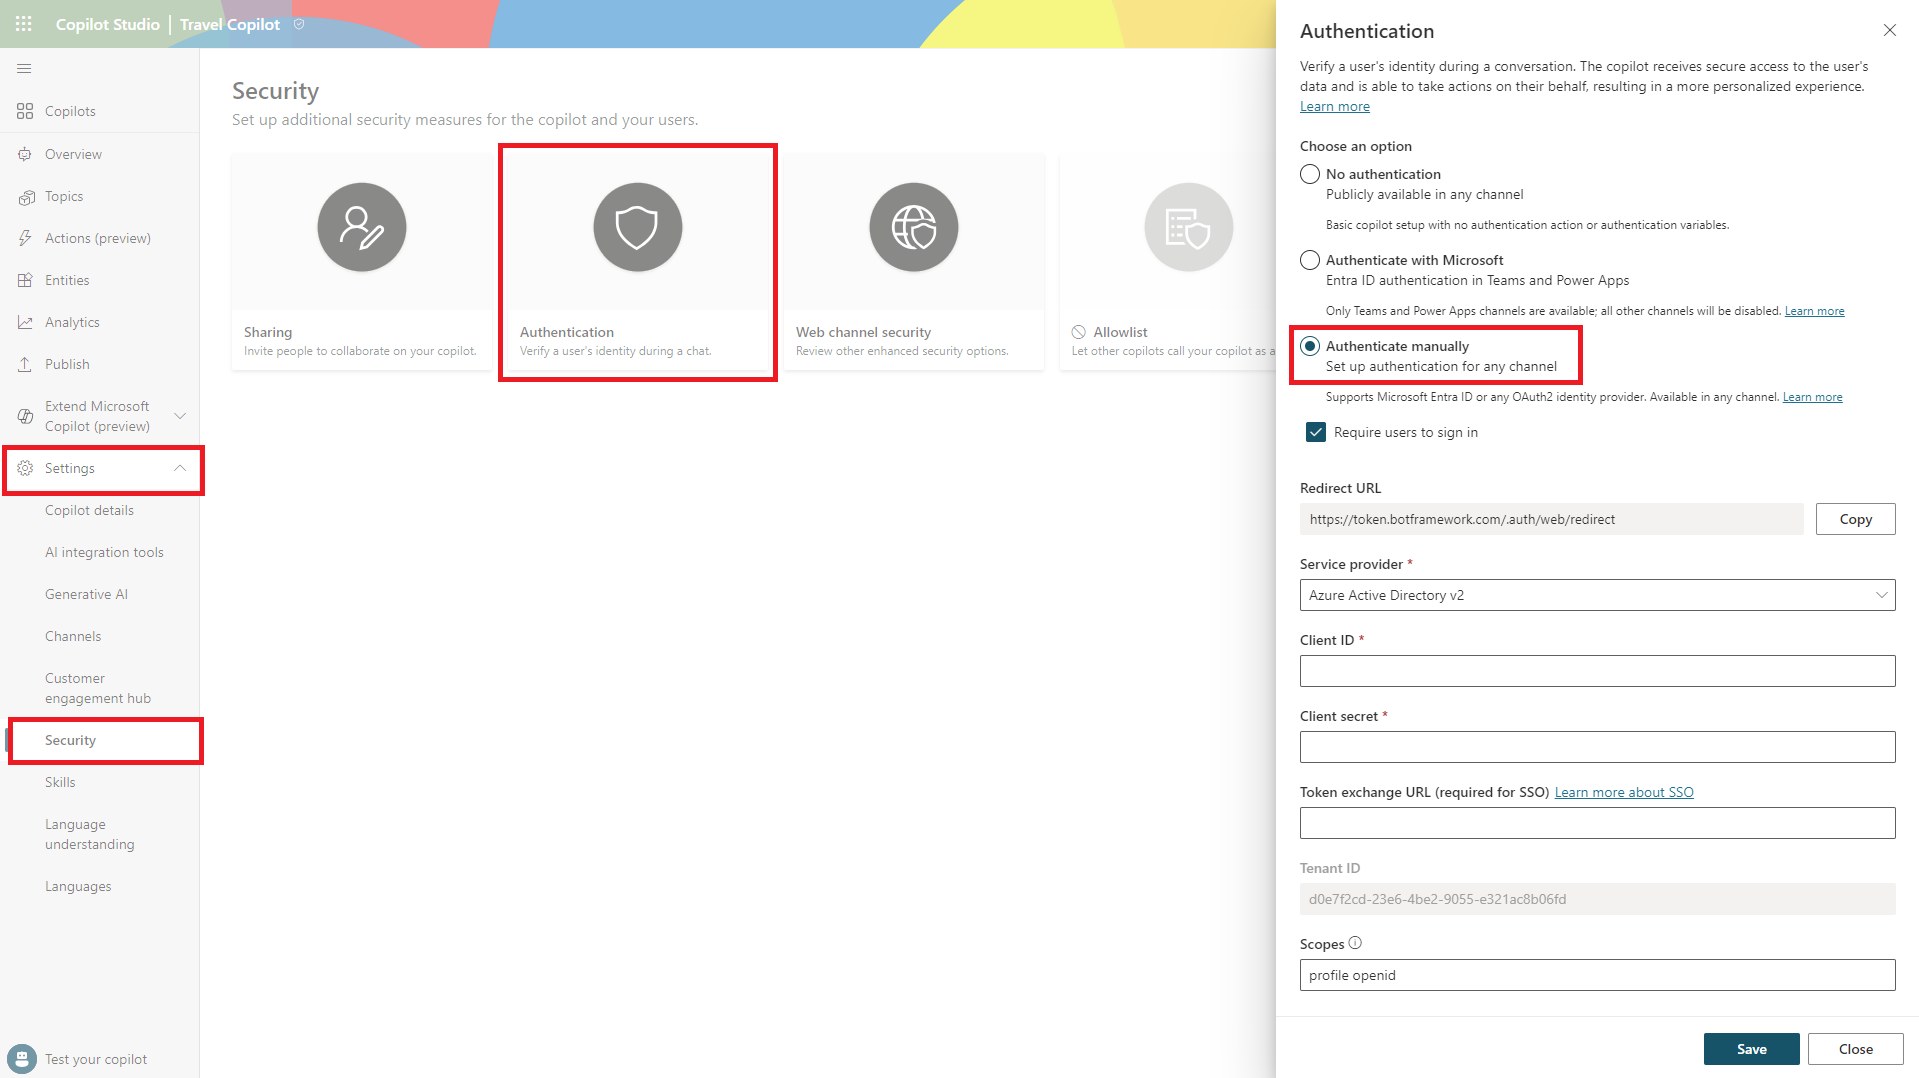
- No Authentication: When your copilot doesn’t require your users to sign in when interacting with the copilot.
- Only for Teams and Power Apps: Automatically sets up Microsoft Entra ID authentication for Teams without the need for any manual configuration.
- Authenticate manually: configure any Microsoft Entra ID v1, Microsoft Entra ID, or OAuth2-compatible identity provider with this option.
Require users to sign in options determines whether a user needs to sign in before interacting with the copilot.
Set up Microsoft Entra App registration
Follow the below steps to set up Microsoft Entra App registration and refer the values back to the Copilot authentication.
- Navigate to the Azure portal.
- From the left menu, click App registrations.
-
You can create a new App registration or can use existing app registration created for your Copilot as well.
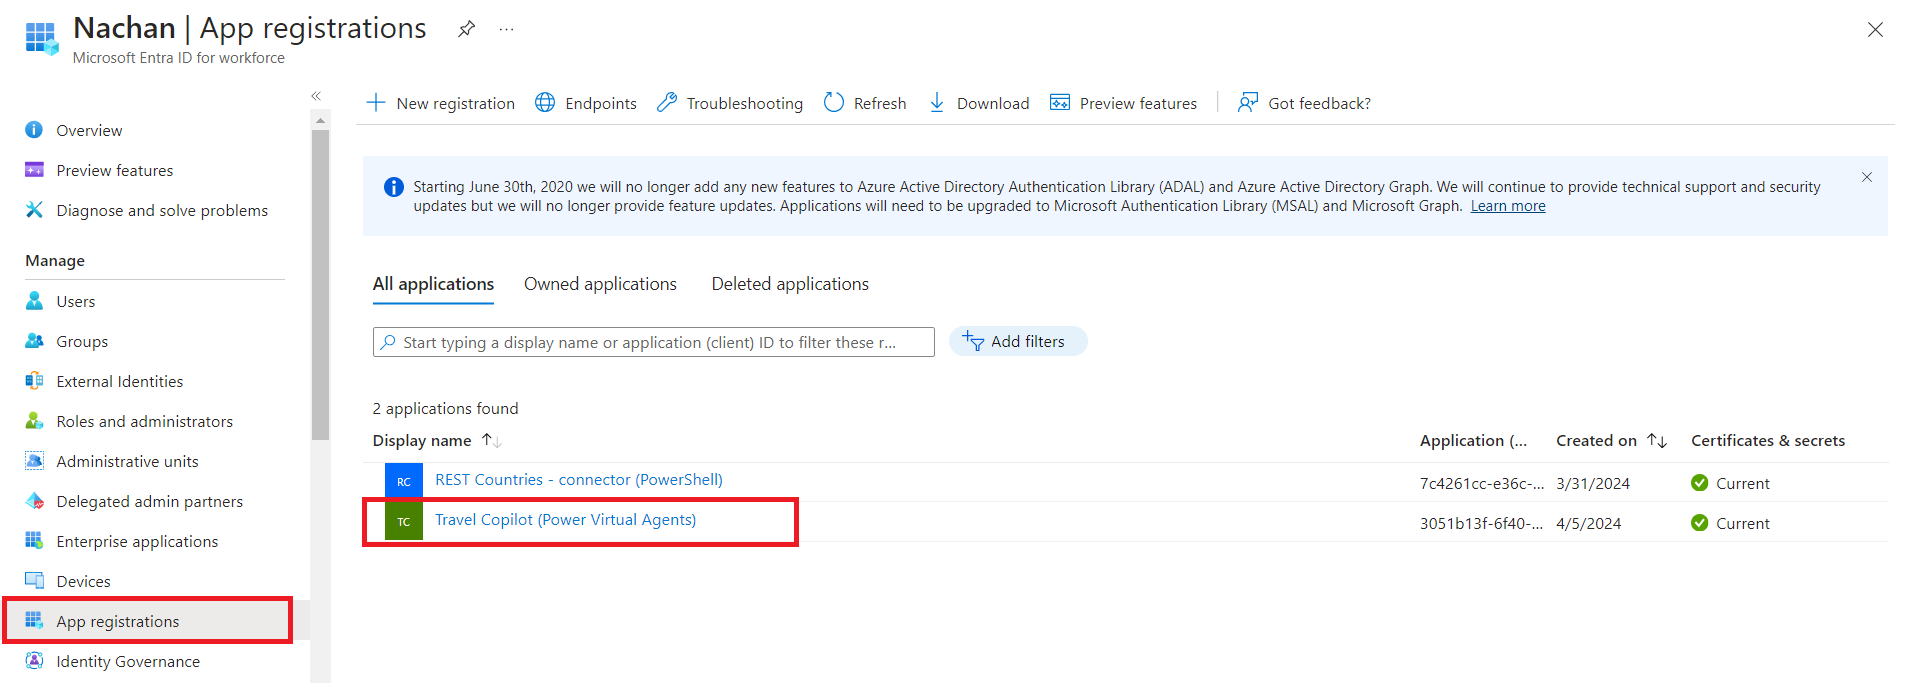
I will use the existing App registration to make further changes.
Add Redirect URI
Add the Redirect URI (for e.g. https://token.botframework.com/.auth/web/redirect) shown in the copilot authentication panel.

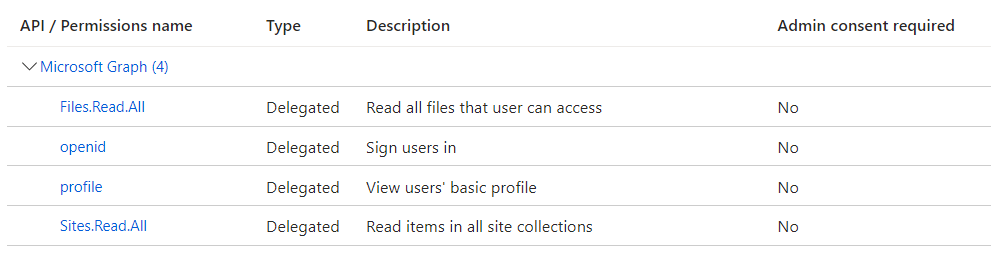
API permissions
Add the below Graph API permissions as delegated.
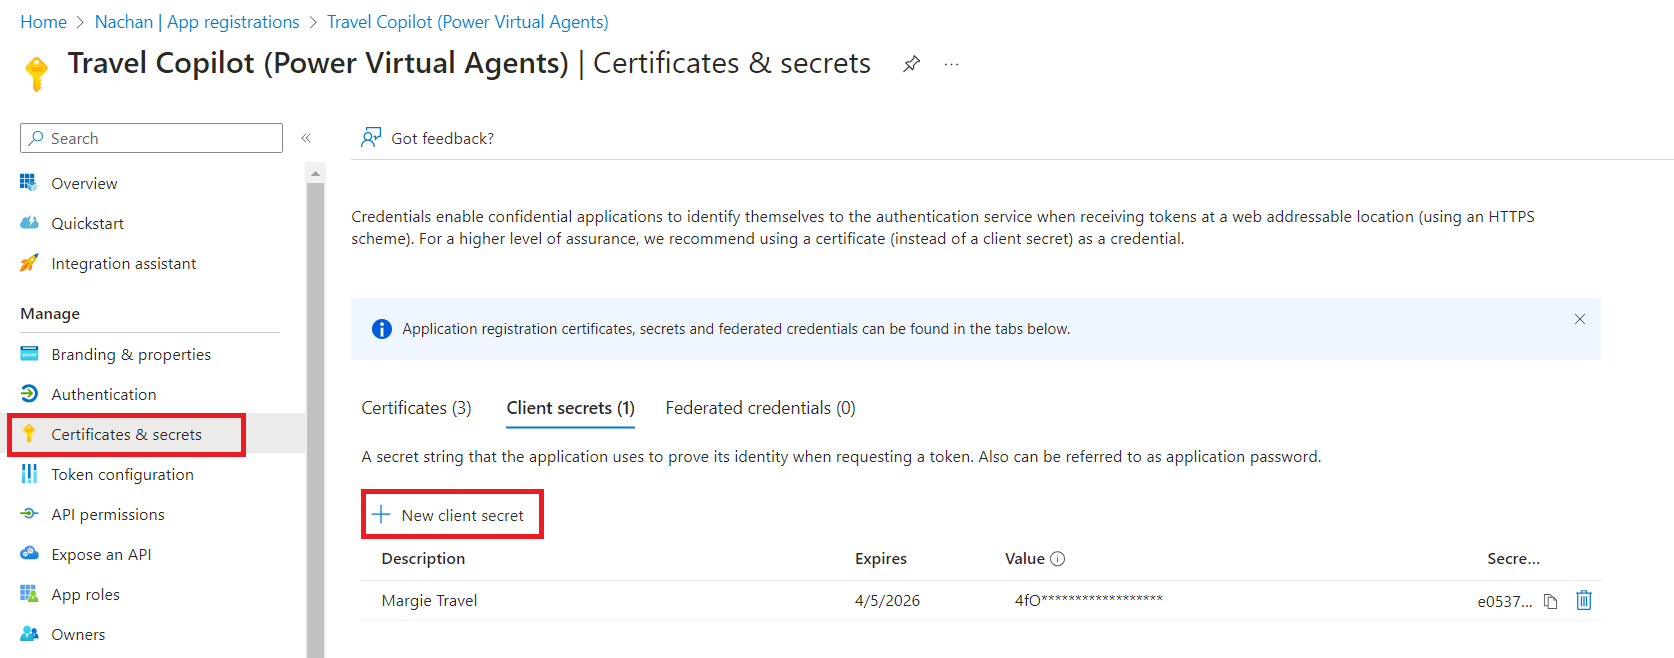
Generate Client secret
Navigate to Certificates & secrets and generate a new client secret.
Update the Copilot configuration
Once the Microsoft Entra App registration is set up, reflect the values to Copilot configuration.
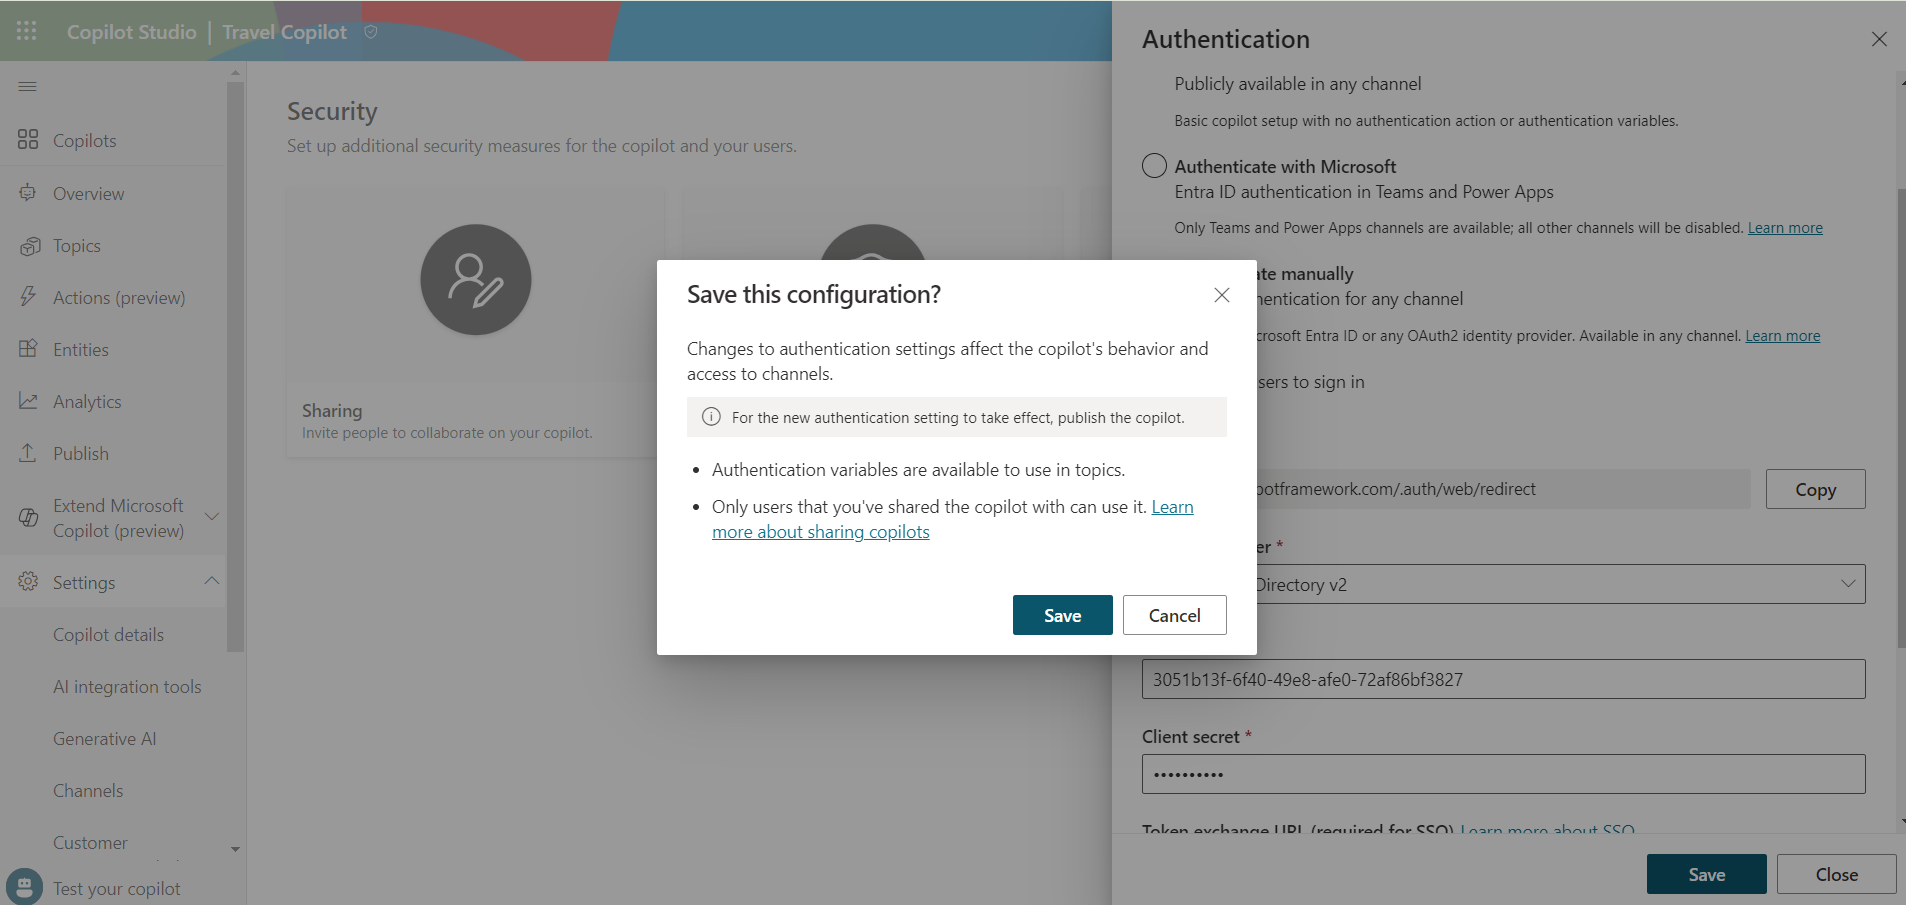
As suggested in the dialog, make sure to publish the copilot. Navigate back to the Conversational boosting topic and make sure no validation error is present.
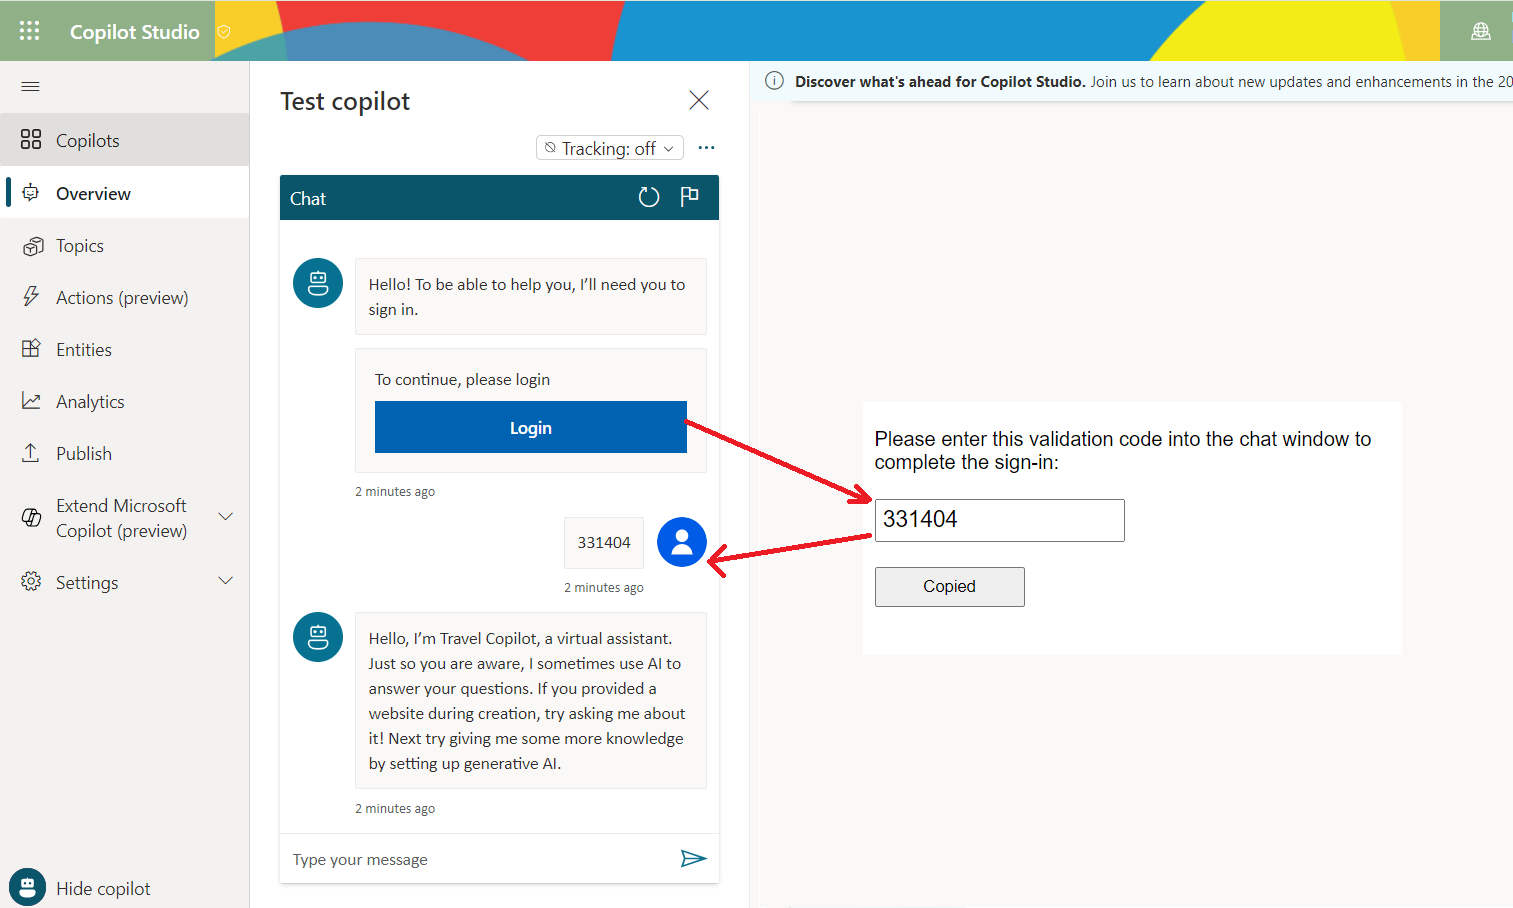
As we had selected the option Require users to sign in in the Copilot configuration, user needs to sign at least once.
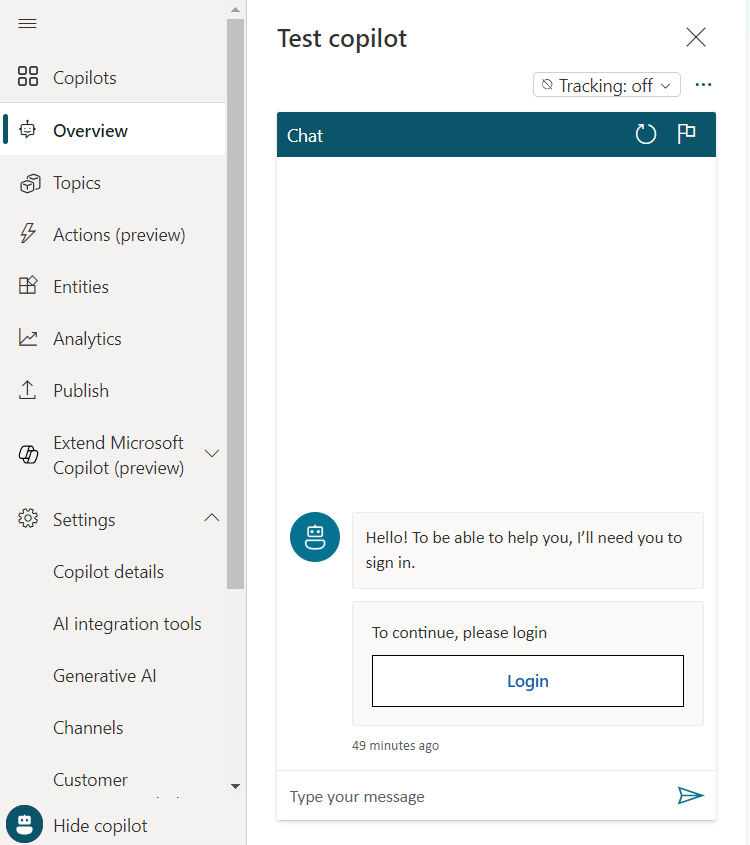
Click the Login button, in the new windows it will generate a code. Paste the code as chat message to start a discussion with your Copilot.
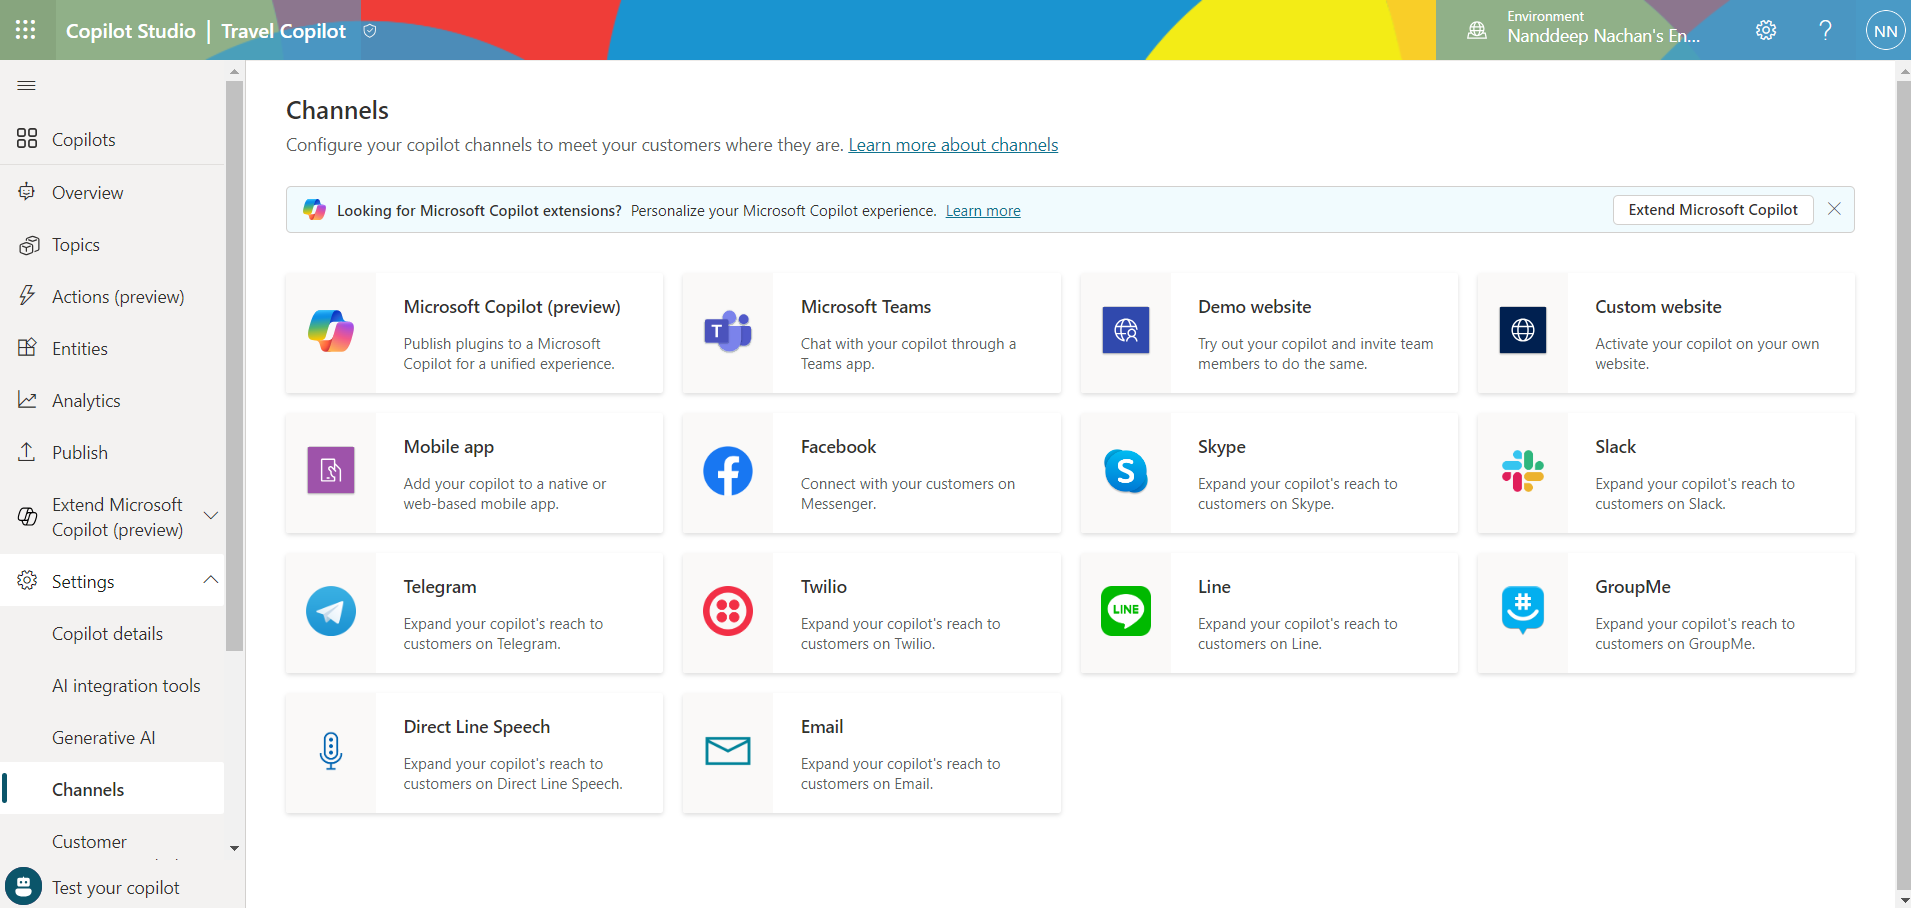
Publish the Copilot
Once you are happy with the Copilot, navigate to Settings > Channels and publish the Copilot to your desired channel.
Travel Copilot plugin experience in M365 Copilot
Type your travel related query into M365 Copilot and it will pick up our travel copilot to answer it as follows.
Summary
The role of SharePoint for generating answers in the Microsoft Copilot Studio is not just supportive but foundational. SharePoint as a data source empowers Microsoft Copilot Studio to act as an intelligent assistant, capable of providing informed answers and suggestions.


Leave a comment