
Building Multilingual Copilots with Microsoft Copilot Studio
Overview
Multilingual copilots are like assistants that can talk to users in various languages, all within one assistant. They can figure out the language you want to use by checking your internet browser settings and then respond in that language. This makes the conversation more personal and interesting for users.
In this article, we will explore the multilingual copilots configured from the Microsoft Copilot Studio.
Set up a topic for Copilot
Follow the below steps to set up a Copilot topic:
- Navigate to Microsoft Copilot Studio at https://copilotstudio.microsoft.com.
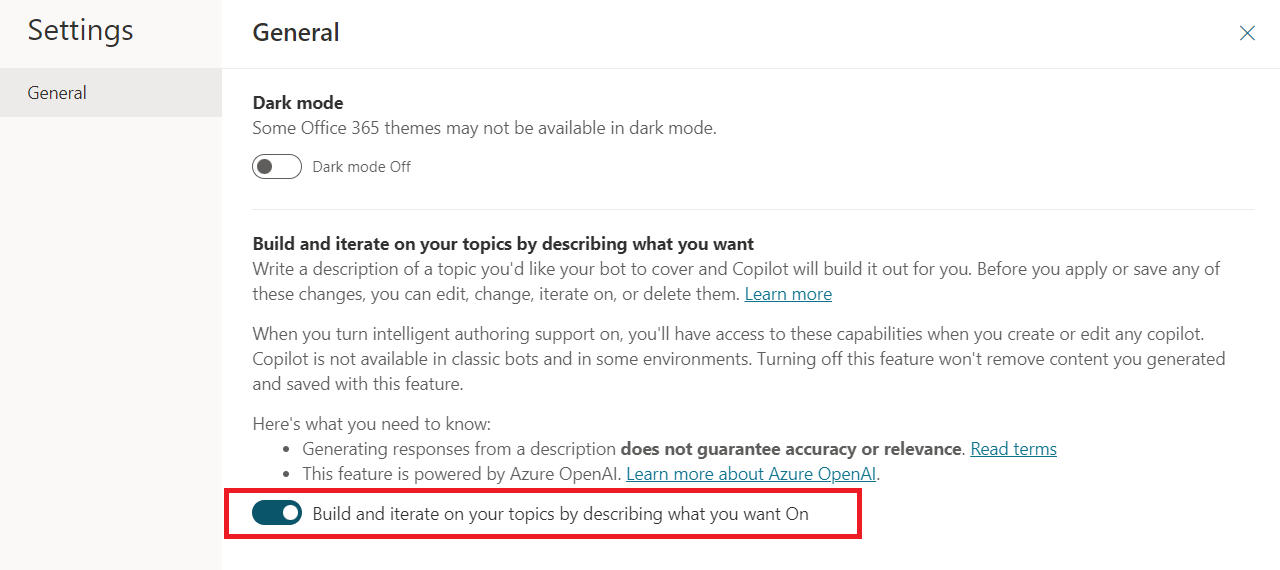
- From the Settings menu, click General settings.
-
Toggle the Build and iterate on your topics by describing what you want option to On.
- Create a new Copilot named “Multilingual Copilot”.
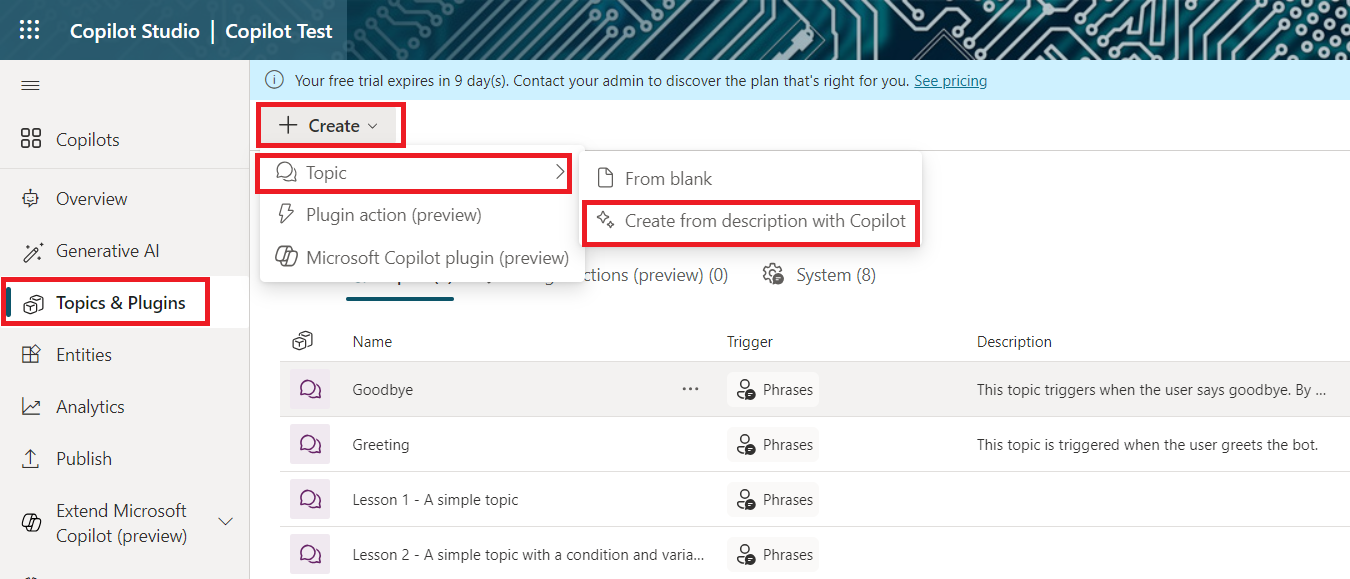
-
From the left menu, select Topics & Plugins > Create> Topic > Create from description with Copilot.
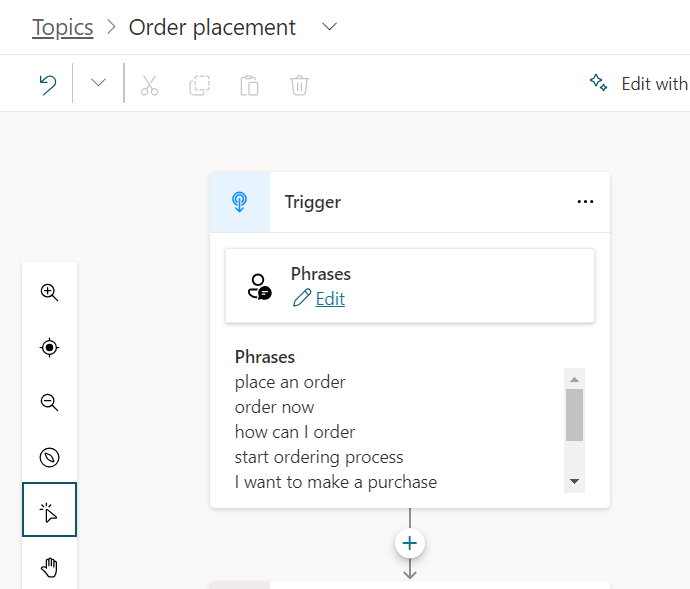
- Name the topic as Order placement.
-
In the Create a topic to… textbox, type Let the user select items from the menu and place the order.
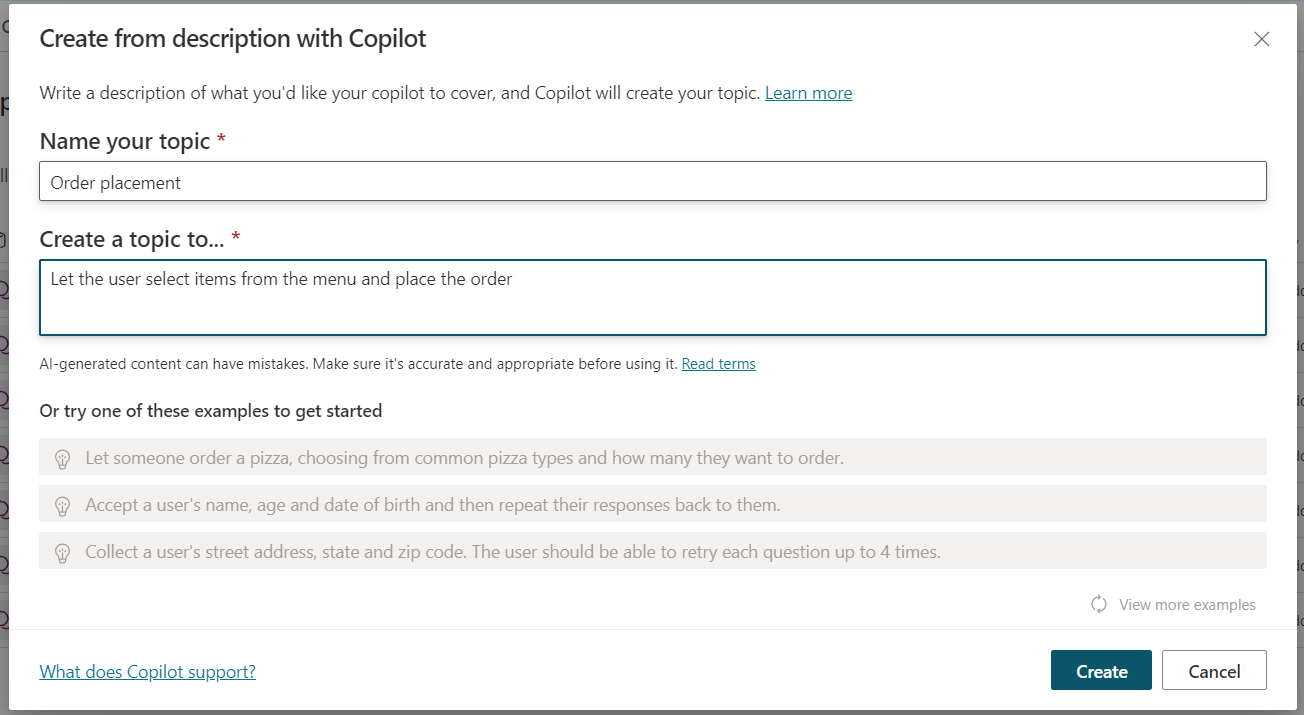
- Click Create.
-
The new topic will be generated with trigger phrases.
Set up a Copilot to work with multiple languages
Follow the below steps to add language support to Copilot:
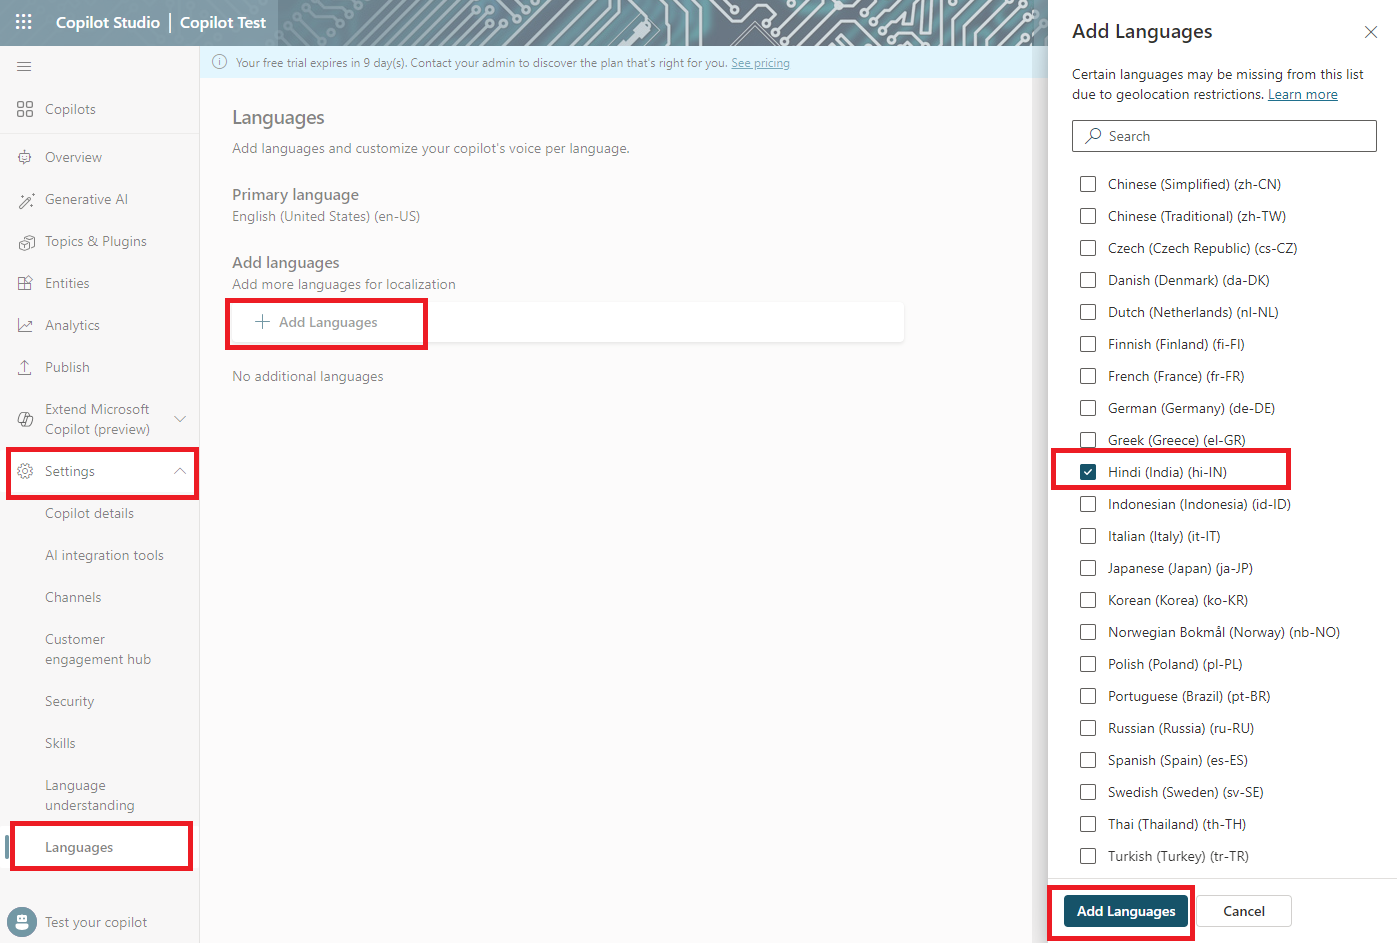
- From the left menu, click Settings > Languages.
- Click Add languages.
- Select the languages to add.
-
Click Add Languages.
Manage localization
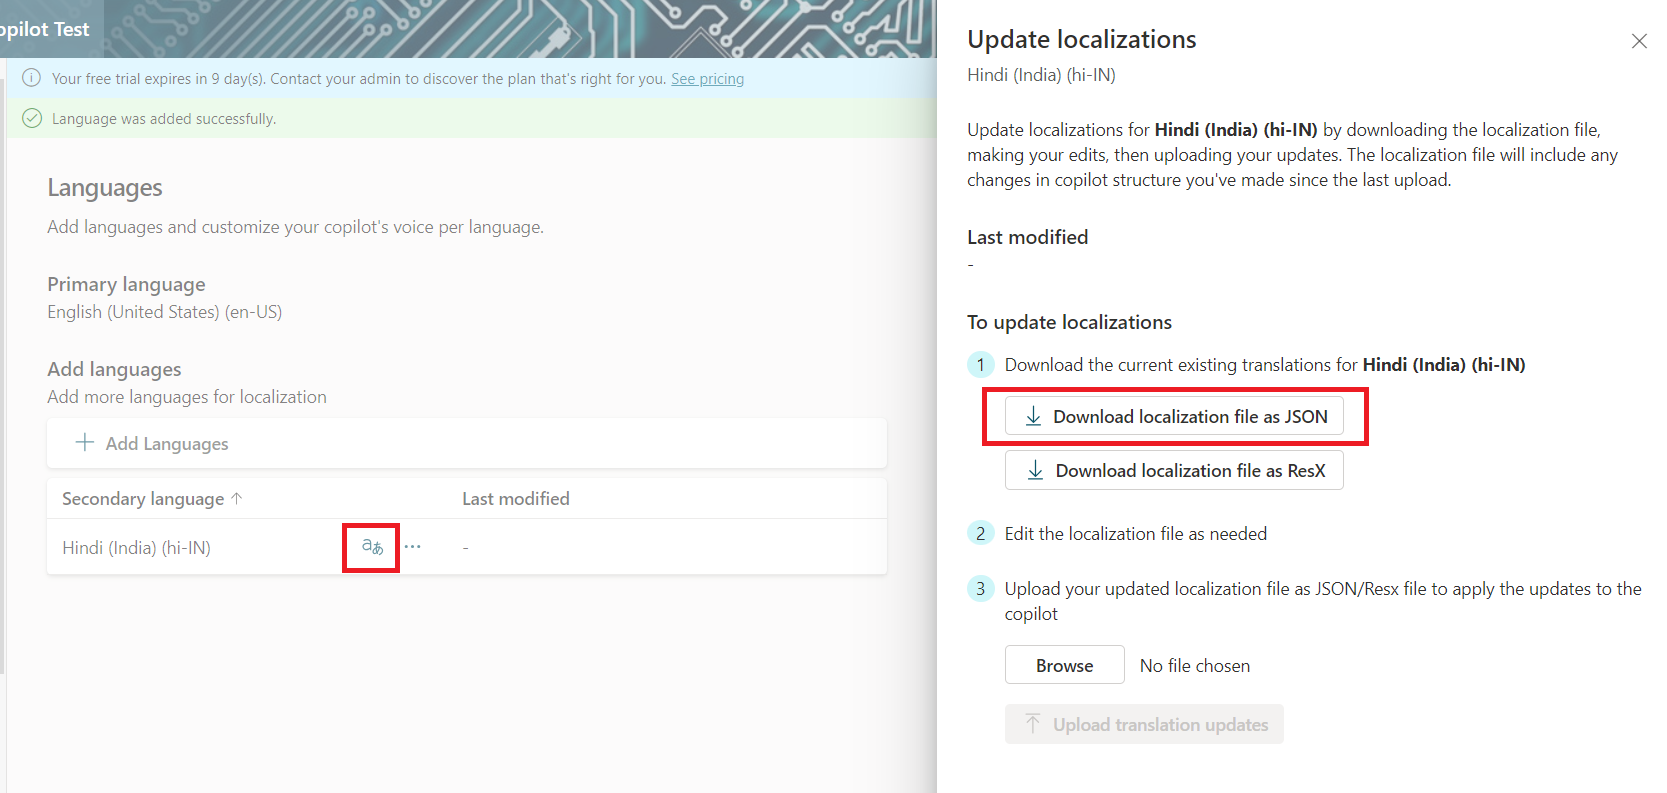
All Copilot topic and content editing must be done in the Copilot’s primary language. Follow the below instructions to translate the text for the Copilot’s secondary language. After localizing and uploading the copilot strings, you can see the translated content in the authoring canvas by switching the language in the test copilot.
- For a language, click the Update localizations icon.
-
Click Download localization file as JSON to download the current localization file for that language.
-
Update the Copilot’s messages in English with the selected secondary language.

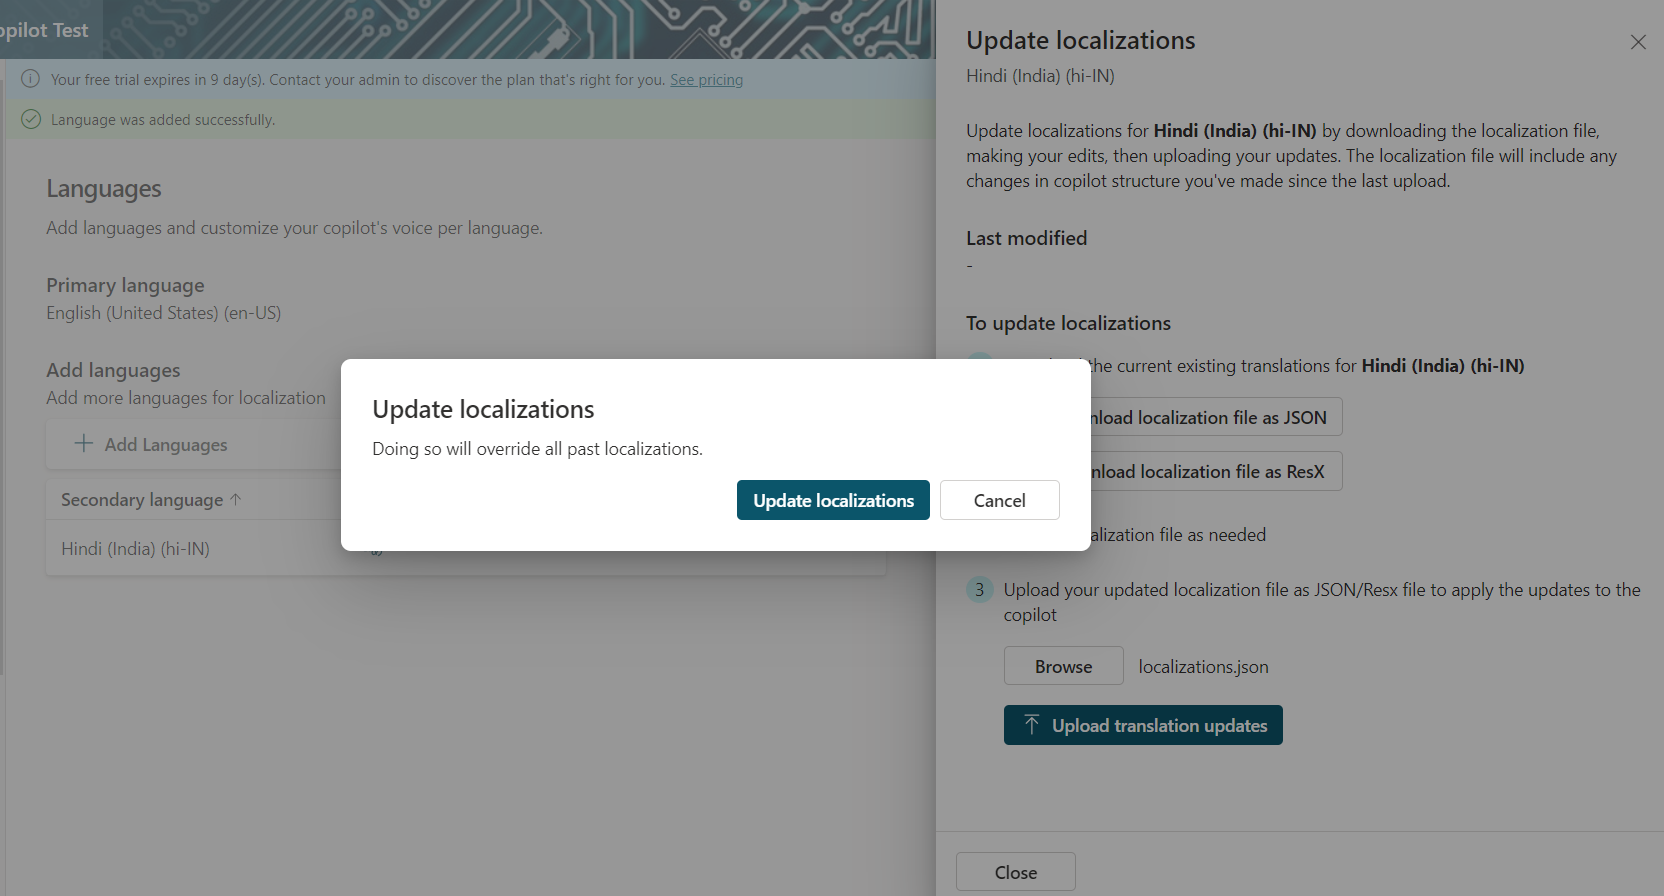
- On the Update localizations page, select Browse, and upload the translated file.
-
Click Update localizations.
Authoring for multilingual copilots
When authoring, you can configure the copilot to change the current spoken language in the middle of a conversation.
To change the copilot’s current language, you can set the User.Language variable value to one of your copilot’s secondary languages. This selection changes the language spoken by your copilot immediately.
Follow the below steps:
- Open the “Order placement” topic.
-
Add a Variable management > Set a variable value node.
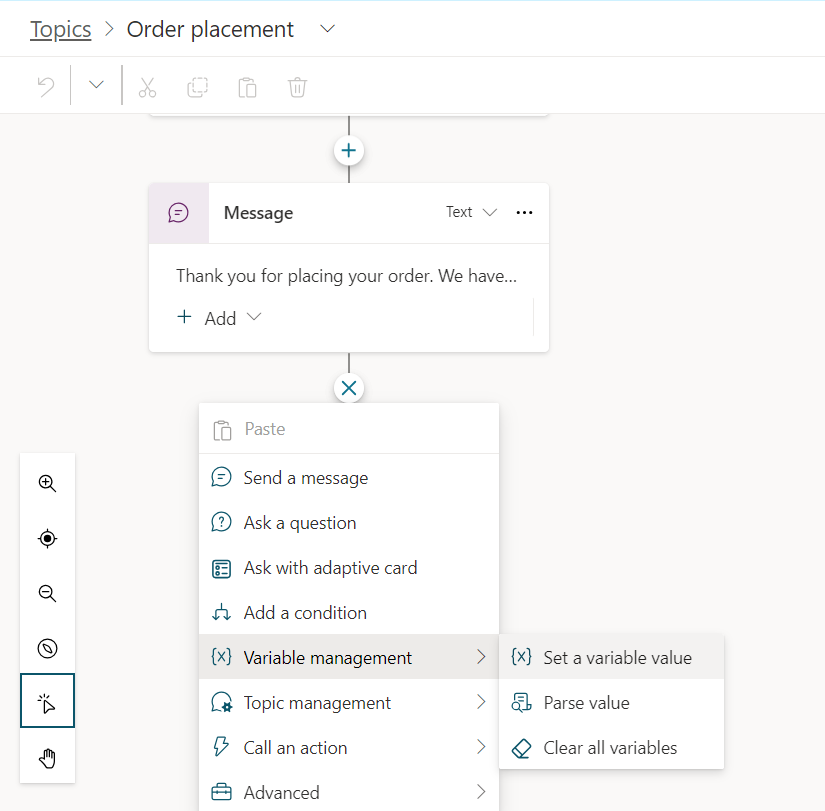
-
Select
User.Languagevariable under the System tab. Set the value to localized language (for e.g., Hindi).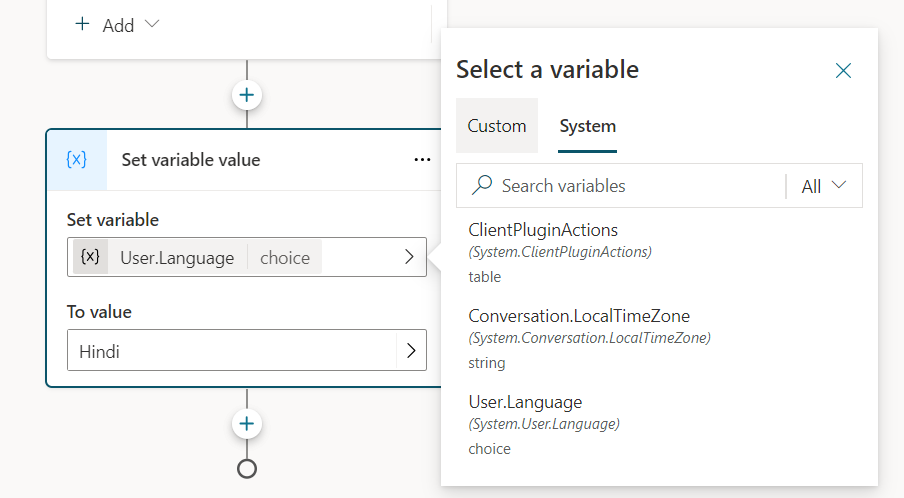
- Click Save.
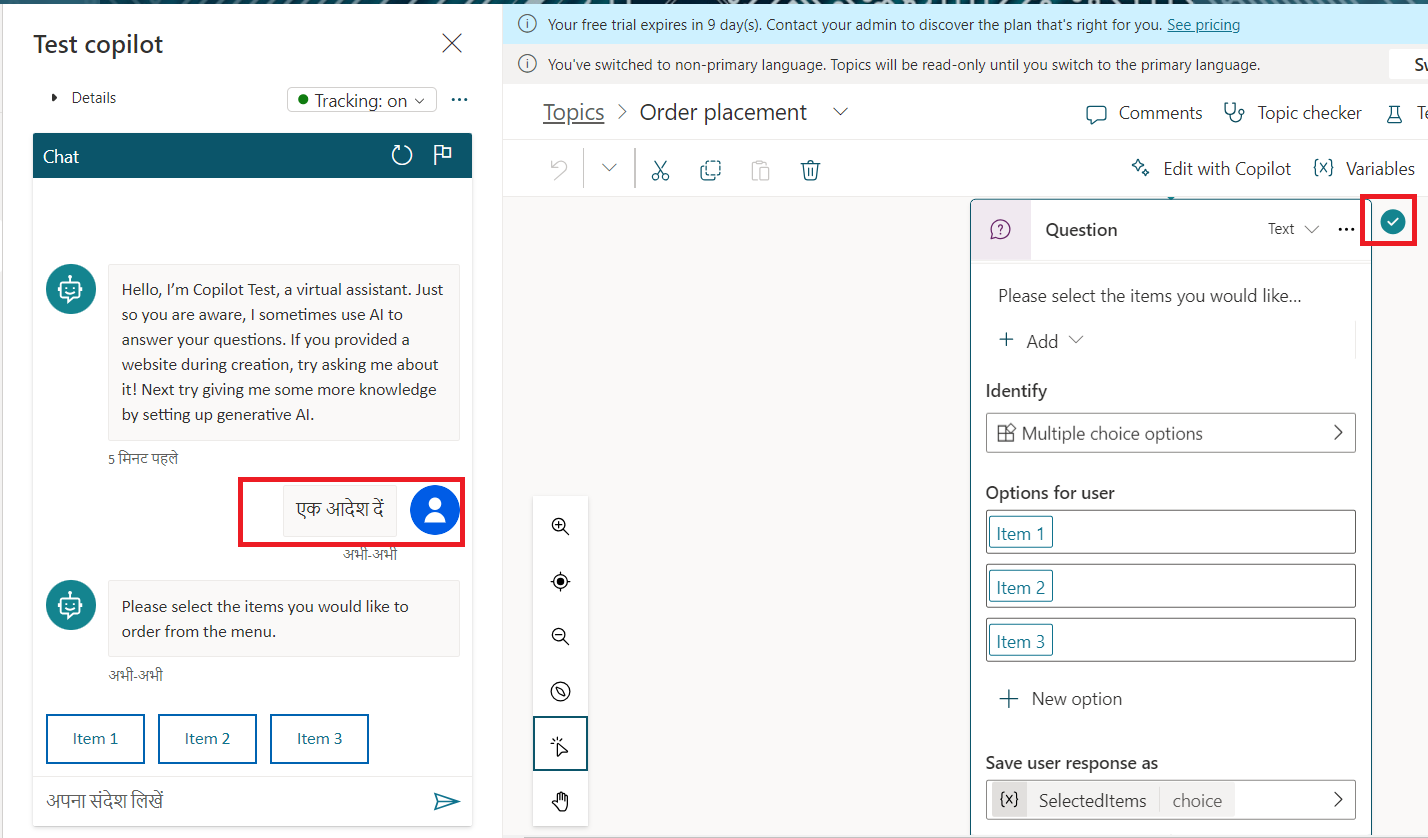
Test the multilingual Copilot with a secondary language
Follow the below steps to test the multilingual capabilities of the Copilot:
- From the left navigation, click Test your copilot.
-
Select the secondary language.
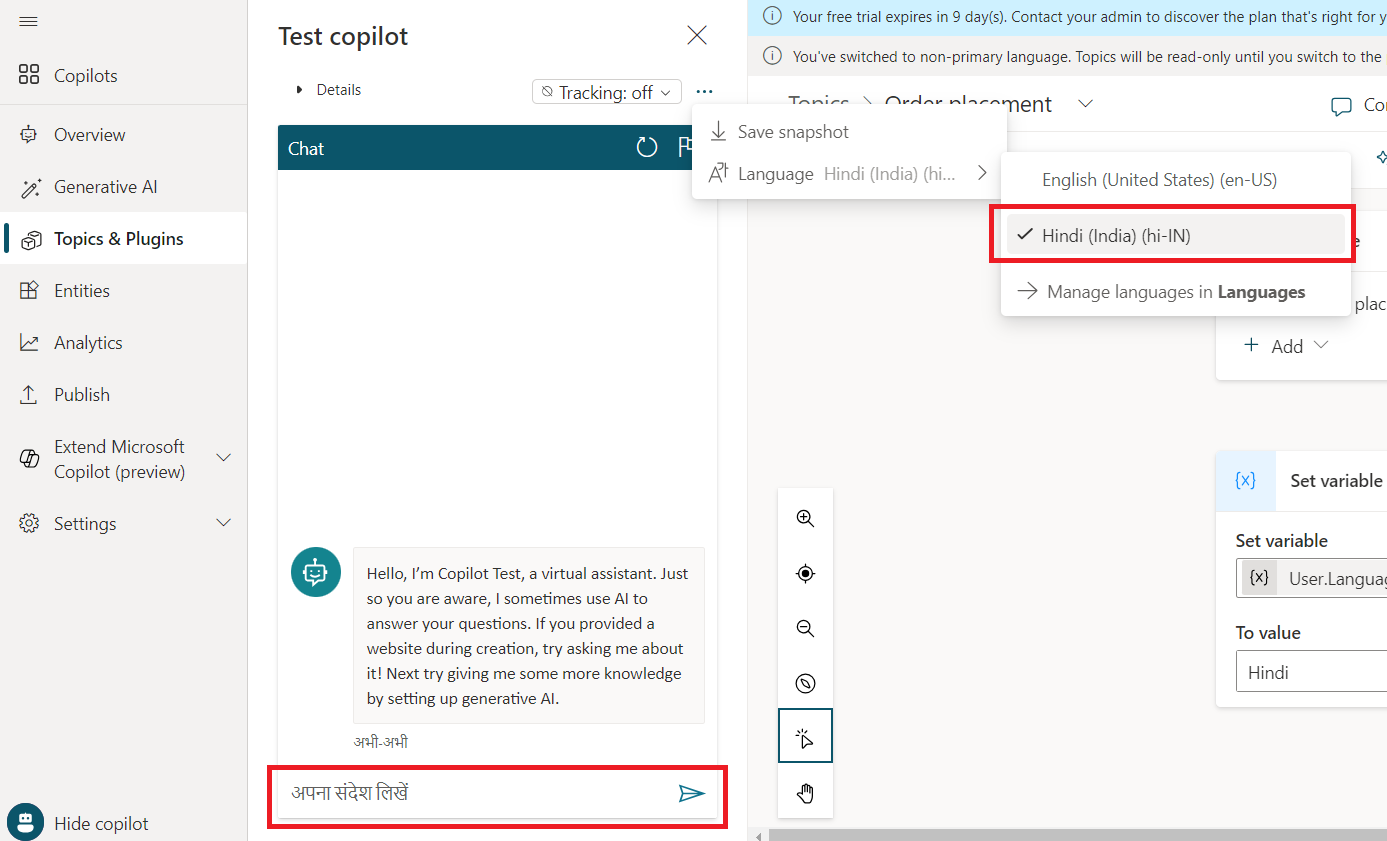
- The copilot will reload using the selected secondary language. The authoring canvas should show the text in the secondary language.
-
Enter a message in the secondary language to test the copilot.
Test the multilingual Copilot with language variable
Follow the below steps to test the multilingual Copilot by setting the language variable.
- From the left navigation, click Test your copilot.
- Select the language as English.
- Use the same prompts from the previous test.
-
After the Set variable value node execution, the language automatically changes to Hindi, as we have configured the topic to change the language using the
User.Languagevariable.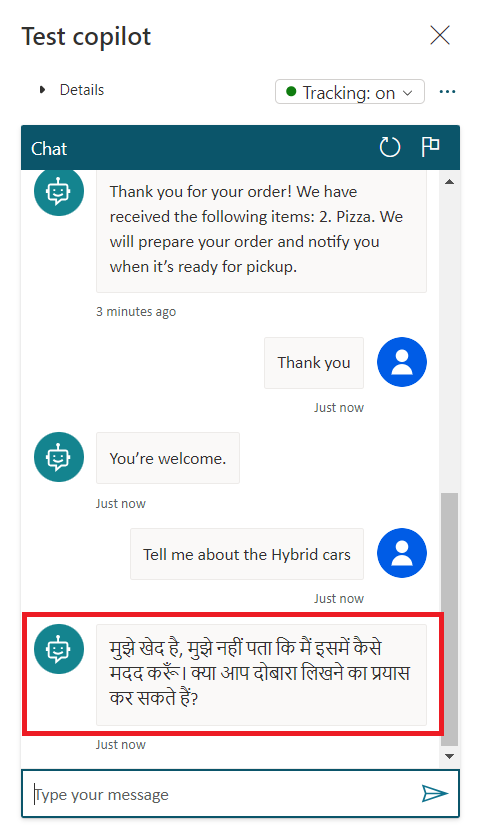
How does Copilot act with languages that haven’t been set up?
If the language in your web browser is not set up in Copilot, Copilot will always use its main language (the one it was originally made in). You can’t change Copilot’s main language once it’s created.
How does Copilot act when there are no translations available for certain languages?
If the Copilot author makes a change in the main language but doesn’t add translations, Copilot will display the changes without translations. This can make it confusing with two languages. Always update translations after changing things in the main language to avoid confusion.
Summary
In this article, we have explored how to set up multiple languages, update the local versions, and test them in Copilot using Microsoft Copilot Studio.


Leave a comment