
Azure Cognitive Services: Custom Vision API for better image prediction in SharePoint Online
Overview
In the previous article, we explored the Computer Vision API. The computer vision API offers services to detect commonly known objects. For example, when you upload an image of a car, it will correctly identify it as a car. However, in certain circumstances, you want to identify a few objects or scenarios which computer vision API does not recognize. Custom vision API becomes handy in these scenarios.
In this article, we will have an overview of the Custom Vision API, build, and use it in our applications.
Custom Vision API
Custom vision API is also trained by Microsoft to identify common objects and scenarios. On top of it, we can also train the Custom vision service for specific things we want to recognize ourselves.
Custom vision service follows below simple principal.
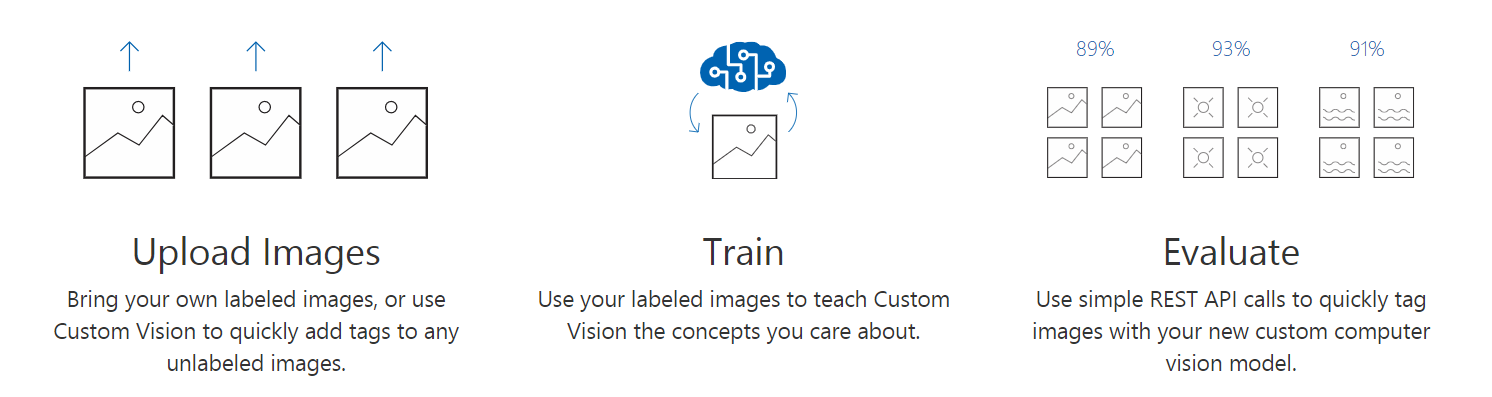
Custom Vision API in MS Azure
Custom Vision API has a separate key for prediction and training.
Pricing:
- Pricing for prediction goes per 1000 transactions.
- Pricing for training goes per computer hour.
- Image storage is priced per 1000 images.
Set up Custom Vision API
Follow the below steps to set up the custom vision API in MS Azure.
- Open MS Azure portal (https://portal.azure.com/)
- Click Create a resource.
-
Search for Custom vision in the marketplace.
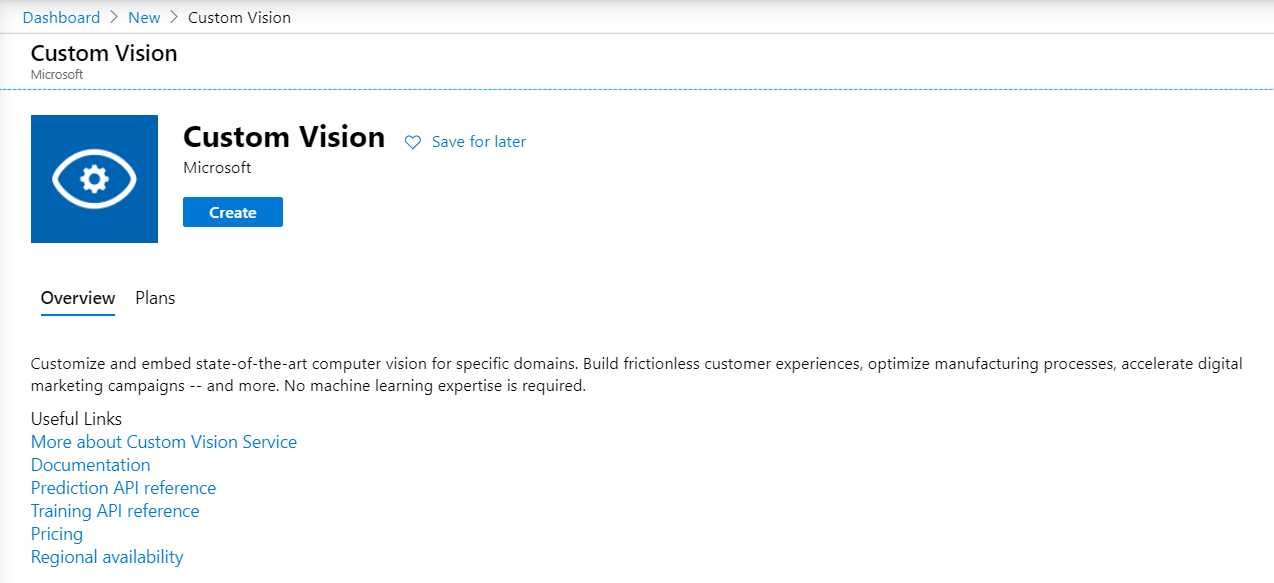
-
Click Create.
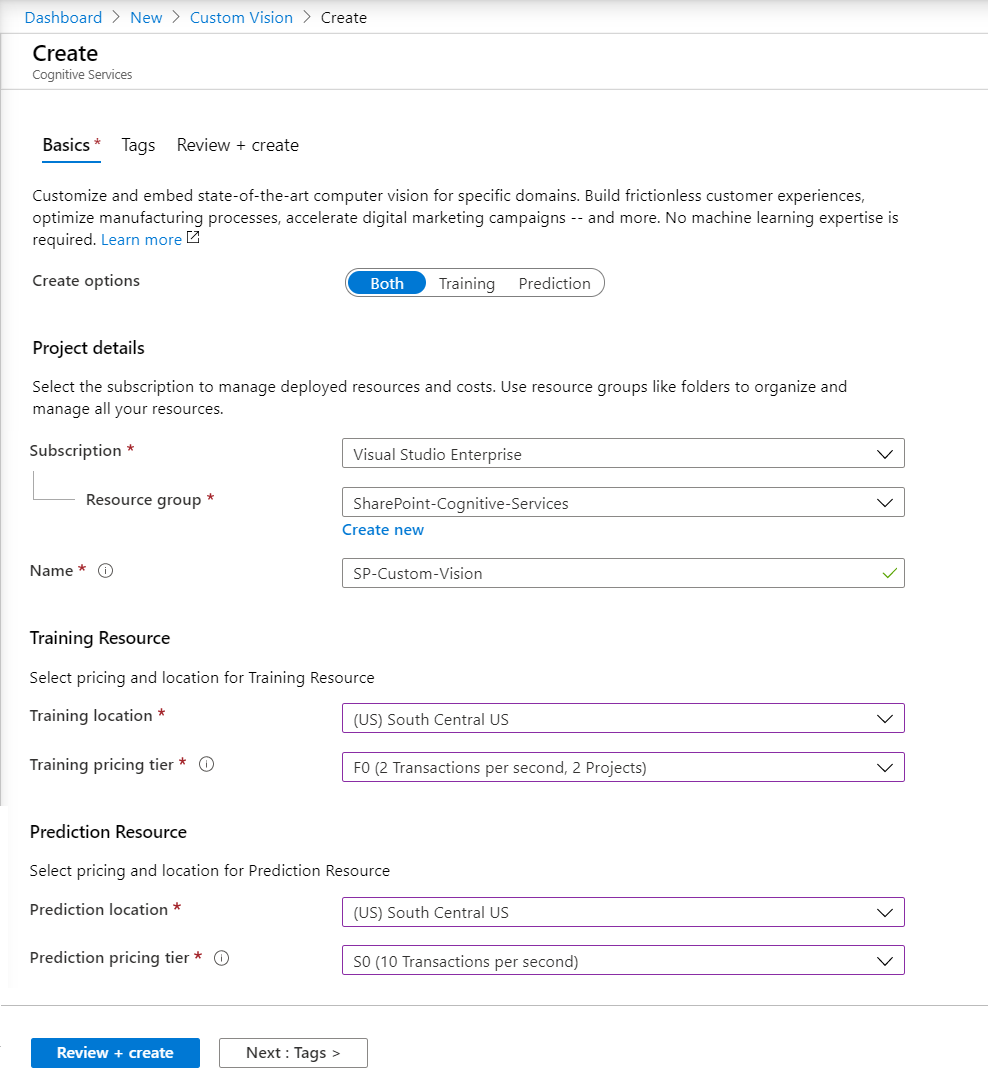
- Choose the Create options as training, prediction, or both.
- Select your subscription.
- Underneath select existing or create a new resource group.
- Name the Custom Vision API.
- For training resource select the location and pricing tier (free or standard)
- For prediction resource select the location and pricing tier (free or standard)
- Click Review + create.
- Review the information. Click Create.
Now, let us have a look at the resource group.

The resource group contains 2 services: training and prediction API. Each one has separate API key and endpoints.
Train the Model
We need to train the service to recognize our characters.
- Open https://www.customvision.ai This offers UI to upload, tag, and train the model.
-
Create a new project.
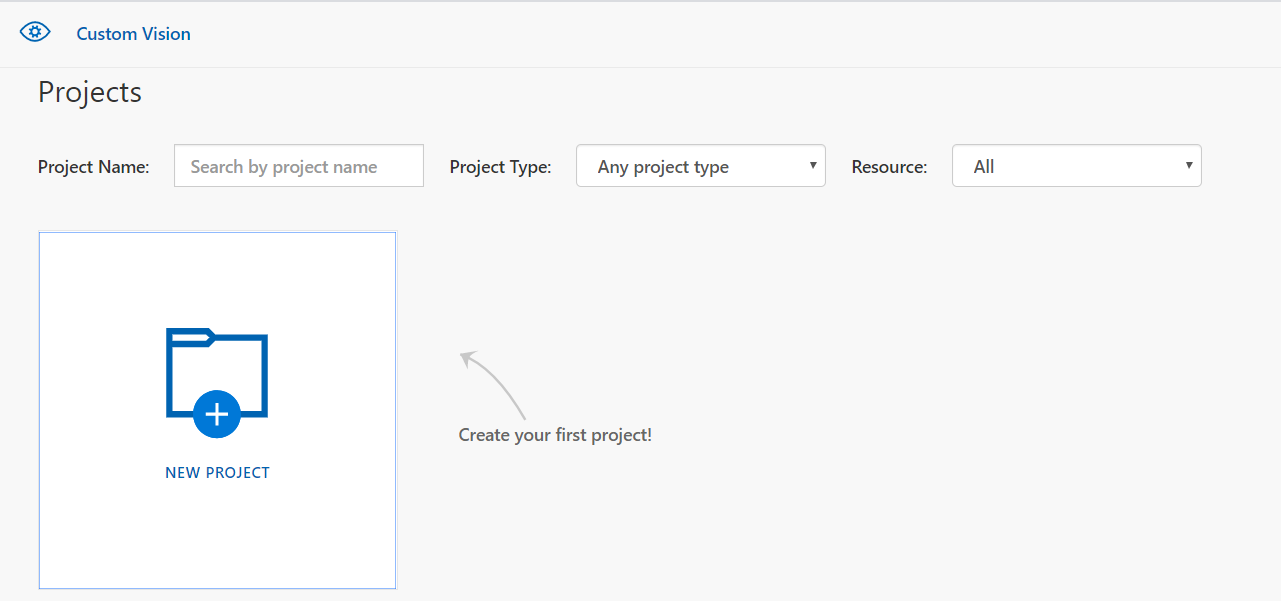
-
Select your parameters to create a new project.

- Click Create project.
-
Once the project is created, add the related images.
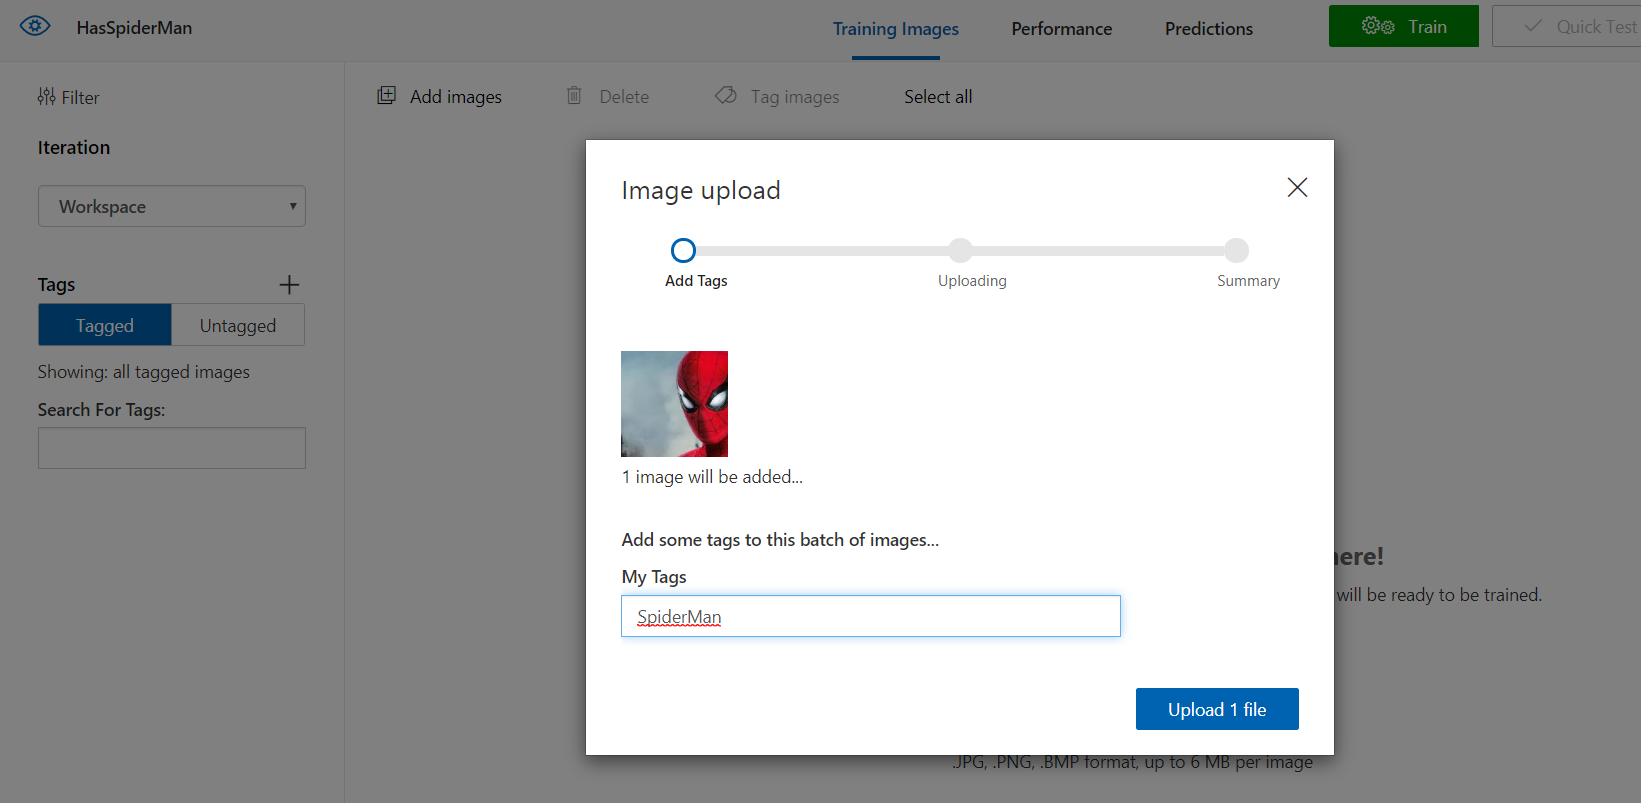
-
Microsoft recommends uploading at least 50 images for each tag you make. Optionally create negative tags to exclude things like company logos and box art.
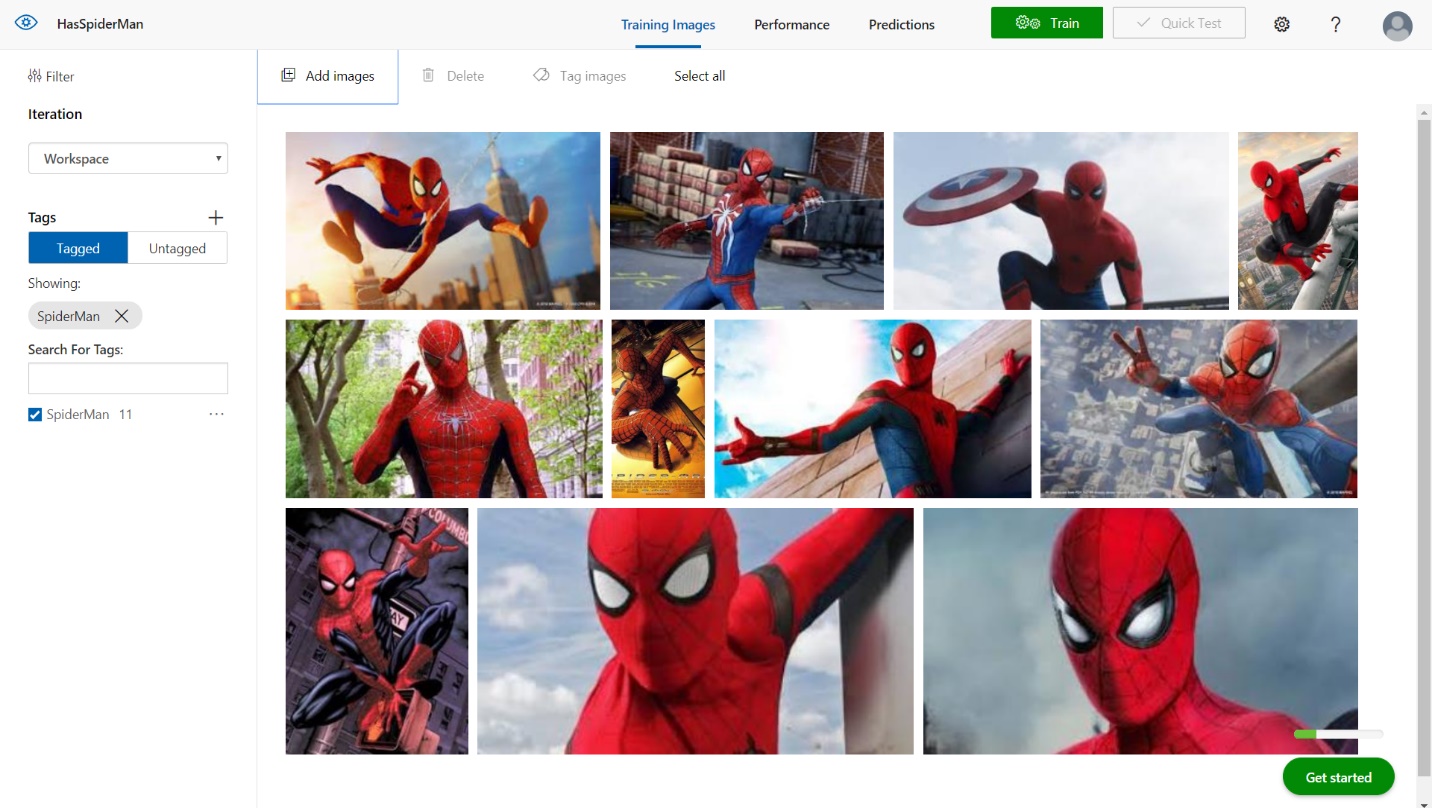
- Once we have uploaded and tagged our images, click Train. Every time you train the classifier, it will create a new iteration of your model.
- There are two types of training: Quick and Advanced. Quick Training is quicker and works fine when we have lots of good samples. Advanced Training takes anywhere from 1-24 hours however can be more accurate. Note that you only get 1 free hour of training, so use the Advanced Training when you absolutely require it.
-
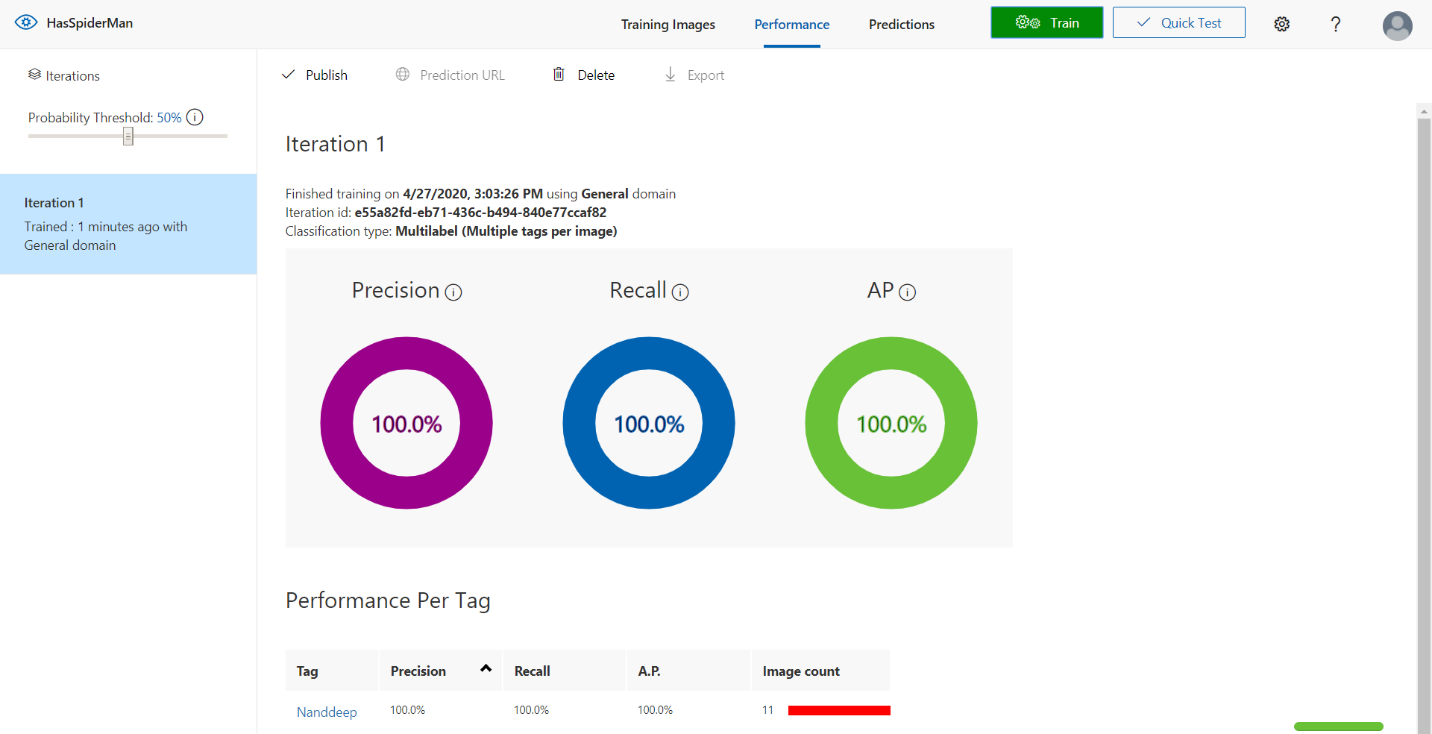
Once training is complete, you will get metrics for the model as overall and per tag.
- Click the Quick Test.
-
Browse to local file for from URL.
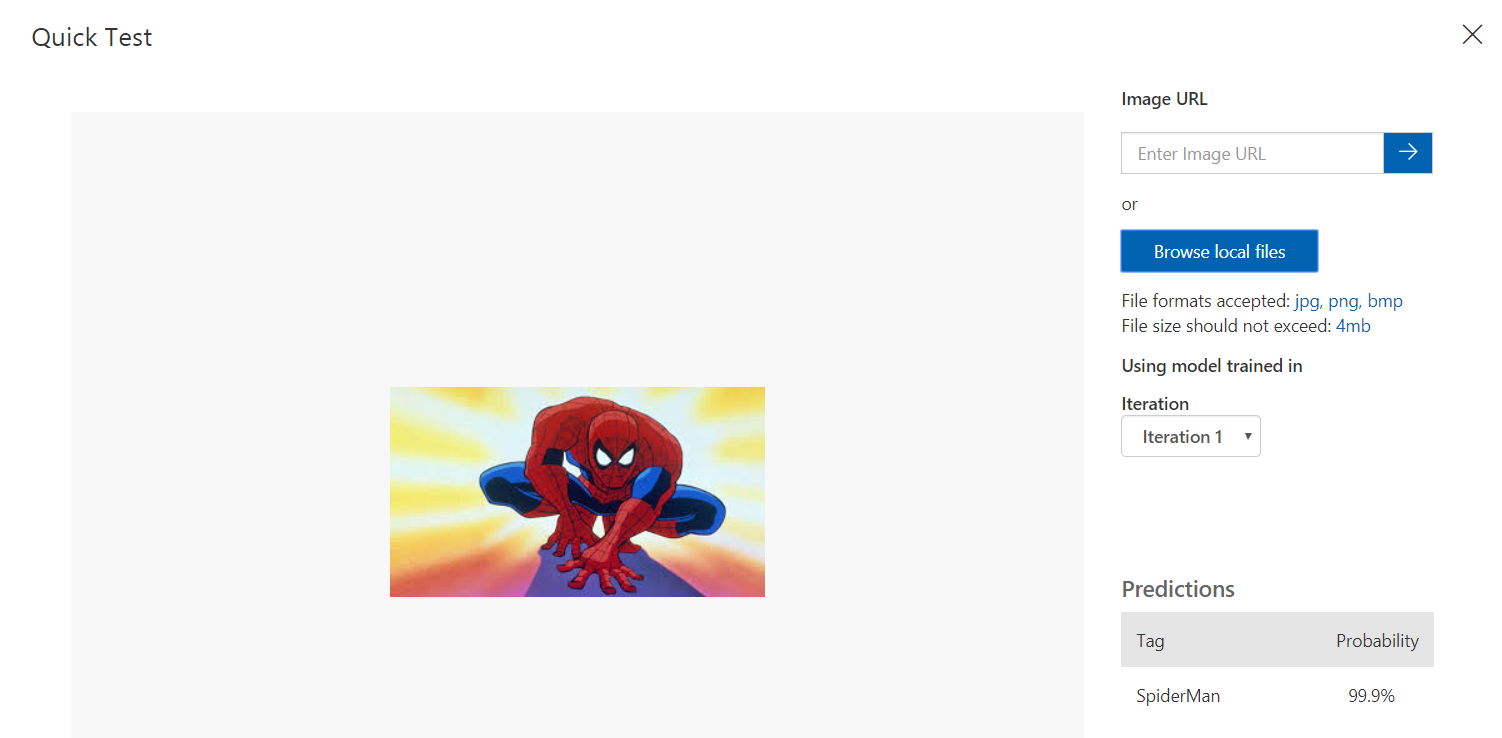
Cool! It predicted Spiderman with a 99.9% probability.
- Click Publish to publish the model.
Custom Vision Prediction API
The real power of the service is in the API which allows us to integrate within our applications. We will need below information from Azure portal
- API key
- Project ID
- Prediction URL
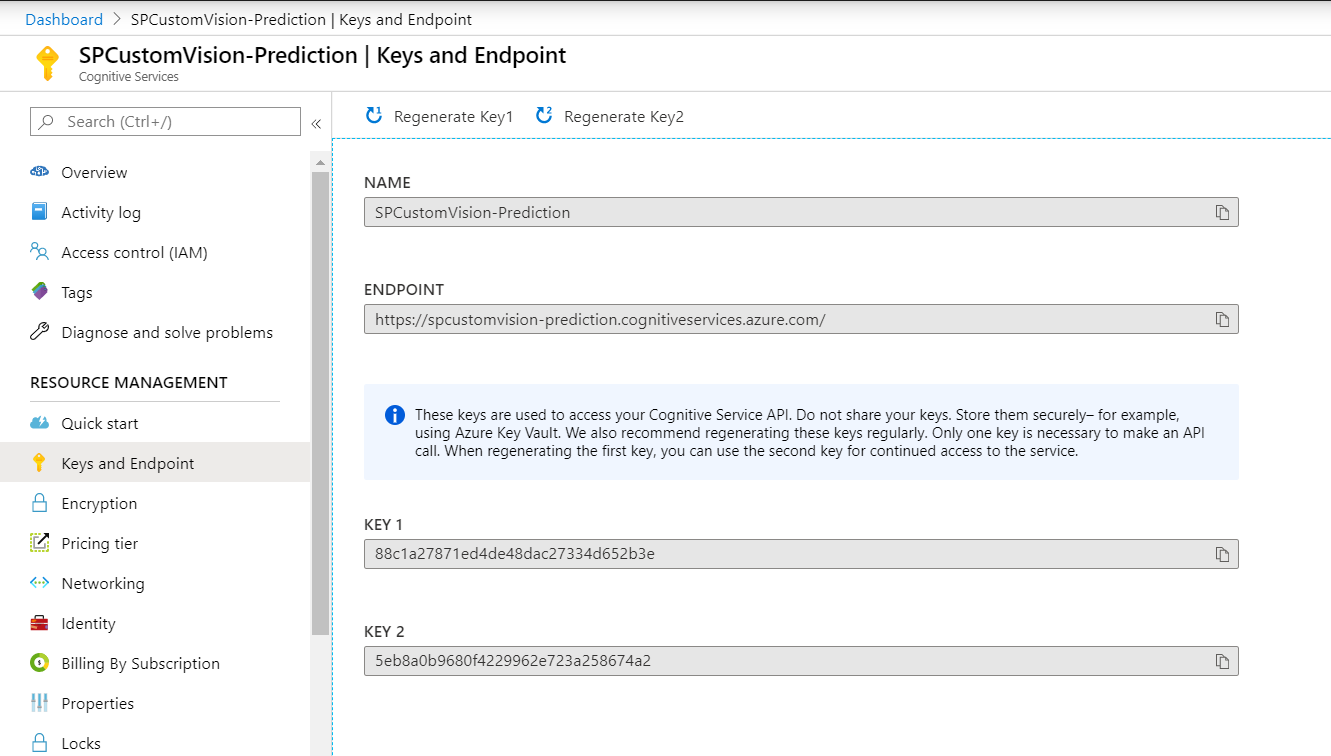
API Key
Click Keys and Endpoint to get the key to access Cognitive service API.
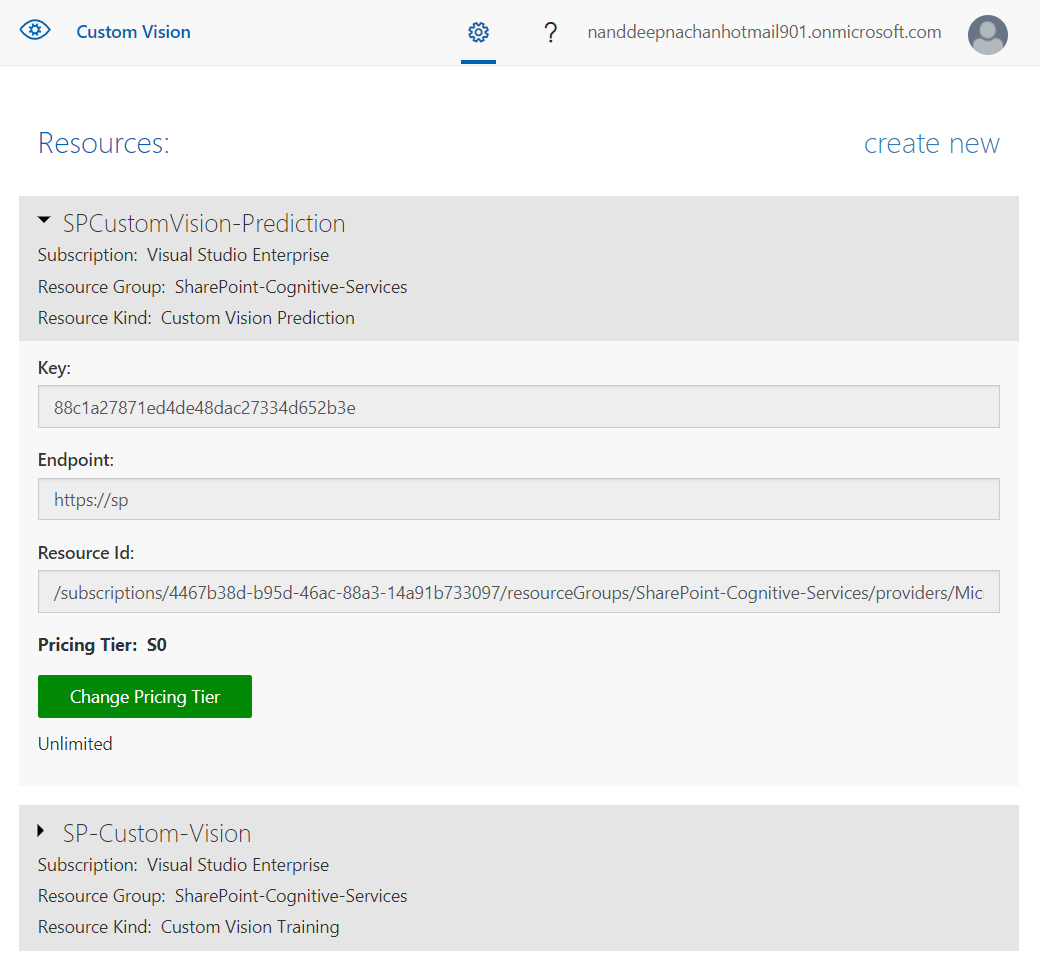
Prediction Key
Follow the below steps to get the prediction key:
- Open https://www.customvision.ai/
- Click the gear icon.
- Note down the Key under Resources.
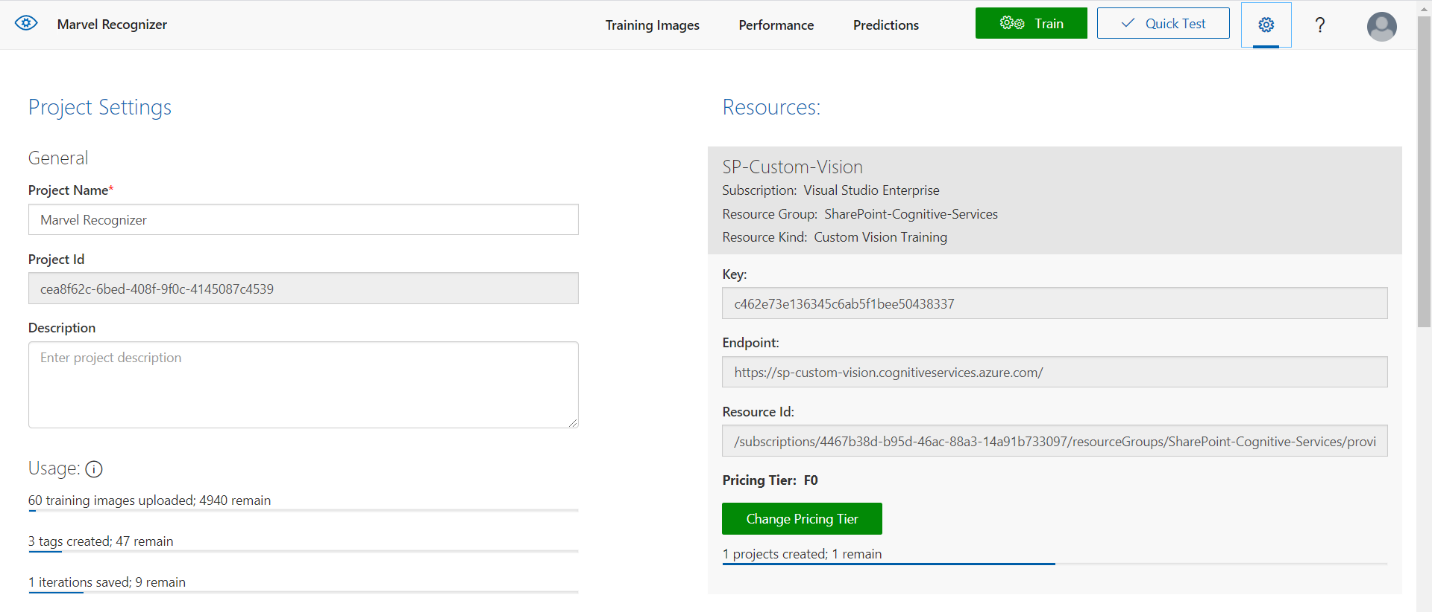
Project ID
Follow the below steps to get the Project ID:
- Open https://www.customvision.ai/
- Select the project.
- Click the gear icon.
- Note down the Key under Resources.
Prediction API
Follow the below steps to get the Prediction API:
- Select the project
- Click Performance.
- Click the Prediction URL.
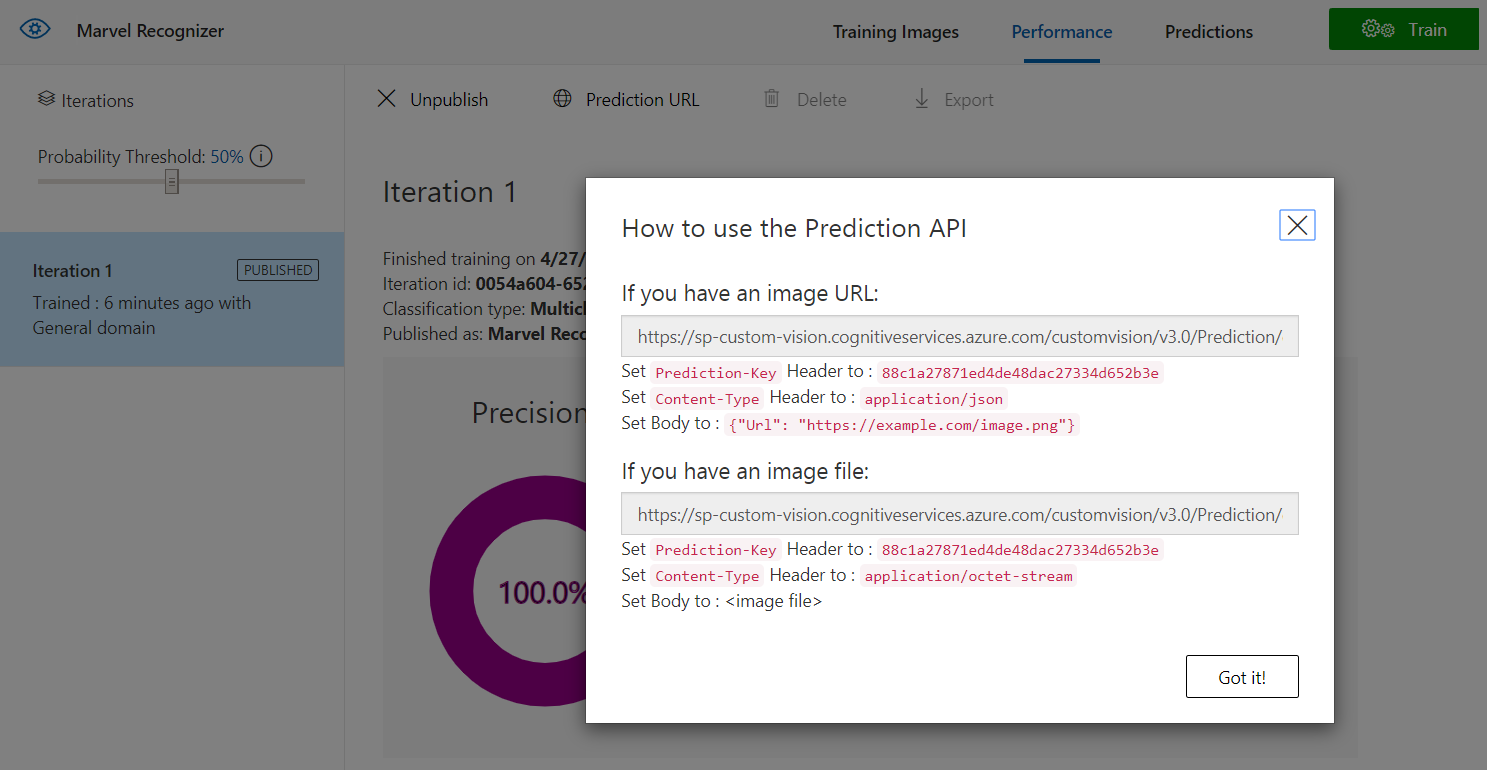
The first one is used when we have an image URL. Use the second one when we have an image on a local folder.
Set up Power Automate Flow.
Now we will set up Power Automate flow to integrate Computer Vision API for analyzing images uploaded to SharePoint.
Follow the below steps to set up Power Automate flow:
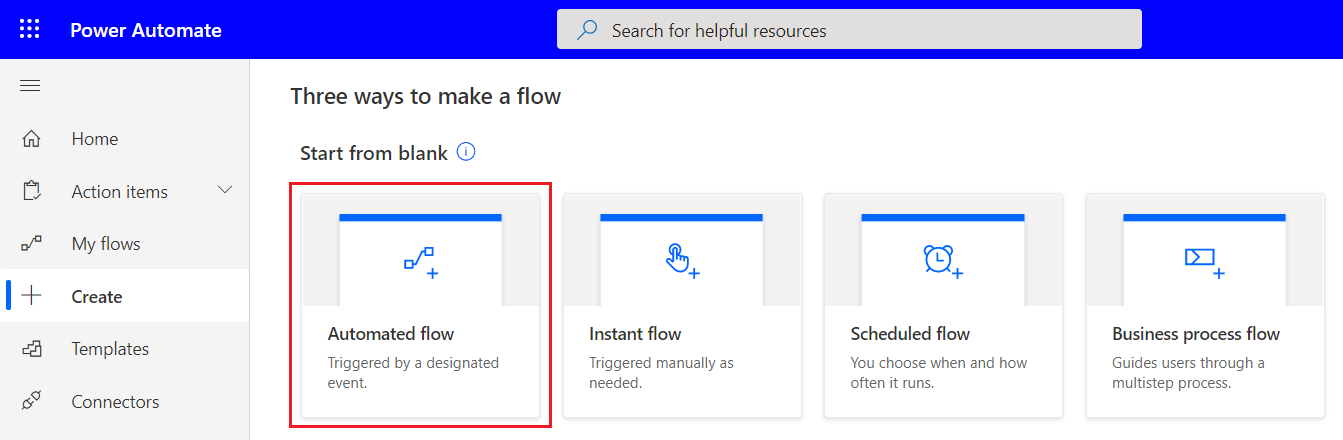
- Open Power Automate portal.
-
Create an Automated flow.
- Name the flow.
-
Choose the flow’s trigger as When a file is created in a folder.
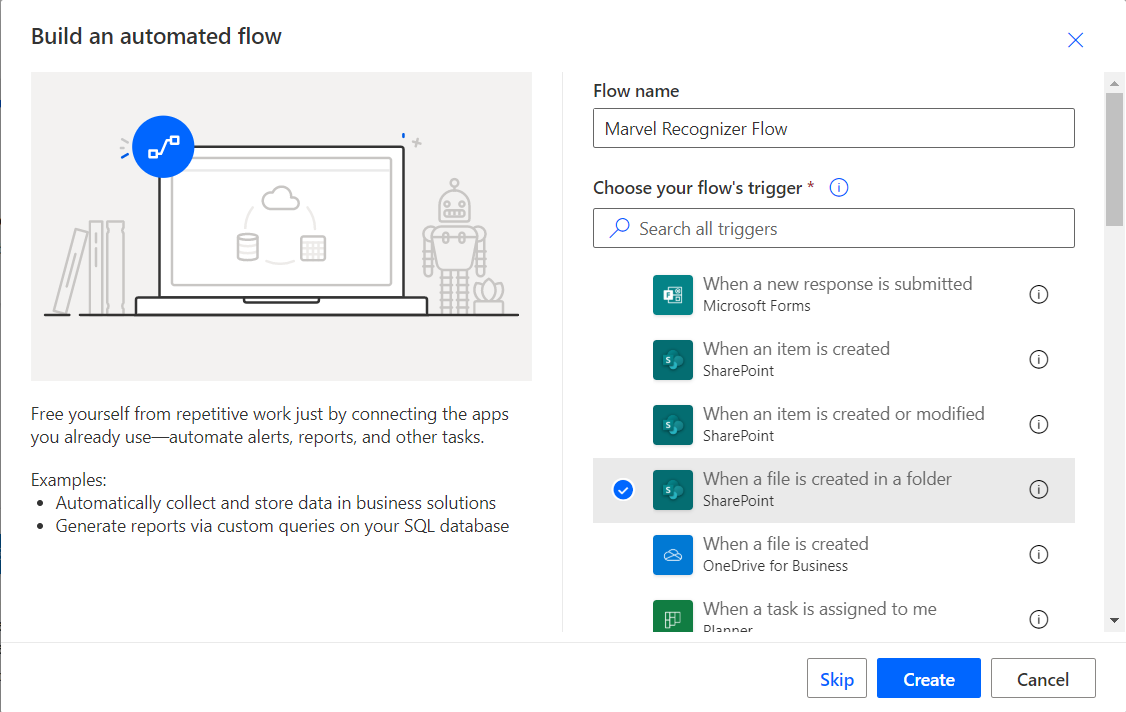
- Click Create.
-
Specify the site address and folder Id.
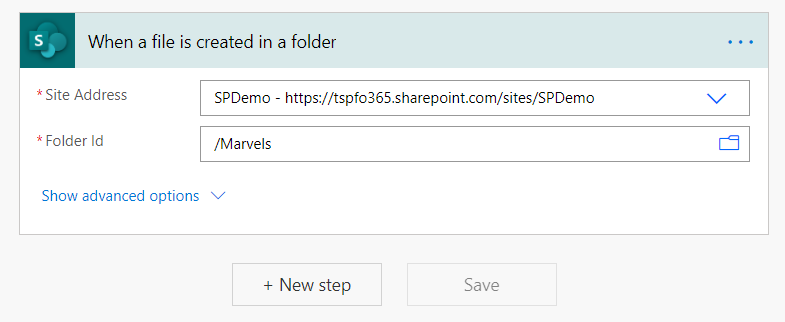
- Click + New step.
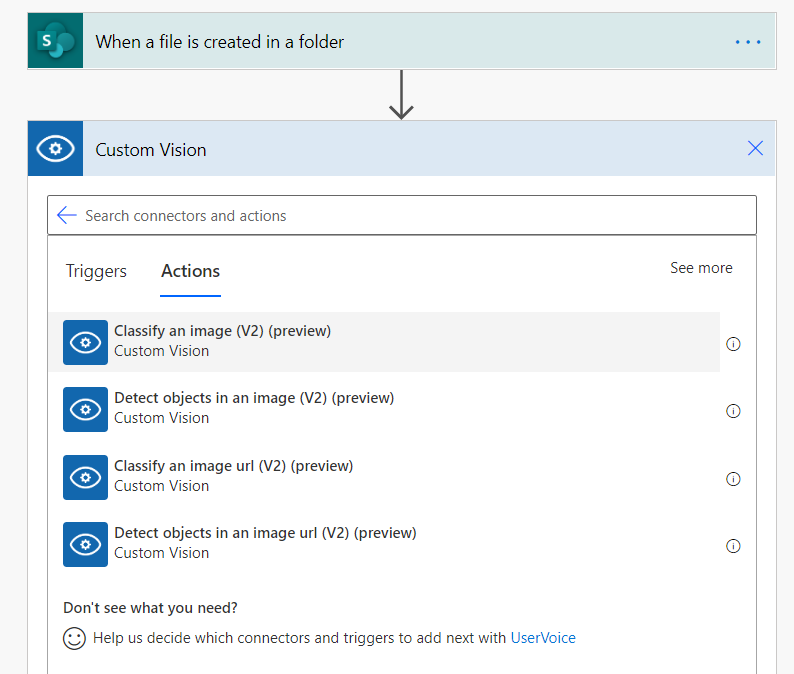
- Find the connector Custom Vision API.
-
Select action as Classify an image (V2) (preview).
- Configure the Computer Vision API connection.
-
Specify the name for the connection, cognitive services account key, and endpoint.
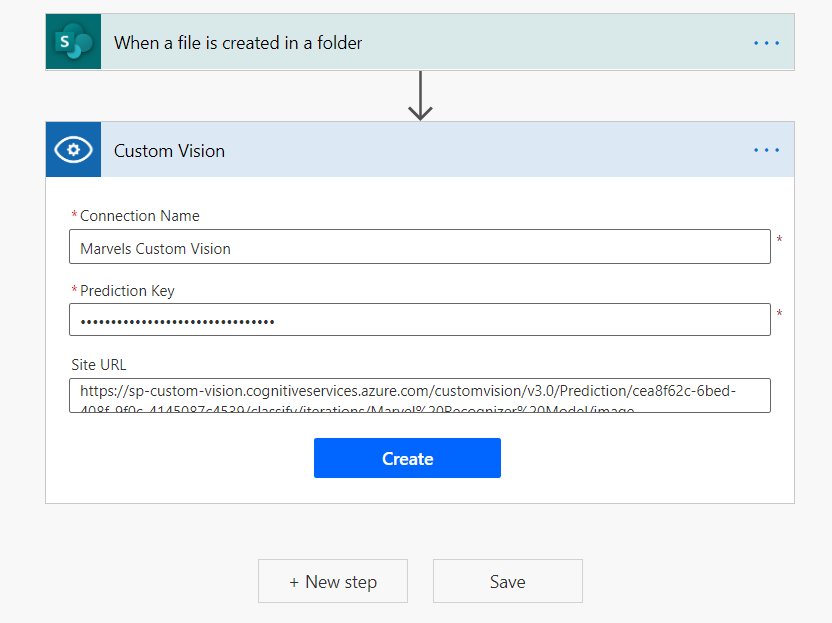
- Click Create.
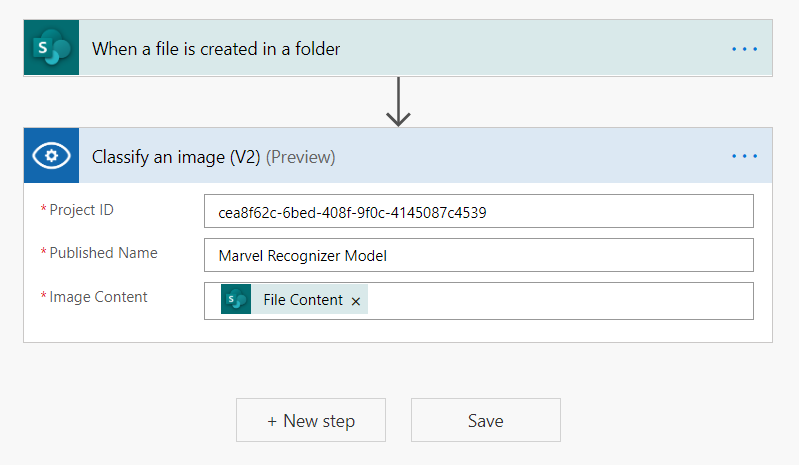
-
In the next screen, specify Project ID of custom vision project, Published Name of the model to evaluate against, and Image content we want to analyze.
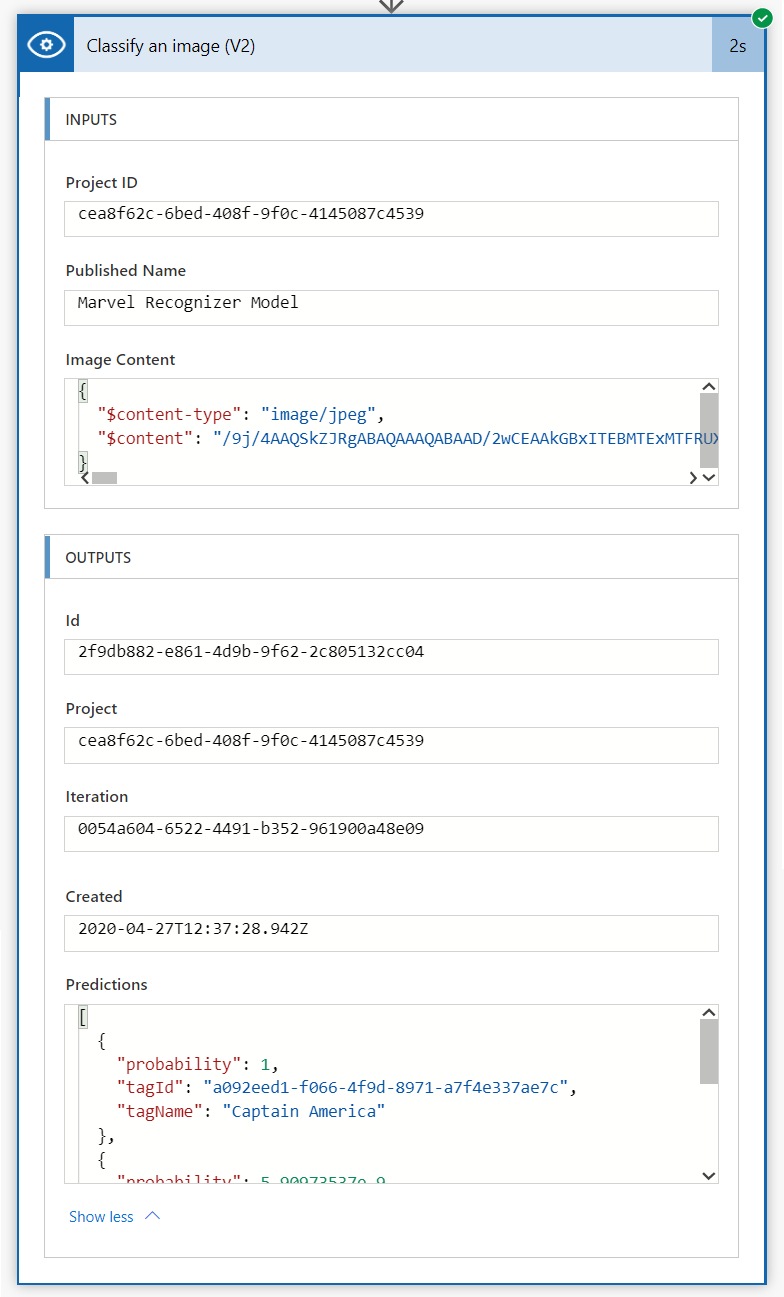
- Upload an image in the SharePoint library. The flow will run, and we will have an output like below:
Update Metadata to SharePoint
We will have to parse the response and store the metadata to SharePoint.
-
Add an action “Send an HTTP request to SharePoint” to get to the file to update the properties.
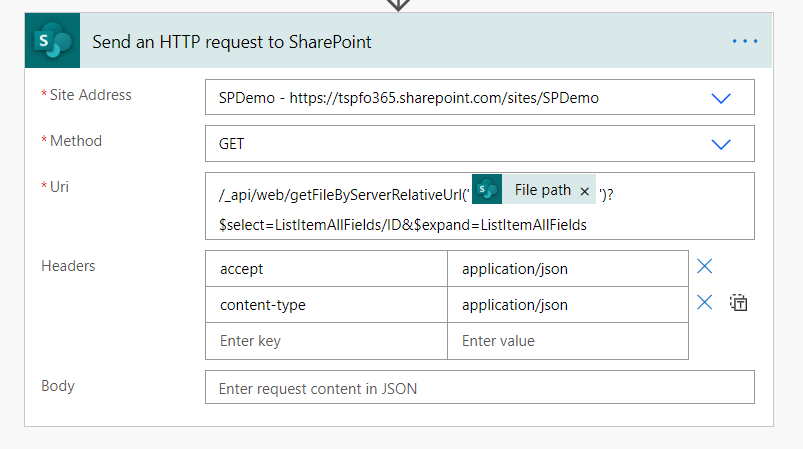
- Site address: Specify SharePoint site url
- Method: Get
- Uri: /_api/web/getFileByServerRelativeUrl(‘File Path’)?$select=ListItemAllFields/ID&$expand=ListItemAllFields
-
Headers: key: accept, value: application/json key: content-type, value: application/json
-
Run the flow and get the Body from the output of “Send an HTTP request to SharePoint”.
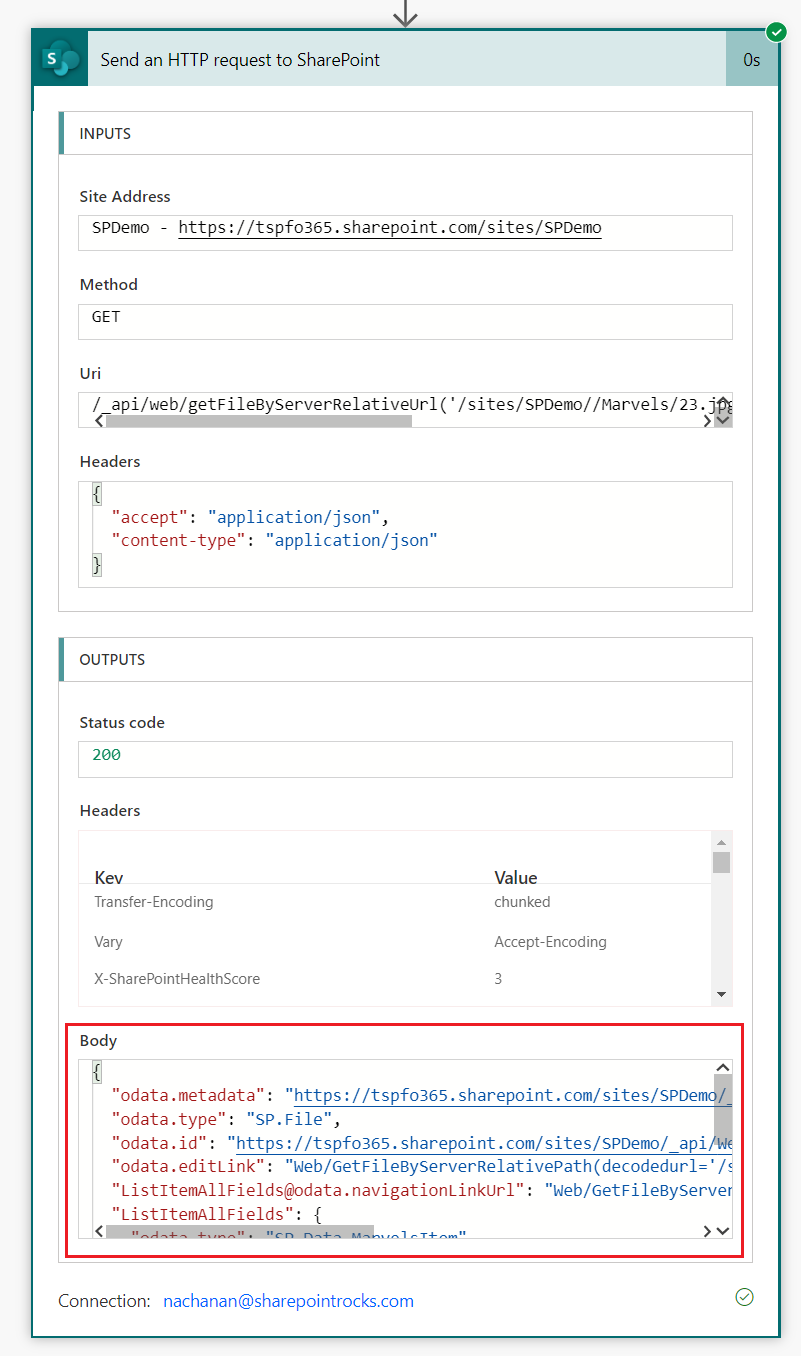
-
Get the first Prediction as follows:

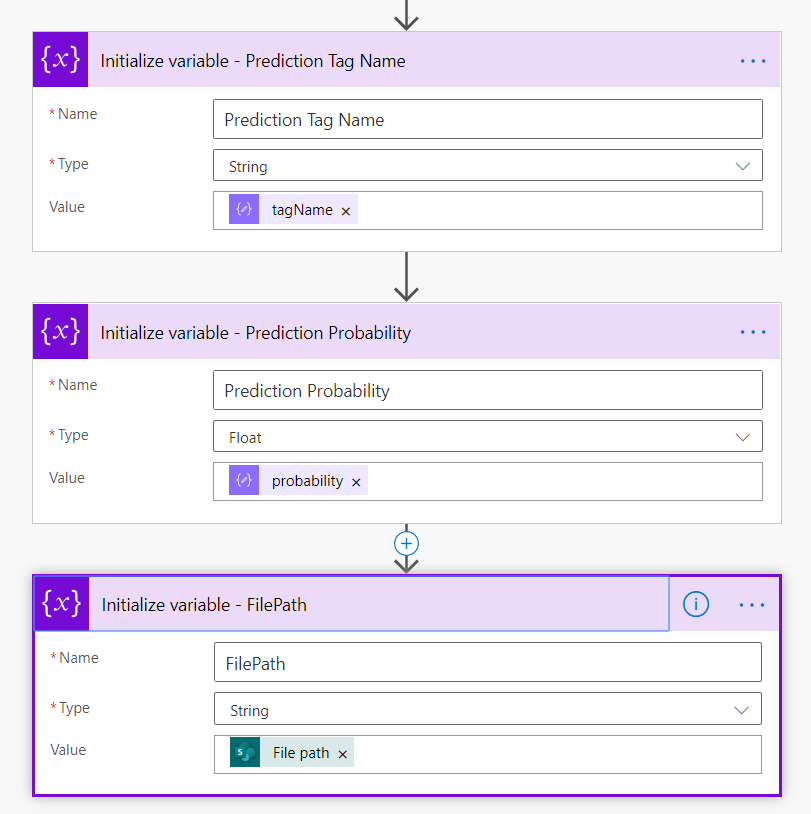
- Initialize the variables Prediction tag name, Prediction probability to store the returned prediction value.
-
Initialize the variable FilePath to store the path to the uploaded SharePoint file in the library.
- Add an action Parse JSON. Specify the content as Body.
-
Generate the schema from a sample of the previous run.

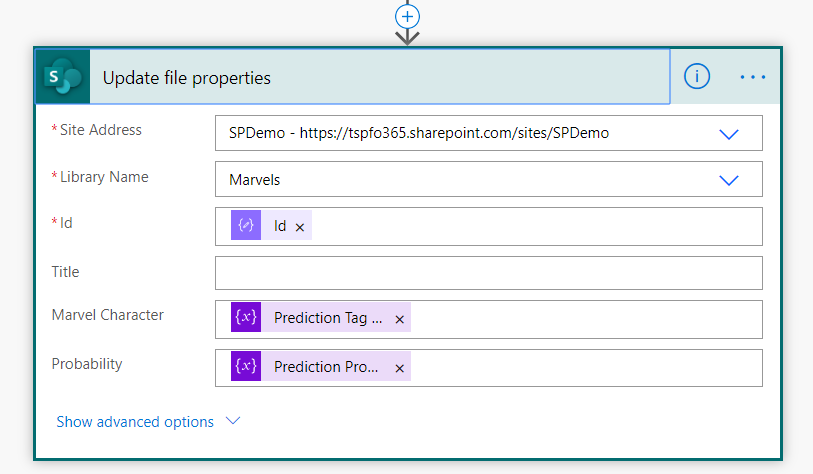
- Add an action “Update file properties”.
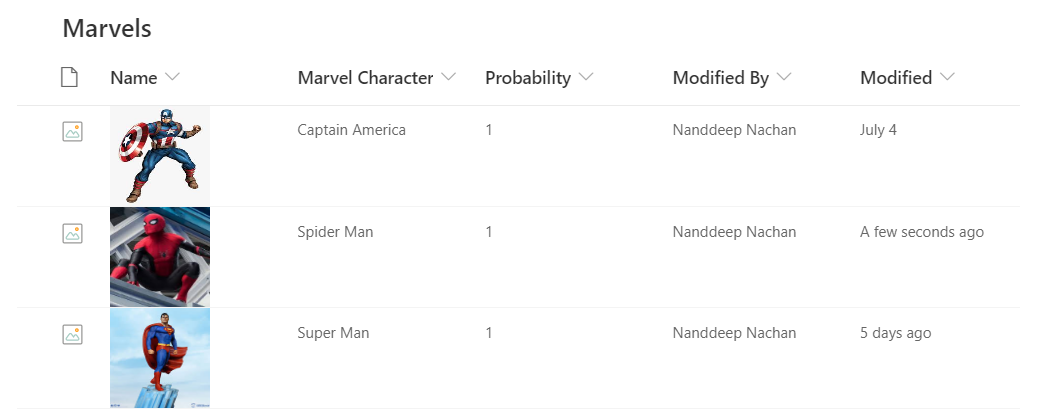
Test the Solution
In the SharePoint library, upload an image. This will trigger a flow. A flow will call Custom Vision service for analyzing images uploaded to SharePoint. The flow will then update the returned metadata to the SharePoint column inside the library.
Summary
Azure Cognitive Services Custom Vision API helps to analyze images uploaded to SharePoint. Custom vision API is also trained by Microsoft to identify common objects and scenarios. On top of it, we can also train the Custom vision service for specific things we want to recognize ourselves. This information then can be tagged in metadata columns inside the picture/document library for ease of searching and filtering.


Leave a comment