
Develop Outlook Add-ins with SharePoint Framework
Overview
SharePoint Framework is spreading its wings and now ready to go beyond of SharePoint and develop solutions targeting Office 365 platform. SPFx already supports to host the SPFx web part as tabs in MS Teams and create personal tabs in MS Team. Now, SPFx v1.10 allows to develop Outlook Web App add-ins hosted on SharePoint.
In this article, we will explore how can develop Outlook Add-ins with SharePoint Framework.
Develop SPFx Web Part for Outlook Add-ins
Before we dive in to implementing SPFx web part, please note that this feature is available in beta and at the moment, only supported within the context of the Outlook Web Access. The GA should support Office desktop too.
As this feature is in preview, we have to scaffold the project with Yeoman using –plusbeta switch.
Follow the below steps to develop the SPFx solution.
-
Open a command prompt. Create a directory for the SPFx solution.
md spfx-outlook-addin -
Navigate to the directory.
cd spfx-outlook-addin -
Run the Yeoman SharePoint Generator to create the solution.
yo @microsoft/sharepoint --plusbeta -
Yeoman generator will present you with the wizard by asking questions about the solution to be created.
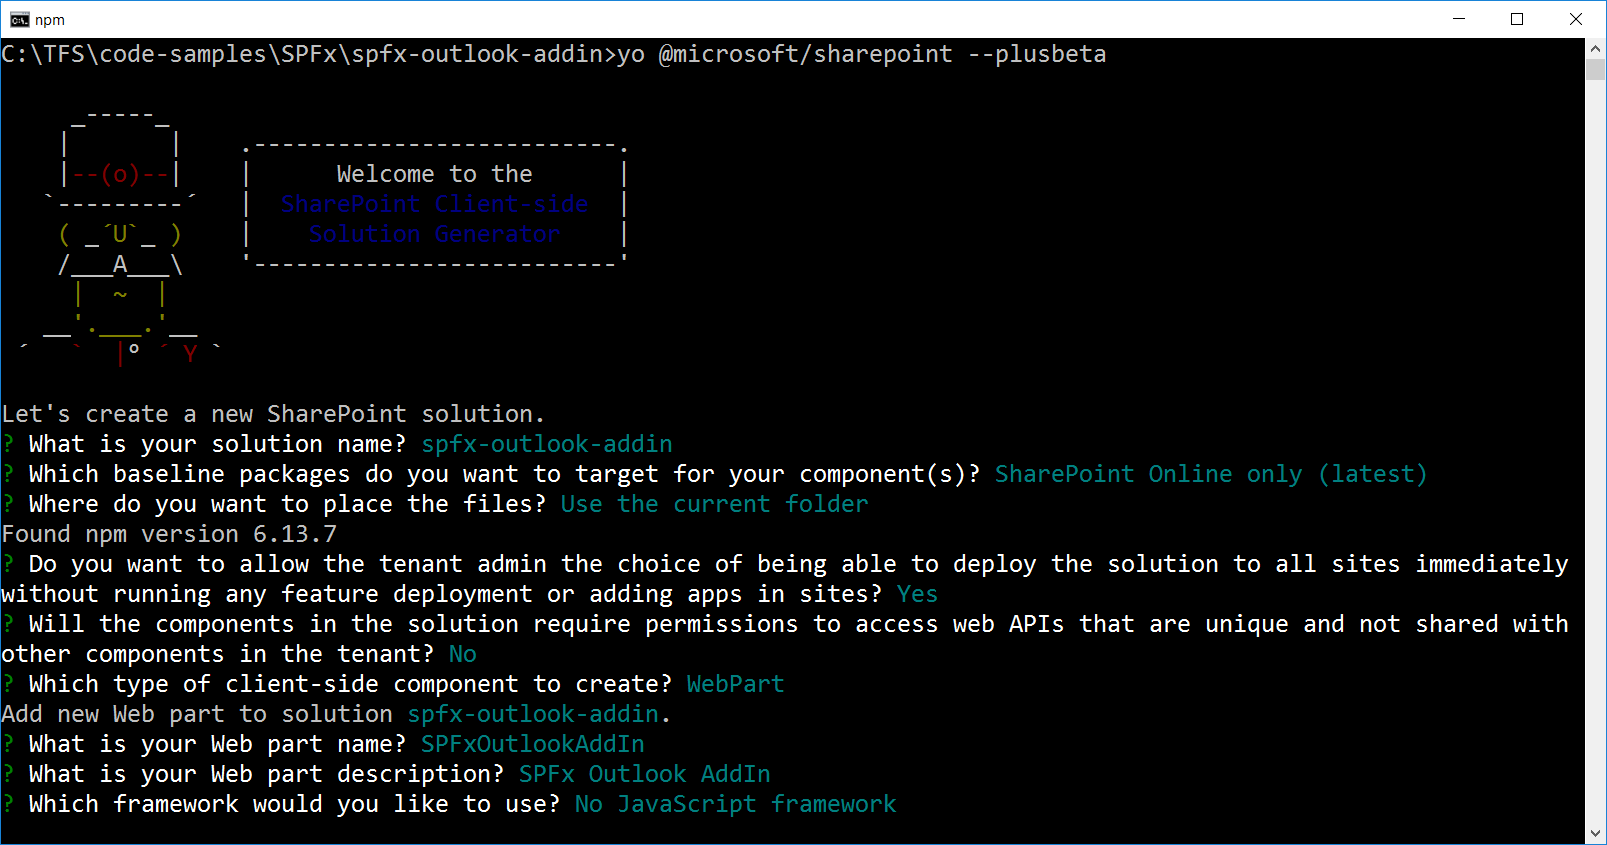
When prompted:
- Accept the default spfx-outlook-addin as your solution name, and then select Enter.
- Select SharePoint Online only (latest), and then select Enter.
- Select Use the current folder as the location for the files.
- Select y to ensure that your web part is automatically deployed tenant-wide when it’s added to the tenant App Catalog.
- Select N on the question if solution contains unique permissions.
- Select WebPart as the client-side component type to be created.
- Enter SPFxOutlookAddIn for the web part name, and then select Enter.
- Enter the description of the web part.
- Select No JavaScript framework to develop the web part.
-
Yeoman generator will perform the scaffolding process to generate the solution. The scaffolding process will take a significant amount of time.
-
Once the scaffolding process is completed, lock down the version of the project dependencies by running below command.
npm shrinkwrap -
In the command prompt type below command to open the solution in the code editor of your choice.
code .
Use Office JavaScript SDK (Office.js)
Include correct types by installing below npm package. The type declarations should go in devDependencies.
npm install @types/office-js --save-dev
The below property will help to identify if the web part is running under Office context.
this.context.sdks.office
Support for Office AddIn
The SPFx solution contains an additional folder “officeAddin”. This supports one time configuration option when the add-in is initially viewed. This option is controlled from URL of the solution.
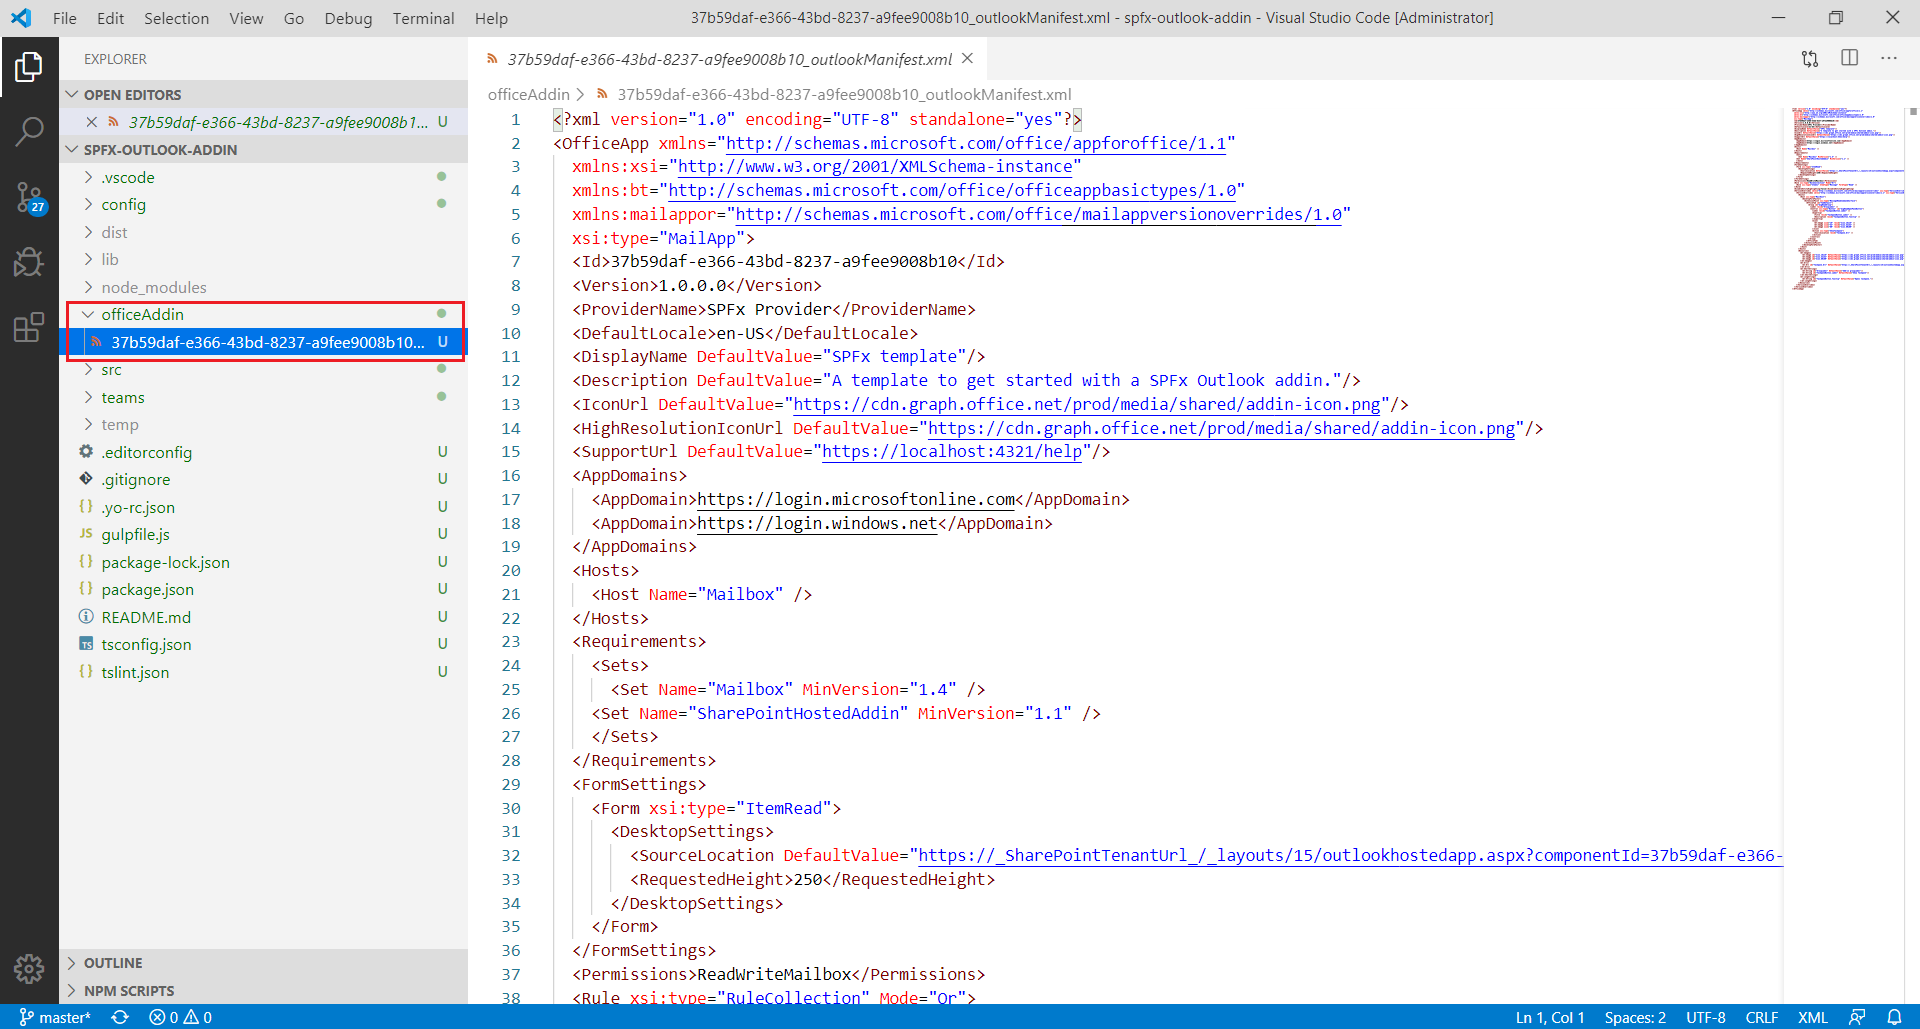
By default, configuration option is enabled. If your add-in does not have any initial configuration options, you can remove the isConfigureMode query parameter.
Code the SPFx Outlook AddIn
We will update the code to work as Outlook AddIn.
- Open the web part file at
src\webparts\spFxOutlookAddIn\SpFxOutlookAddInWebPart.ts. - Update the render method to check the office context.
public render(): void {
  let title: string = "";
  let subTitle: string = "";
  let contextInfo: string = "";

  if (this.context.sdks.office) {
    // Office context
    title = "Welcome to Office!";
    subTitle = "Extending Office with SPFx.";
    contextInfo = "Email: " + this.context.sdks.office.context.mailbox.userProfile.emailAddress;
  }
  else {
    // SharePoint context
    title = "Welcome to SharePoint!";
    subTitle = "Customize SharePoint experiences using Web Parts.";
    contextInfo = "SharePoint site: " + this.context.pageContext.web.title;
  }

  this.domElement.innerHTML = `
    <div class="${ styles.spFxOutlookAddIn}">
      <div class="${ styles.container}">
        <div class="${ styles.row}">
          <div class="${ styles.column}">
            <span class="${ styles.title}">${title}</span>
            <p class="${ styles.subTitle}">${subTitle}</p>
            <p class="${ styles.description}">${contextInfo}</p>
          </div>
        </div>
      </div>
    </div>`;
}
Deploy the Outlook Add-in
The deployment process involves 2 steps.
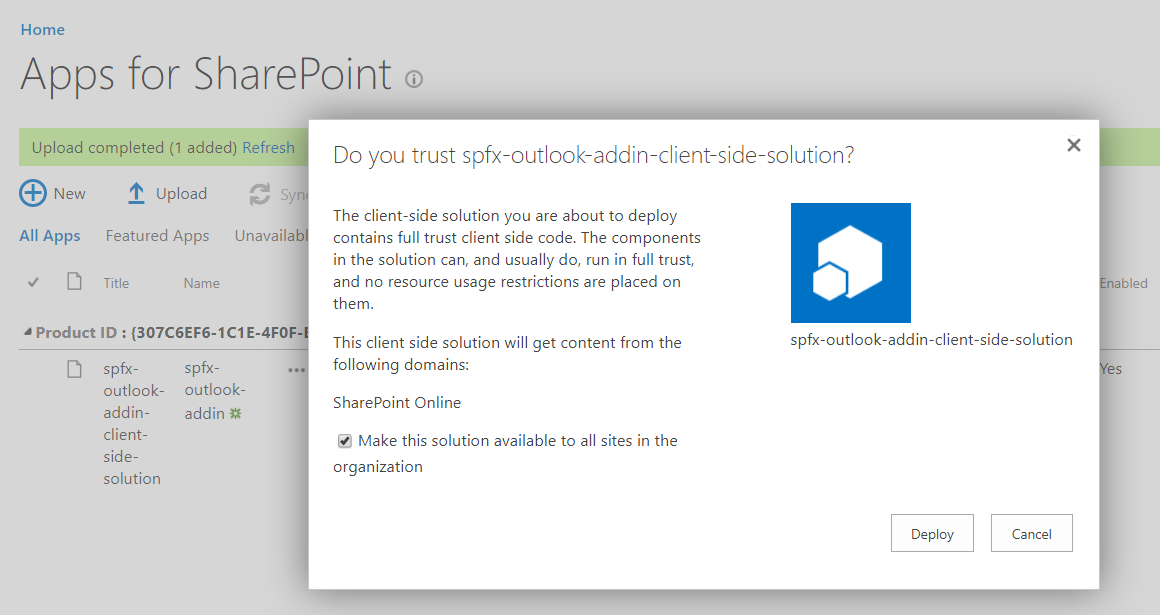
Step 1: Deploy solution to SharePoint App Catalog
- Package and deploy the solution by running below commands:
gulp bundle --ship
gulp package-solution --ship
- Deploy the solution to SharePoint app catalog.
Step 2: Add Add-in to Outlook Web Access
Since this feature is in preview, it can be only added to Outlook web access.
- Open Office 365 Outlook Web access.
- Open any existing email.
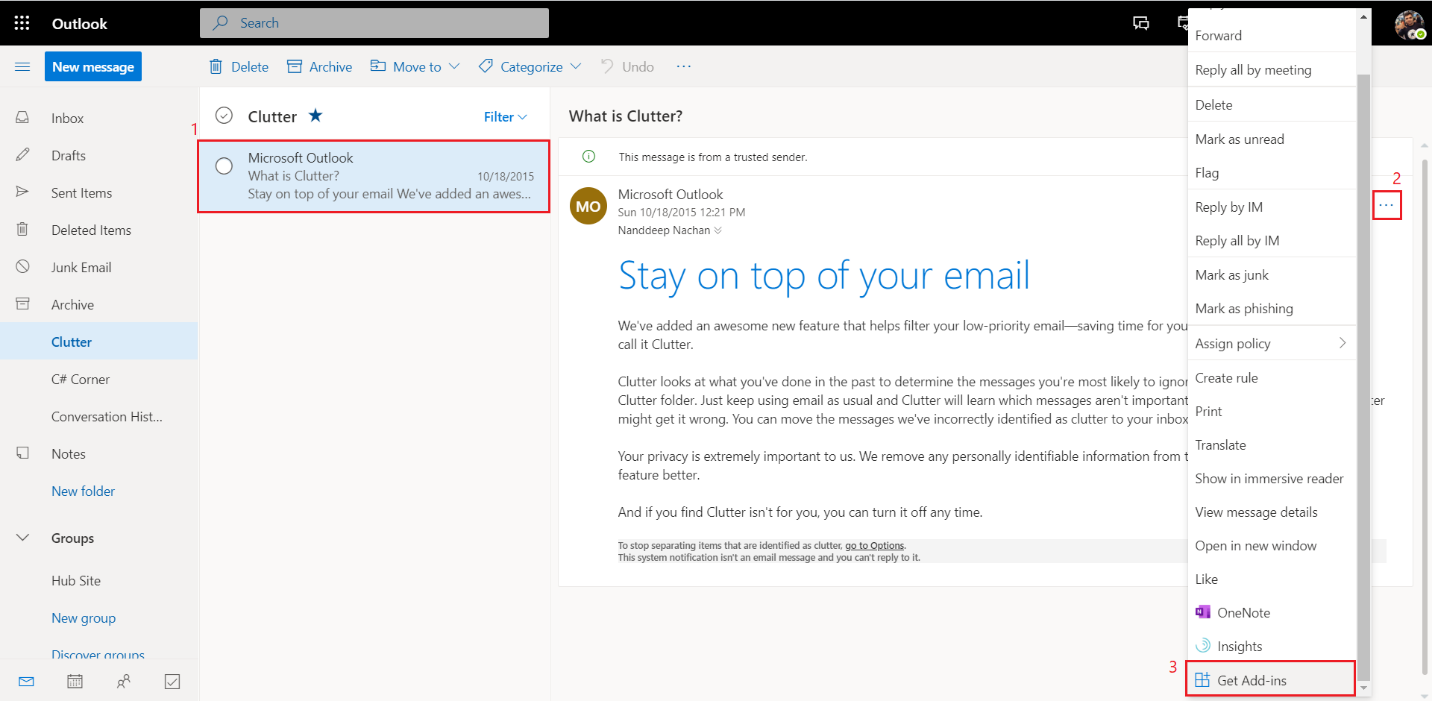
-
Click “…” and Select “Get Add-ins”.
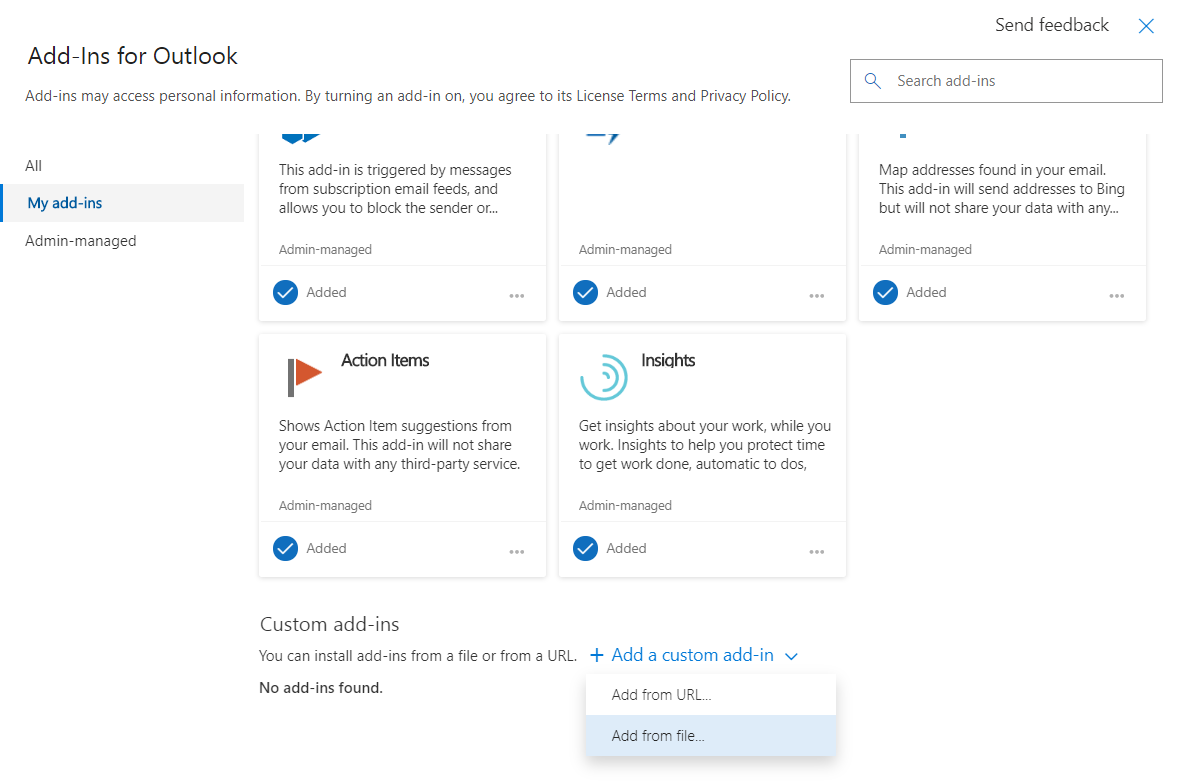
- From left menu, click “My add-ins”.
-
Under “Custom add-ins”, click “Add from file…”
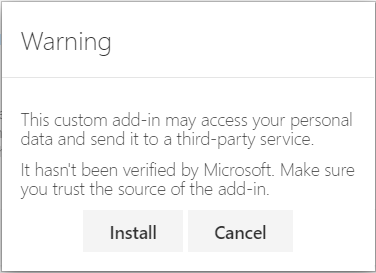
- Upload the manifest xml file from SPFx project solution under the officeAddin folder.
-
Click Install.
-
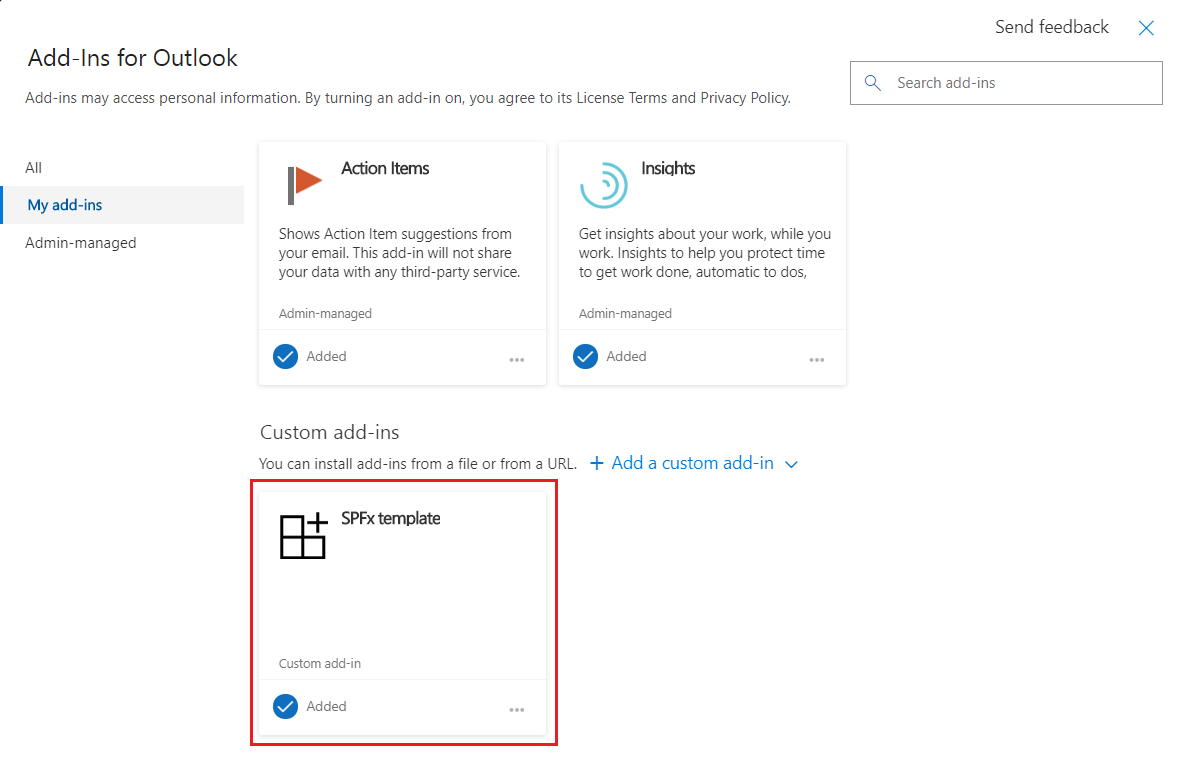
The custom add-in will appear.
- Close the add-in window.
-
From an email, click “…”
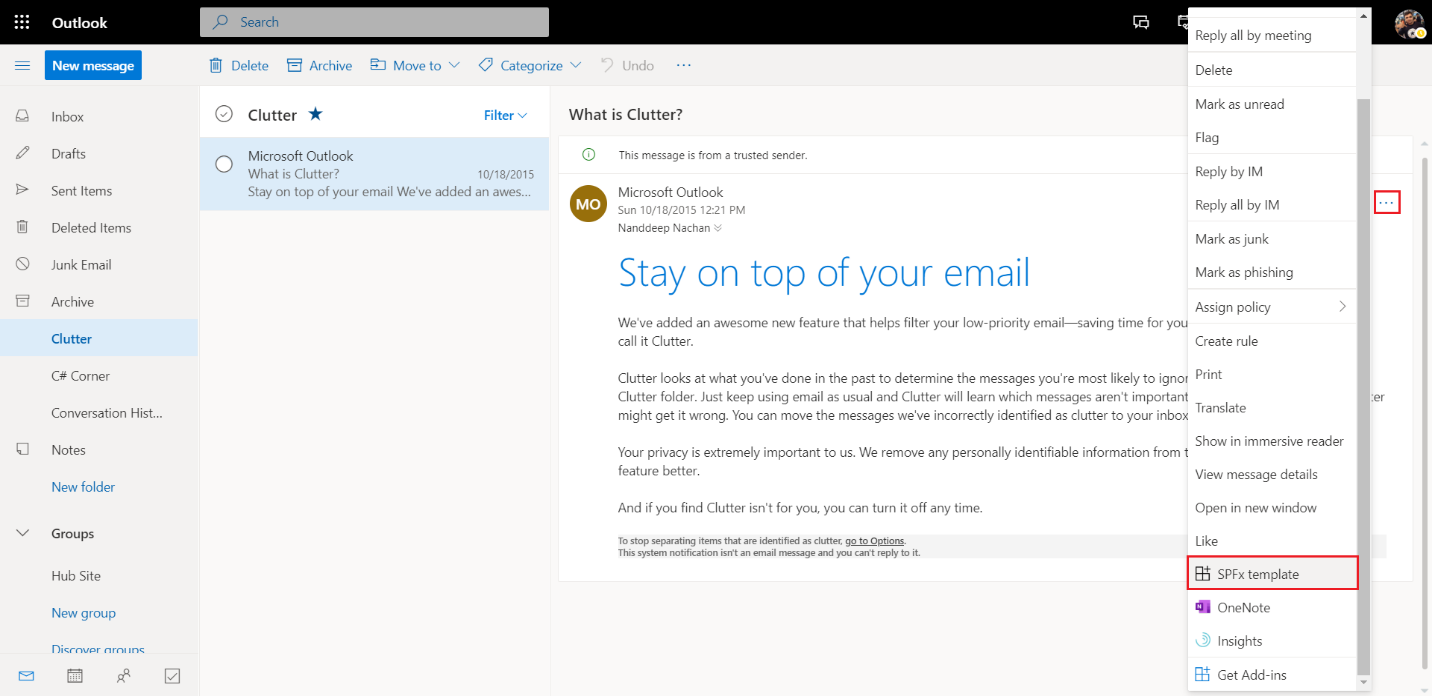
-
The configuration option is available during initial view of the add-in.
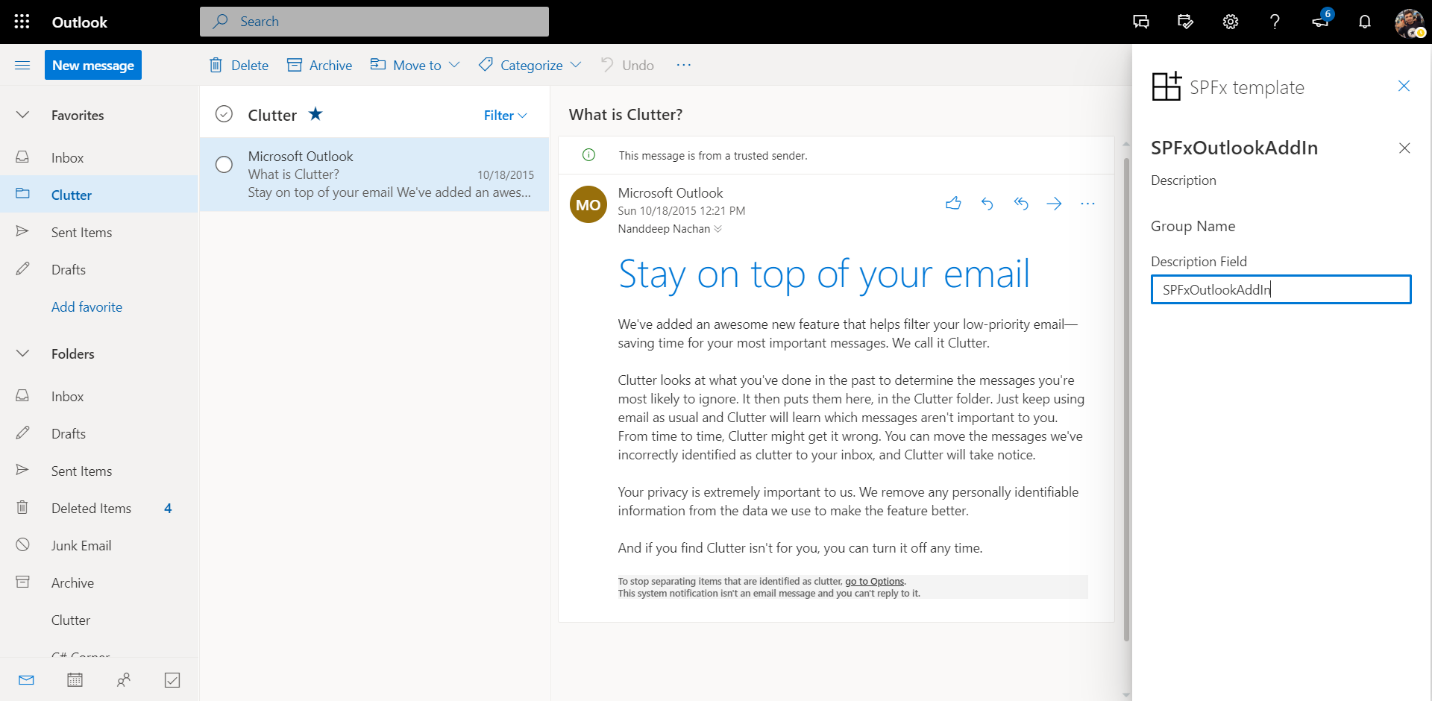
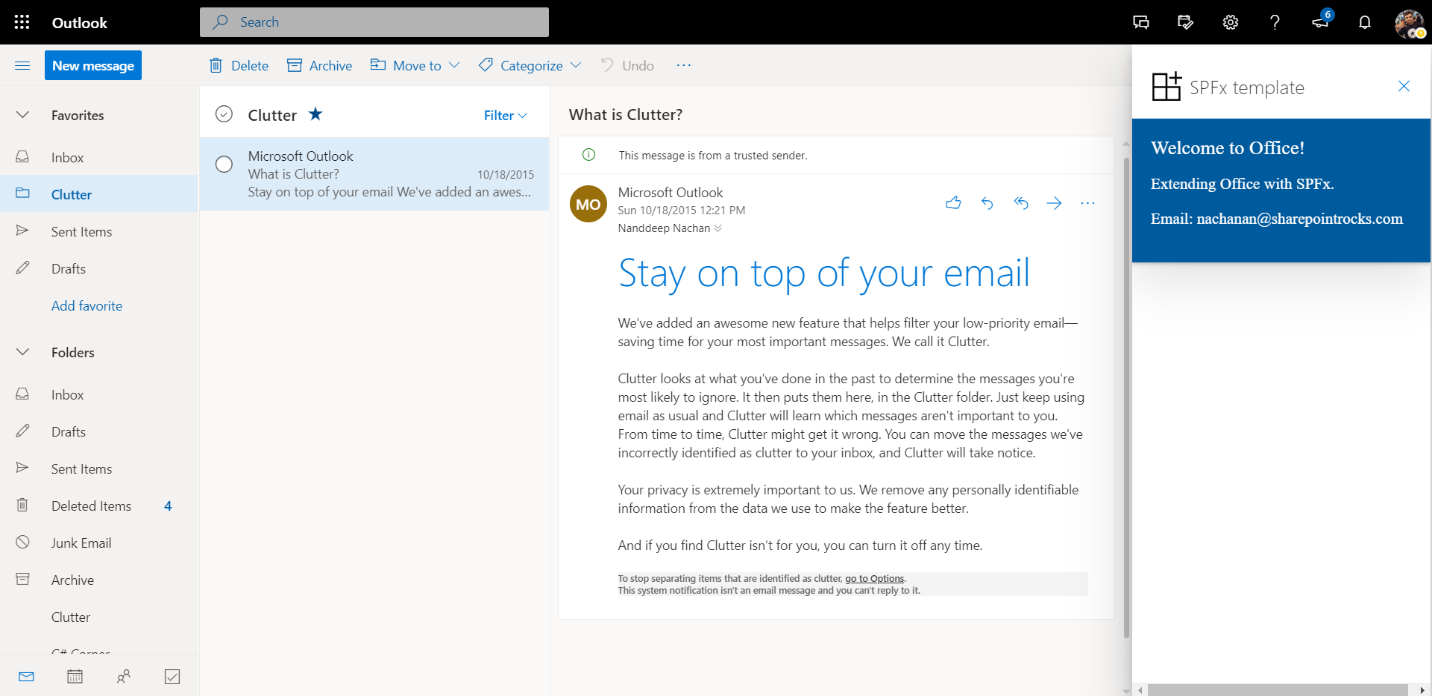
- After the initial configuration options set, the SPFx Outlook AddIn can be seen as below:
Summary
SPFx v1.10 allows to develop Outlook Web App add-ins hosted on SharePoint. This feature is available in beta and at the moment, only supported within the context of the Outlook Web Access.
This content was originally posted here.


Leave a comment