
SPFx - Connect to MS Graph with MSGraphClient
Overview
A while back, I had an article on the same topic to Consume Microsoft Graph API Using MSGraphClient. It was implemented with SPFx version 1.5.1, when MSGraphClient was in preview. However, it is a new HTTP client introduced with SPFx version 1.6.0.
During this article, we will explore the new MSGraphClient capabilities to connect to MS Graph. We will develop a practical scenario to connect to MS Graph from SPFx web part.
Develop SharePoint Framework Web Part
-
Open a command prompt. Create a directory for SPFx solution.
md ms-graph-client -
Navigate to the above created directory.
cd ms-graph-client -
Run the Yeoman SharePoint Generator to create the solution.
yo @microsoft/sharepoint -
Yeoman generator will present you with the wizard by asking questions about the solution to be created.
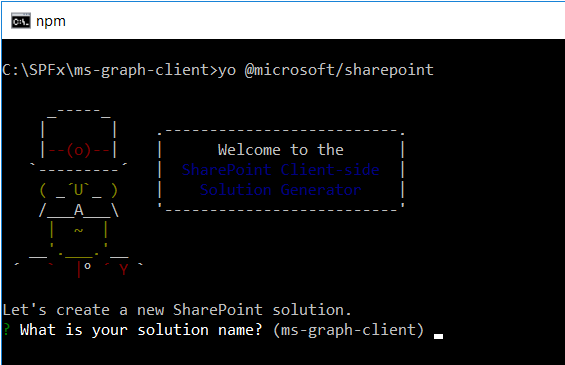
- Solution Name: Hit enter to have default name (ms-graph-client in this case) or type in any other name for your solution.
- Selected choice: Hit enter
- Target for the component: Here we can select the target environment where we are planning to deploy the client web part i.e. SharePoint Online or SharePoint On-Premises (SharePoint 2016 onwards).
- Selected choice: SharePoint Online only (latest)
- Place of files: We may choose to use the same folder or create a sub-folder for our solution.
- Selected choice: Same folder
- Deployment option: Selecting Y will allow the app to deployed instantly to all sites and will be accessible everywhere.
- Selected choice: N (install on each site explicitly)
- Permissions to access web APIs: Choose if the components in the solution require permissions to access web APIs that are unique and not shared with other components in the tenant.
- Selected choice: N (solution contains unique permissions)
- Type of client-side component to create: We can choose to create client side web part or an extension. Choose web part option.
- Selected choice: WebPart
- Web part name: Hit enter to select the default name or type in any other name.
- Selected choice: ConnectWithMSGraphClient
- Web part description: Hit enter to select the default description or type in any other value.
- Selected choice: Connect to MS Graph with MSGraphClient
- Framework to use: Select any JavaScript framework to develop the component. Available choices are (No JavaScript Framework, React, and Knockout)
- Selected choice: React
- Solution Name: Hit enter to have default name (ms-graph-client in this case) or type in any other name for your solution.
- Yeoman generator will perform scaffolding process to generate the solution. The scaffolding process will take a significant amount of time.
-
Once the scaffolding process is completed, lock down the version of project dependencies by running below command.
npm shrinkwrap - In the command prompt type below command to open the solution in the code editor of your choice.
code .
NPM Packages Dependency
Microsoft Graph TypeScript types
The typings will help for providing intellisence during writing the code.
On the command prompt, run below command to include the npm package.
npm install @microsoft/microsoft-graph-types --save-dev
Set Permission Scopes
To consume MS Graph or any third-party REST APIs, the permissions needs to be explicitly set in the solution manifest.
Open “config\package-solution.json” and add below permission scope to give read permission on MS Graph for all users.
{
  "$schema": "https://developer.microsoft.com/json-schemas/spfx-build/package-solution.schema.json",
  "solution": {
    "name": "ms-graph-client-client-side-solution",
    "id": "3d05713c-be24-48a5-84c9-02390c5340aa",
    "version": "1.0.0.0",
    "includeClientSideAssets": true,
    "isDomainIsolated": false,
    "webApiPermissionRequests": [
      {
        "resource": "Microsoft Graph",
        "scope": "User.ReadBasic.All"
      }
    ]
  },
  "paths": {
    "zippedPackage": "solution/ms-graph-client.sppkg"
  }
}
Pass the context from web part to React Component
We will have to pass the SharePoint context from our web part to the React component.
- Open React component properties at “src\webparts\connectWithMsGraphClient\components\IConnectWithMsGraphClientProps.ts”.
-
Add below properties.
import { WebPartContext } from '@microsoft/sp-webpart-base'; export interface IConnectWithMsGraphClientProps { description: string; context: WebPartContext; } - From our web part (src\webparts\connectWithMsGraphClient\ConnectWithMsGraphClientWebPart.ts) pass the context to React component.
export default class ConnectWithMsGraphClientWebPart extends BaseClientSideWebPart<IConnectWithMsGraphClientWebPartProps> {

  public render(): void {
    const element: React.ReactElement<IConnectWithMsGraphClientProps> = React.createElement(
      ConnectWithMsGraphClient,
      {
        description: this.properties.description,
        context: this.context
      }
    );

    ReactDom.render(element, this.domElement);
  }
  .
  .
  .
}
Define State
-
Add a file “src\webparts\connectWithMsGraphClient\components\IUserInfo.ts” to represent the user information.
export interface IUsernfo { displayName: string; mail: string; userPrincipalName: string; } -
Add a file “src\webparts\connectWithMsGraphClient\components\IConnectWithMsGraphClientState.ts” to represent a state with array of IUsernfo.
import { IUserInfo } from './IUserInfo';

export interface IConnectWithMsGraphClientState {
    users: Array<IUserInfo>;
}
Use MSGraphClient in the SPFx Web Part
We will use the MSGraphClient to connect to MS Grpah.
- Open the React component file at “src\webparts\connectWithMsGraphClient\components\ConnectWithMsGraphClient.tsx”.
-
Add below imports.
import { MSGraphClient } from '@microsoft/sp-http'; import * as MicrosoftGraph from '@microsoft/microsoft-graph-types'; import { autobind, PrimaryButton, DetailsList, DetailsListLayoutMode, CheckboxVisibility, SelectionMode } from 'office-ui-fabric-react'; -
Configure the columns for the DetailsList component to display user details. Add below lines after import statements.
// Configure the columns for the DetailsList component let _usersListColumns = [ { key: 'displayName', name: 'Display name', fieldName: 'displayName', minWidth: 50, maxWidth: 100, isResizable: true }, { key: 'mail', name: 'Mail', fieldName: 'mail', minWidth: 50, maxWidth: 100, isResizable: true }, { key: 'userPrincipalName', name: 'User Principal Name', fieldName: 'userPrincipalName', minWidth: 100, maxWidth: 200, isResizable: true }, ]; -
Initialize the state of component in constructor.
export default class ConnectWithMsGraphClient extends React.Component<IConnectWithMsGraphClientProps, IConnectWithMsGraphClientState> { constructor(props: IConnectWithMsGraphClientProps, state: IConnectWithMsGraphClientState) { super(props); // Initialize the state of the component this.state = { users: [] }; } . . . } -
Implement a generic method to get the user details using MS Graph API.
@autobind private getUserDetails(): void { this.props.context.msGraphClientFactory .getClient() .then((client: MSGraphClient): void => { // Get user information from the Microsoft Graph client .api('users') .version("v1.0") .select("displayName,mail,userPrincipalName") .get((error, result: any, rawResponse?: any) => { // handle the response if (error) { console.log(error); return; } // Prepare the output array var users: Array<IUserInfo> = new Array<IUserInfo>(); // Map the JSON response to the output array result.value.map((item: any) => { users.push({ displayName: item.displayName, mail: item.mail, userPrincipalName: item.userPrincipalName, }); }); // Update the component state accordingly to the result this.setState( { users: users, } ); }); }); } - Update the render() method to place the needed controls.
public render(): React.ReactElement<IConnectWithMsGraphClientProps> {
return (
<div className={styles.connectWithMsGraphClient}>
<div className={styles.container}>
<div className={styles.row}>
<div className={styles.column}>
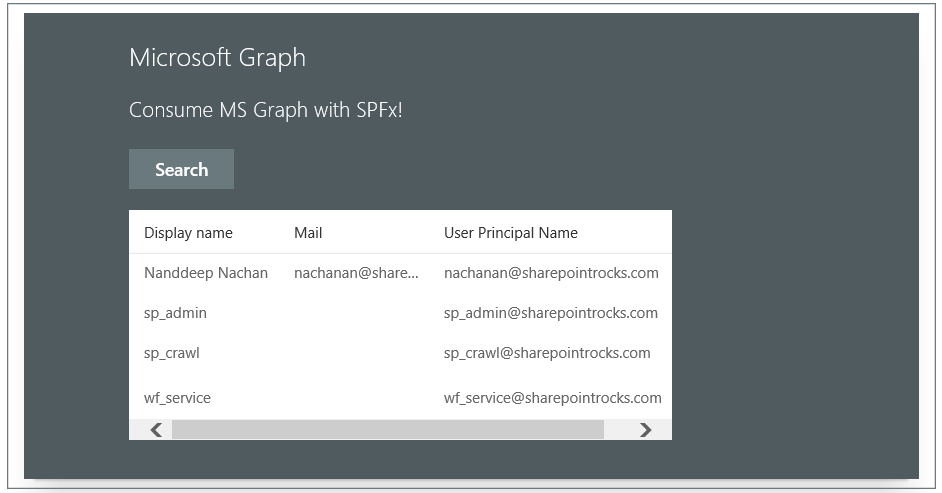
<span className={styles.title}>Microsoft Graph</span>
<p className={styles.subTitle}>Consume MS Graph with SPFx!</p>
<p className={styles.description}>{escape(this.props.description)}</p>
<p className={styles.form}>
<PrimaryButton
text='Search'
title='Search'
onClick={this.getUserDetails}
/>
</p>
{
(this.state.users != null && this.state.users.length > 0) ?
<p className={styles.form}>
<DetailsList
items={this.state.users}
columns={_usersListColumns}
setKey='set'
checkboxVisibility={CheckboxVisibility.hidden}
selectionMode={SelectionMode.none}
layoutMode={DetailsListLayoutMode.fixedColumns}
compact={true}
/>
</p>
: null
}
</div>
</div>
</div>
</div>
);
}
Deploy the SPFx Package to SharePoint App Catalog
Follow below steps to deploy the SPFx package (.sppkg) to SharePoint app catalog.
Build minified assets
On the command prompt, type the below command.
gulp bundle --ship
Prepare the package
On the command prompt, type the below command.
gulp package-solution --ship
The .sppkg package will be available inside “sharepoint\solution” folder.
Upload package to app catalog
- Open SharePoint app catalog site.
-
Upload the package to app catalog.
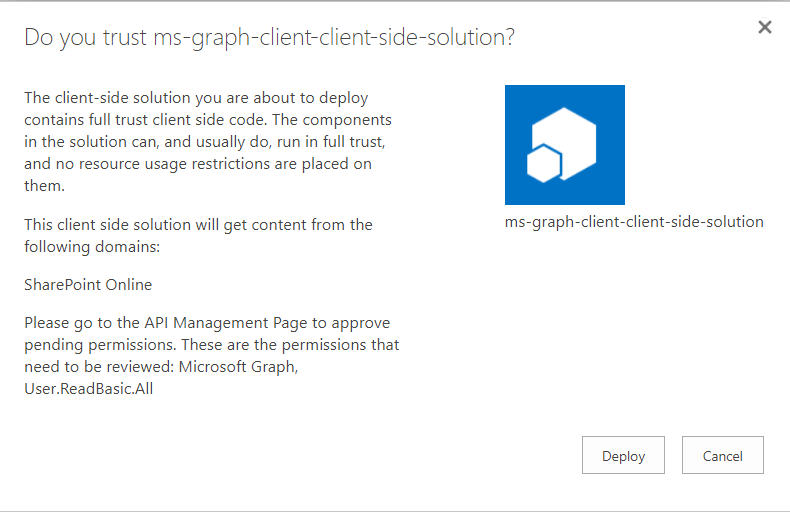
- Click Deploy.
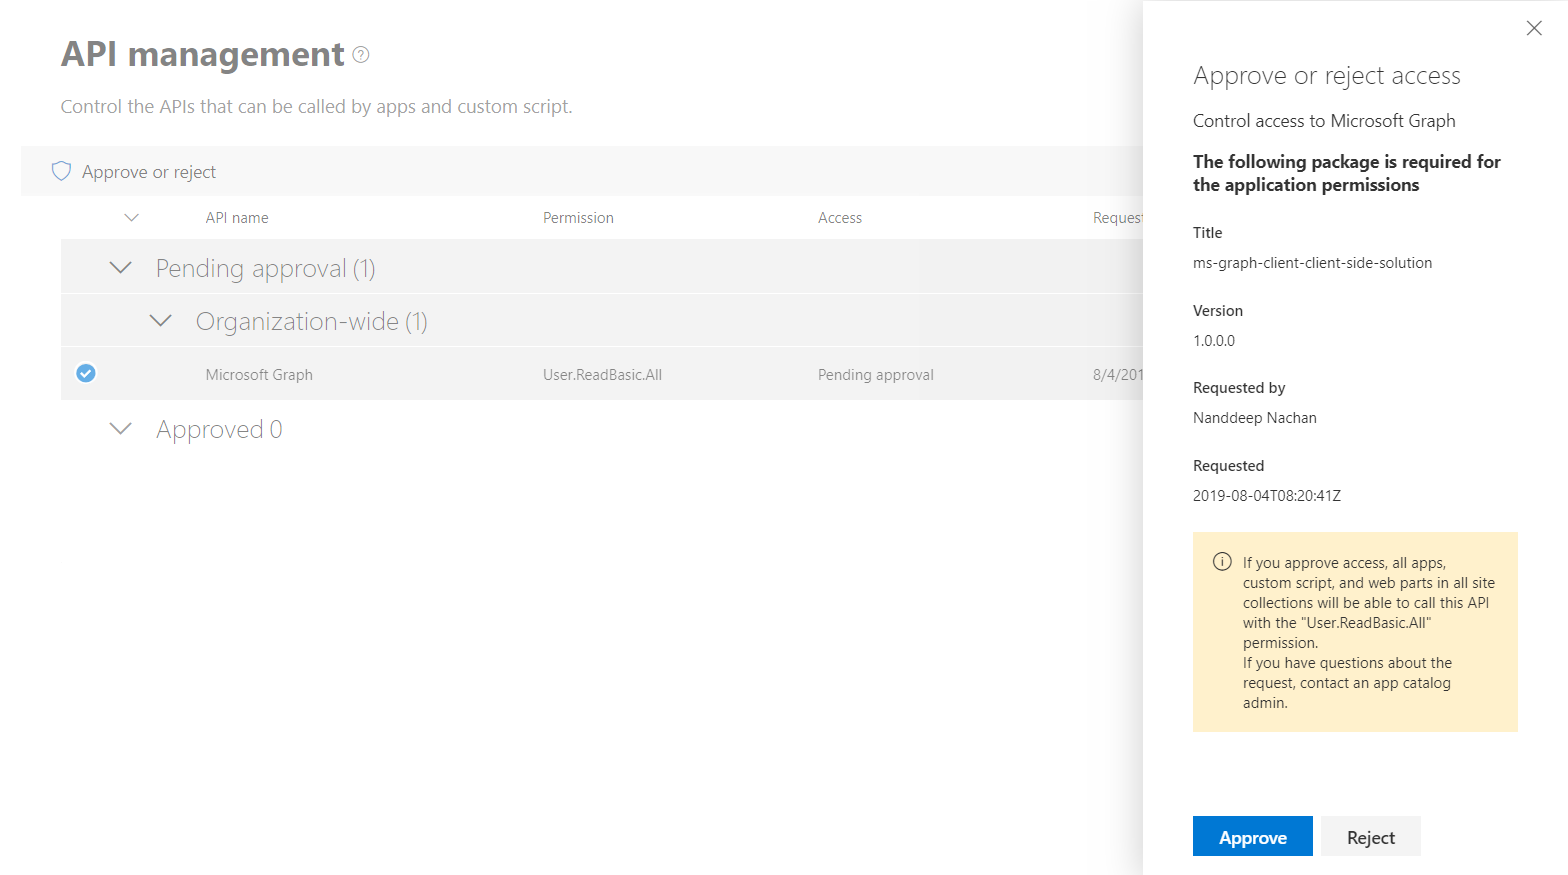
API Management
After deploying the web part, follow the below steps to approve API requests.
- Open SharePoint Admin Center (https://[tenant]-admin.sharepoint.com).
- From left navigation, click API Management.
- Approve the pending requests.
Test the WebPart
- On the command prompt, type
gulp serve. - Open SharePoint site.
- Navigate to /_layouts/15/workbench.aspx
- Locate and add the webpart (named ConnectWithMSGraphClient) to page.
The page generates an alert “To view the information on this page, you need to verify your identity”, to resolve this add below urls to trusted site in browser.
- https://graph.microsoft.com
- https://.office365.com
- https://.microsoftonline.com
- https://.sharepoint.com
- https://.outlook.com
Summary
Microsoft Graph offers a wide range of APIs to access the content and services provided by Office 365. While building SPFx solutions, MS Graph can be easily consumed using MSGraphClient.
This content was originally posted here.


Leave a comment