
Implement CI / CD for SharePoint Framework - Part I
Overview
Implementing SharePoint Framework solutions is easy. However, maintaining the SPFx solutions for their integrity as they grow is always challenging. When an SPFx solution is being worked on by a team of considerable size and it undergoes continuous development efforts, testing and deployment of the latest released package is a huge task. Setting up CI (Continuous Integration) and CD (Continuous Deployment) helps to automate the process.
Continuous Integration
Continuous Integration (CI) is process of automating build and testing of code when a developer commits changes to source control. Commit to source control triggers an automated build which grabs the latest code from version control, builds it and runs tests on it (if configured). Below are few benefits of implementing CI:
- Improved productivity of dev team
- Reduced number of bugs
- Early detection of bugs
- Early to market release
Build pipeline:
Build pipeline includes below major steps:
- Create build definition
- Install Node JS
- Restore npm packages
- Build the solution
- Package the solution
- Prepare the Artifacts
- Publish the Artifacts
Create Build Definition
Build definition contains definition and configuration for build. Follow below steps to create a new build definition.
- Login to Visual Studio Online (Azure DevOps) at https://visualstudio.microsoft.com/vso/
- Select your project to setup build definition.
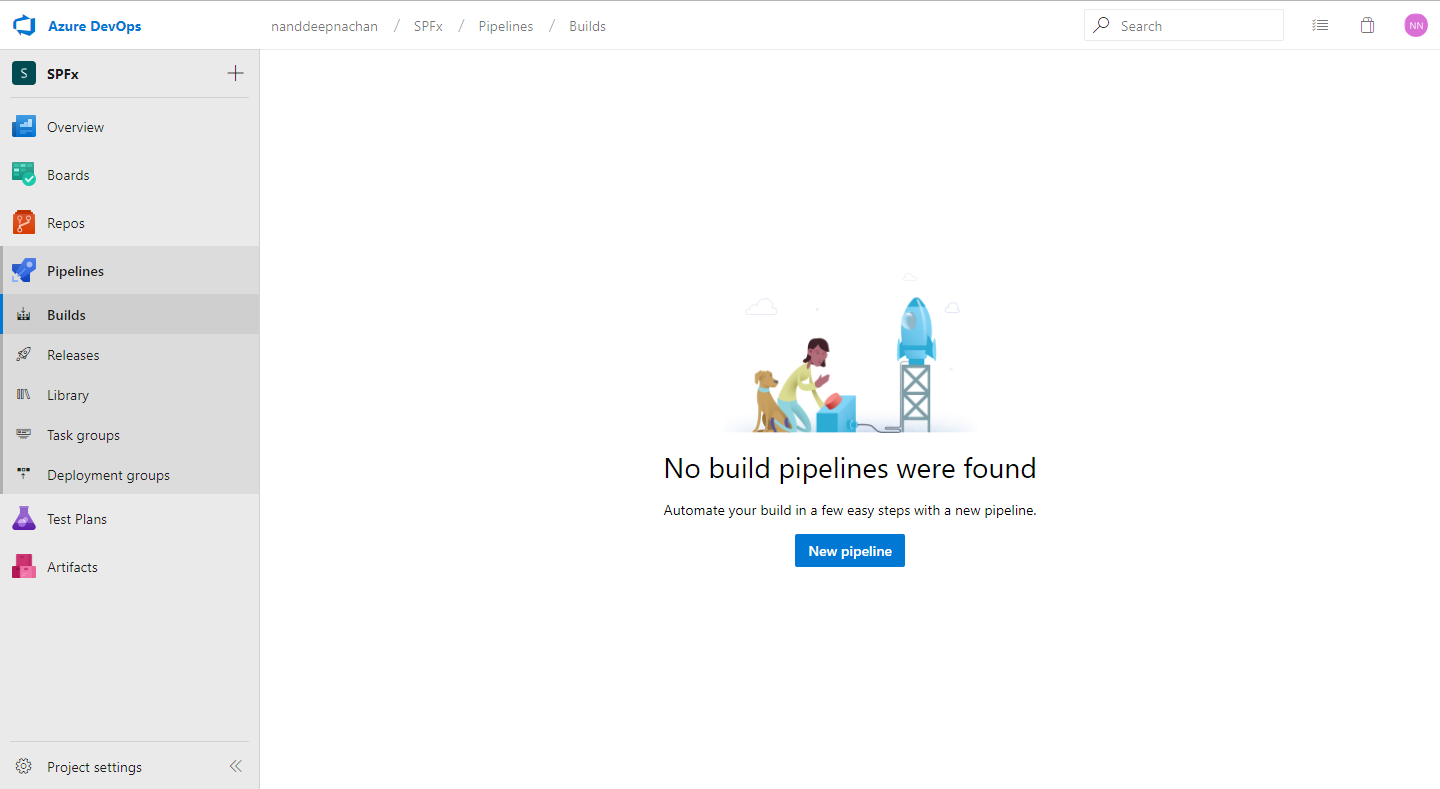
- From left navigation, click Pipelines > Builds.
-
Click New pipeline.
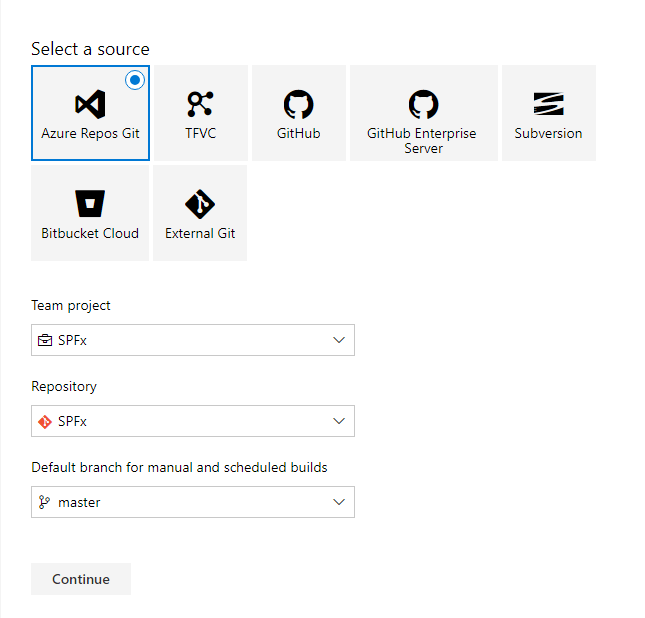
-
Select the source to connect to your source repository. Click continue.
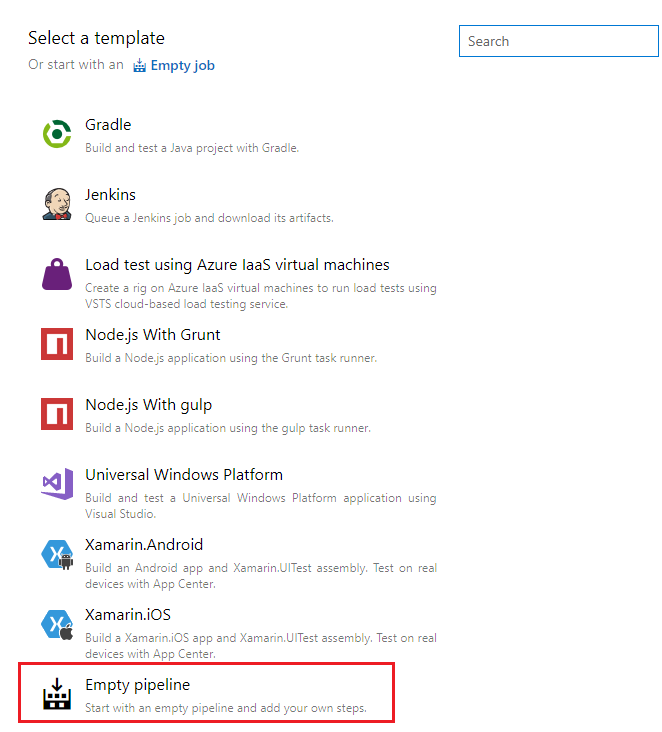
-
Under Select a template, select Empty Pipeline.
-
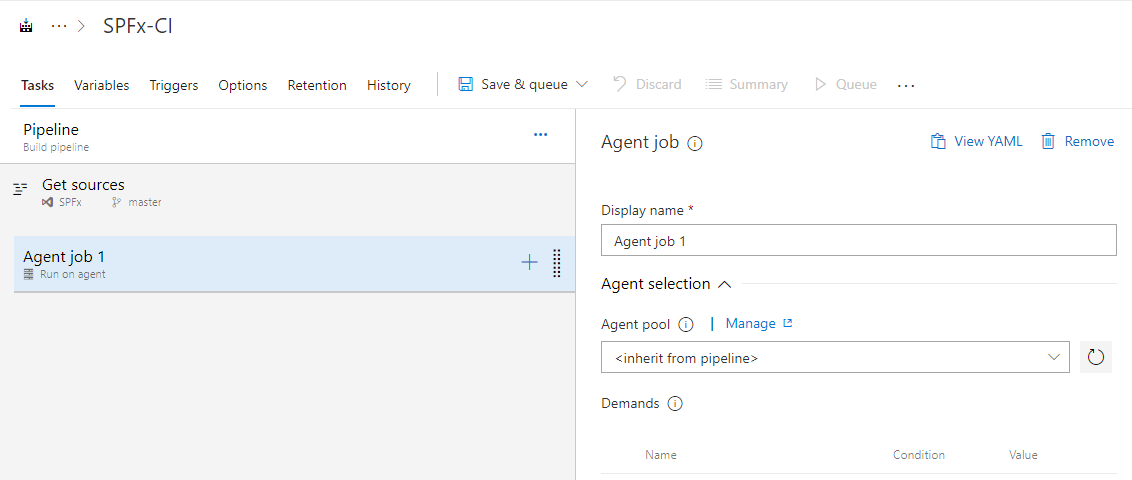
The build definition has default agent. We can add multiple tasks to agent to define our build.
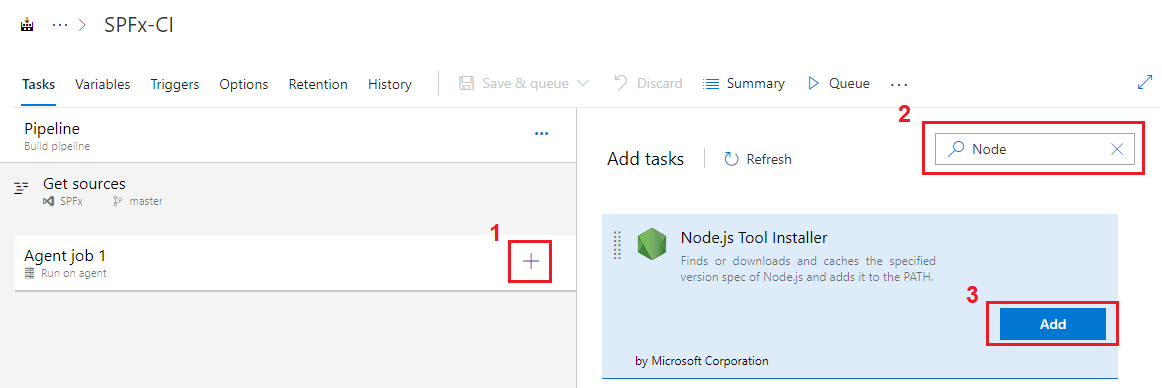
Install Node JS
- On the default agent, click + sign.
- Search for Node.
-
Add Node.js tool installer.
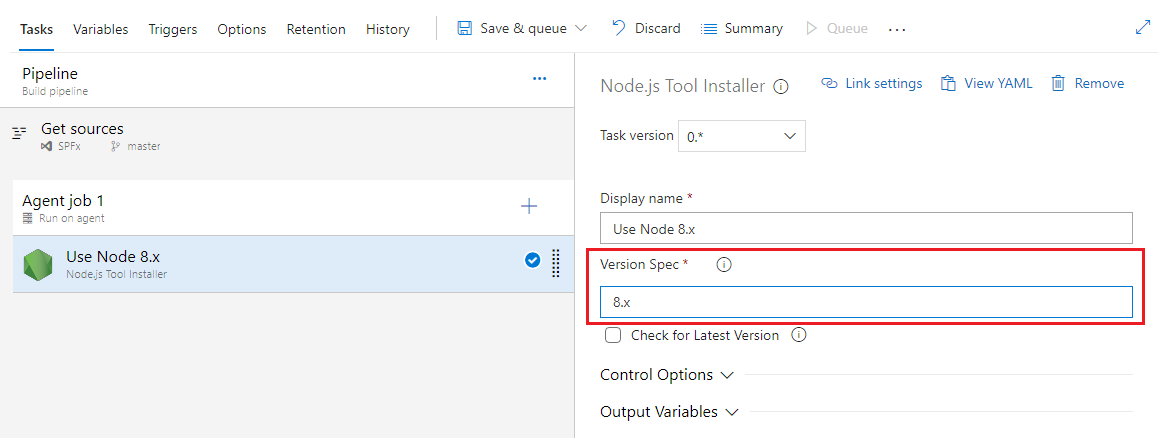
-
Specify the version as 8.x, since SharePoint Framework supports Node version 8.x.
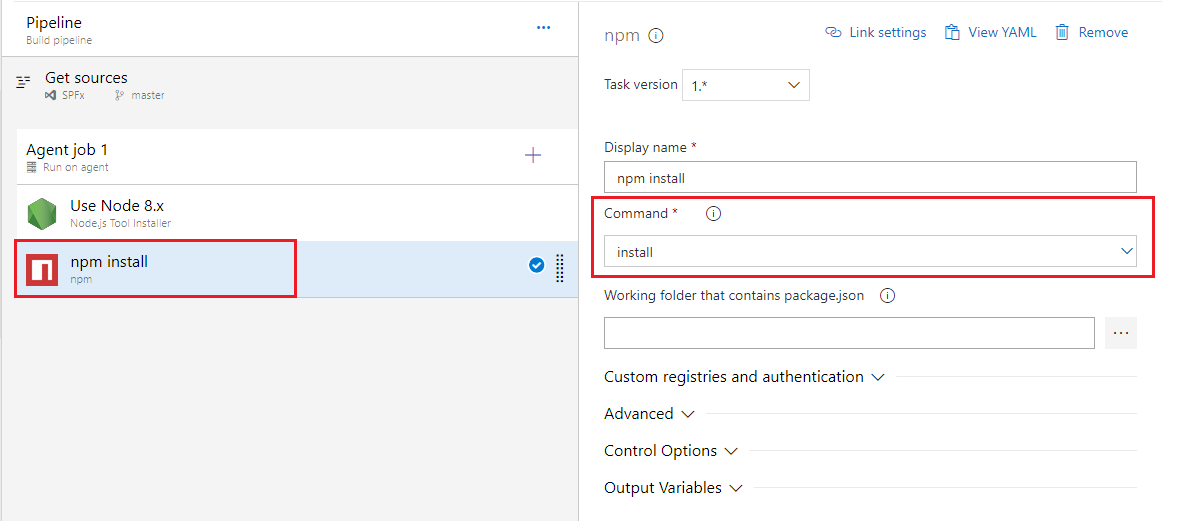
Restore npm Packages
SharePoint Framework solution uses third party npm packages. We need to restore those before starting the build process.
- Add npm task.
- Verify command is set to install.
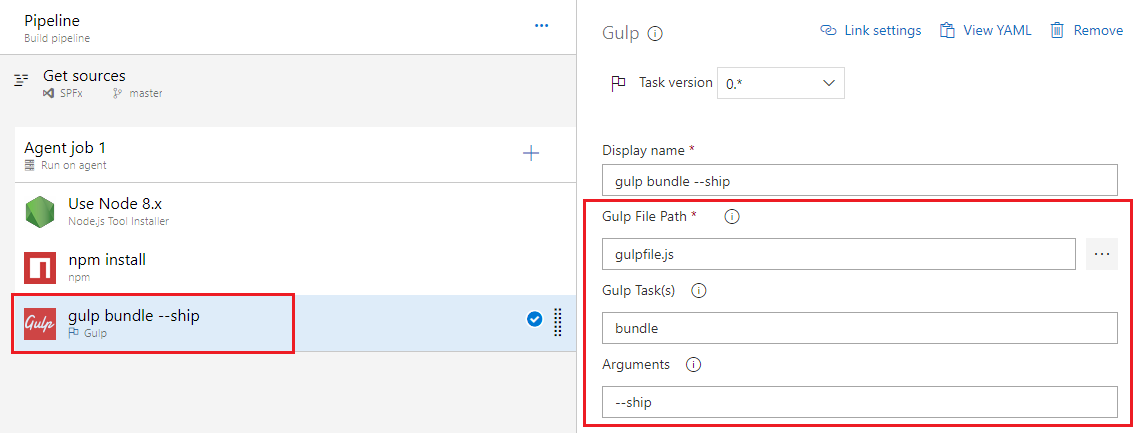
Build the Solution
Build the SPFx solution to minify the required assets to upload to CDN.
- Add gulp task.
- Set Gulp file path to gulpfile.js
- Set Gulp task as
bundle. - Set Gulp arguments to
--ship.
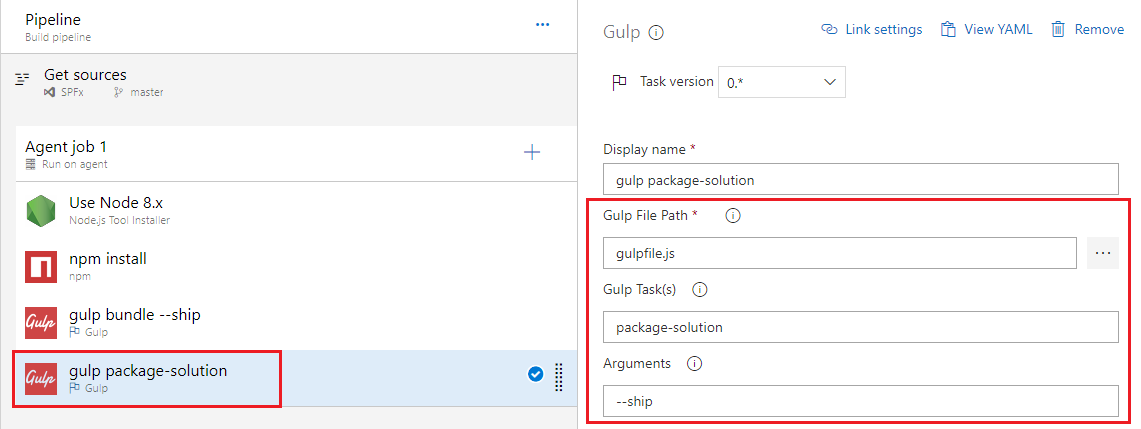
Package the Solution
The next step is to combine the assets into a package.
- Add gulp task.
- Set Gulp file path to gulpfile.js
- Set Gulp task as
package-solution. - Set Gulp arguments to
--ship.
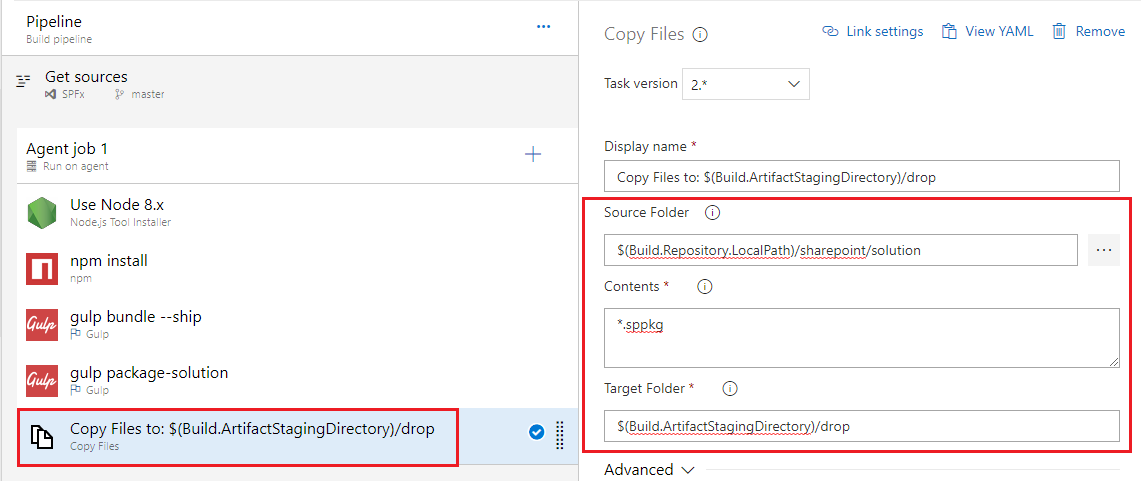
Prepare the Artifacts
Azure DevOps build does not retain any files. The .sppkg file created from above step needs to be copied to staging directory to be published to release pipeline.
- Add Copy Files task
- Set Source Folder to
$(Build.Repository.LocalPath)/sharepoint/solution - Set Contents to
*.sppkg - Set target folder to
$(Build.ArtifactStagingDirectory)/drop`
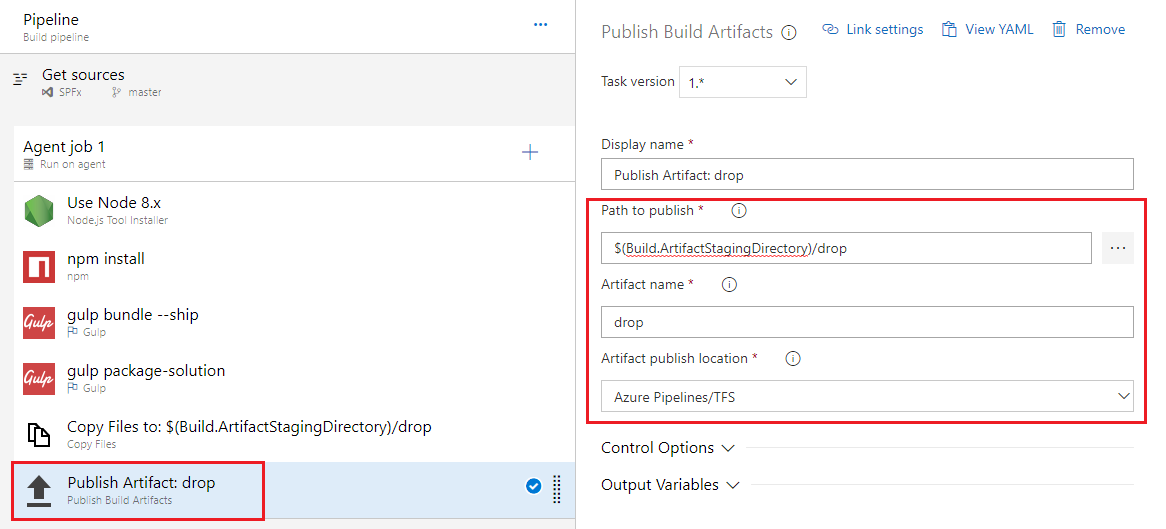
Publish the Artifacts
Instruct Azure DevOps to keep the files after build execution.
- Add Publish Build Artifacts task.
- Set Path to publish to
$(Build.ArtifactStagingDirectory)/drop - Set Artifact name to drop.
Summary
Continuous Integration helps to automate the build process when a solution being worked on by a team is undergoing continuous changes. Azure DevOps helps to automate SPFx solution builds.
This content was originally posted here.


Leave a comment