
SharePoint Framework - Deploy SPFx WebParts to Office 365 Public CDN
Overview
Please read through my previous article Develop First Client Side Web Part ) to get started, develop first SPFx client side web part and test it on a local SharePoint workbench. In the real life scenarios we will have to deploy these SPFx webparts to some hosting environments from where it can be served to SharePoint.
Below are the more common followed deployment approaches
- Azure CDN
- Office 365 Public CDN (This article)
- SharePoint Library in your tenant
In this article, we will explore how SPFx webparts can be deployed to office 365 CDN.
Configure CDN in Office 365 Tenant
Any of the document library in SharePoint Online tenant can be promoted as a CDN, which will help to serve the JS files for SPFx client webparts hosted in SharePoint. This CDN location being public can be accessed easily.
To configure the CDN in Office 365 follow below steps:
- Download and install latest version of SharePoint Online Management Shell from https://www.microsoft.com/en-us/download/details.aspx?id=35588
- Open the SharePoint Online Management Shell.
-
Connect to SharePoint Online tenant using below cmdlet.
Connect-SPOService -Url https://[tenant]-admin.sharepoint.comReplace
[tenant]with your O365 tenant name. -
Run below set of commands to review the existing Office 365 public CDN settings on your tenant.
Get-SPOTenantCdnEnabled -CdnType PublicThis command will return the status of CDN. True if CDN is enabled, false otherwise.

Get-SPOTenantCdnOrigins -CdnType Public
This command will return the location of already configured CDN origins. The urls are relative. On first instance, it will not return any values as CDN is not yet setup.
Get-SPOTenantCdnPolicies -CdnType Public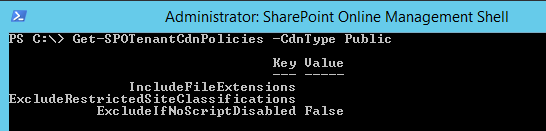
This command will return the policy settings for CDN
-
Run below command to enable the CDN.
Set-SPOTenantCdnEnabled -CdnType Public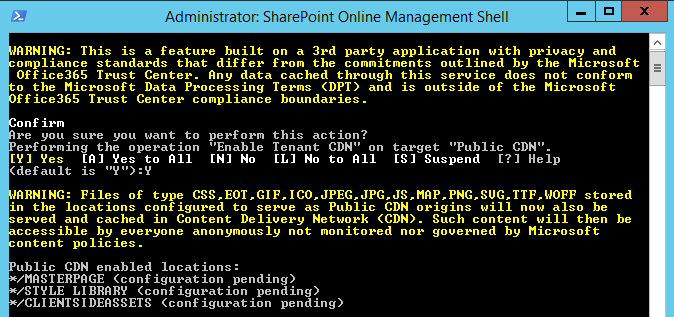
After enabling the CDN, */CLIENTSIDEASSETS origin is by default added as valid origin. By default allowed file extensions are: CSS, EOT, GIF, ICO, JPEG, JPG, JS, MAP, PNG, SVG, TTF, and WOFF.
The configuration takes up to 15 to 20 minutes.
-
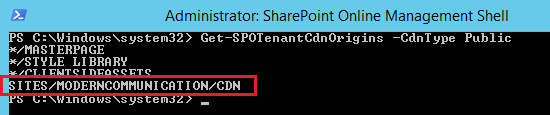
To check the current status of CDN end points, run below command.
Get-SPOTenantCdnOrigins -CdnType Public
The origin will be listed without (configuration pending) status when it is ready. Please be patient for 15 to 20 minutes until it is ready.
Once CDN origin is ready, the output will be as below.

Setup New Office 365 CDN in Tenant
Follow below steps to setup new CDN location
- Open SharePoint site (e.g. https://[tenant].sharepoint.com/sites/[site-collection-name].
- Create a document library (e.g. CDN).
-
Run below command in SharePoint Online Management Shell.
Add-SPOTenantCdnOrigin -CdnType Public -OriginUrl sites/[site-collection-name]/[document-library]The OriginUrl is a relative url. New CDN origin configuration will again take 15 to 20 minutes.
-
Run Get-SPOTenantCdnOrigins to check the status.
- Create a folder in document library preferably with name of SPFx web part (e.g. O365CDNDeploy).
-
To get the path of CDN type below url in browser.
https://[tenant].sharepoint.com/_vti_bin/publiccdn.ashx/url?itemurl=https://[tenant].sharepoint.com/sites/[site-collection-name]/[document-library]/[folder]
Configure SPFx Solution for Azure CDN
Update package details
- Open command prompt.
- In the command prompt, navigate to SPFx solution folder.
- Type
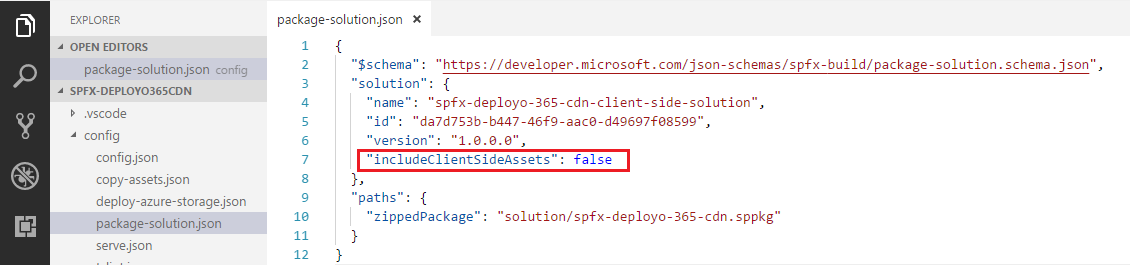
code .to open the solution in code editor of your choice. - Open package-solution.json file from config folder. This file takes care of solution packaging.
-
Set includeClientSideAssets value as false. The client side assets will not be packaged inside final package (sppkg file) because these will be hosted on external Office 365 public CDN.
Update CDN Path
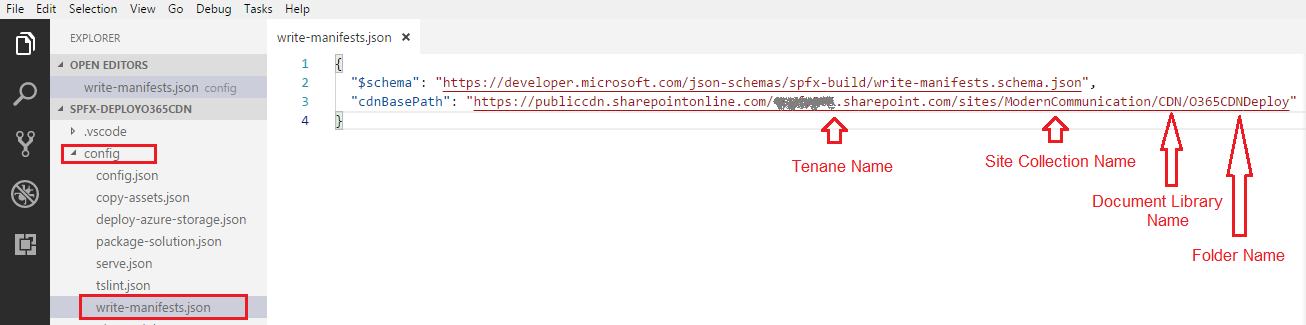
- Open write-manifests.json from config folder.
-
Update CDN base path as Office 365 CDN end point.
https://publiccdn.sharepointonline.com/[tenant]/sites/[site-collection-name]/[document-library]/[folder]
Prepare the package
In the command prompt, type the below command.
gulp bundle --ship
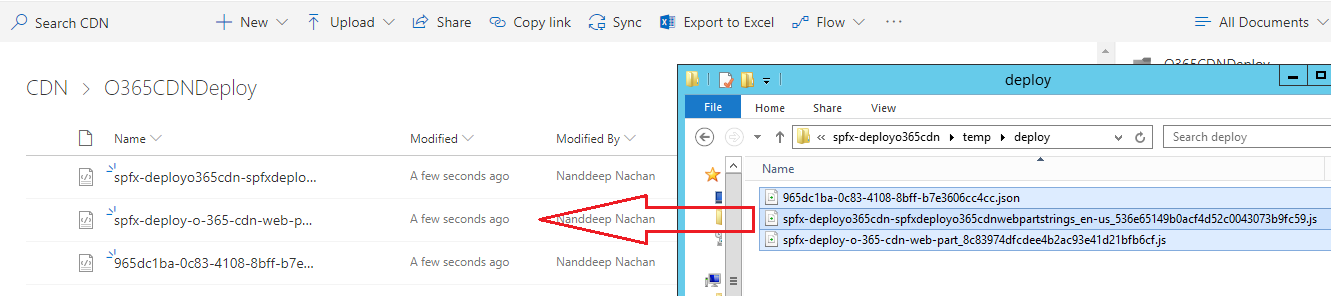
This will minify the required assets to upload to CDN. The ship switch denotes distribution. The minified assets are located at “temp\deploy” folder.
Upload the files from “temp\deploy” folder to CDN location (SharePoint document library setup as CDN).
Deploy Package to SharePoint
In the command prompt, type the below command.
gulp package-solution --ship
This will create the solution package (sppkg) in sharepoint\solution folder.
Upload package to app catalog
- Open the SharePoint app catalog site.
- Upload the solution package (sppkg) from sharepoint\solution folder to app catalog.
-
Make sure the url is pointing to Office 365 CDN.
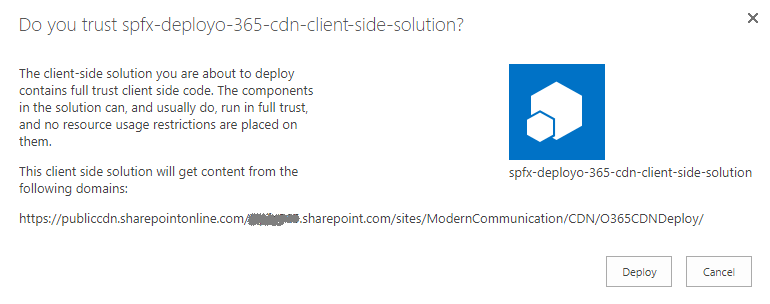
- Click Deploy.
Test the web part
- Open any SharePoint site in your tenant.
- Add the App to your site from Add an App menu.
-
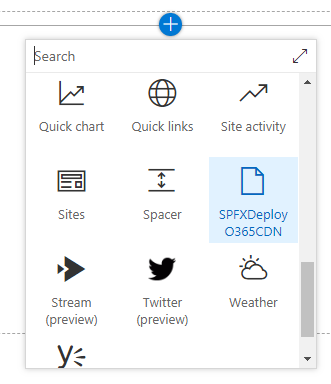
Edit any page and add the web part.
-
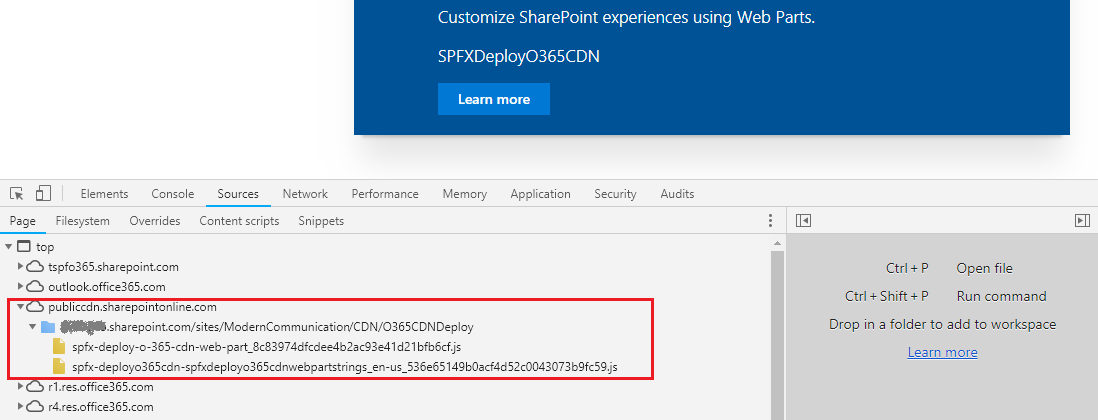
Click F12 to open developer toolbar. Confirm that it is served from Office 365 Public CDN.
Summary
Office 365 CDN is one of the feasible option to deploy the SPFx client side webpart. It requires some manual steps to copy the assets to CDN path. You can update the Office 365 CDN path later in SPFx solution and redeploy it.
This content was originally posted here.


Leave a comment