
SharePoint Framework – Introduction to Web Part Property Pane
Overview
In classic SharePoint, web parts can be configured using the properties, generally referred as WebPart properties. In the SPFx world they are referred as property panes. The property panes allows to control behavior and appearance of web part.
In the previous article, we developed our first SPFx client side web part. In this article we will deep dive into configuring the property panes.
Property Pane Metadata
Property pane has below metadata:
Pages
- Allows to separate complex interactions and divide them across one or multiple pages. Pages has sub-metadata as Header and Groups.
Header
- Defines title of the property pane.
Groups
- Groups together various property fields. Below is the list of out of box supported property fields.
| # | Property field | SPFx Typed Object |
| 1 | Label | PropertyPaneLabel |
| 2 | Textbox | PropertyPaneTextField |
| 3 | Multiple lines of text | PropertyPaneTextField |
| 4 | Link | PropertyPaneLink |
| 5 | Dropdown | PropertyPaneDropdown |
| 6 | Checkbox | PropertyPaneCheckbox |
| 7 | Choice | PropertyPaneChoiceGroup |
| 8 | Toggle | PropertyPaneToggle |
| 9 | Slider | PropertyPaneSlider |
| 10 | Button | PropertyPaneButton |
| 11 | Horizontal Rule | PropertyPaneHorizontalRule |
| 12 | Custom | Our own implementation using combination of above |
Create SPFx Solution
-
Create a directory for SPFx solution.
md spfx-ooopropertypanes -
Navigate to the above-created directory.
cd spfx-ooopropertypanes -
Run Yeoman SharePoint Generator to create the solution.
yo @microsoft/sharepoint -
Provide below values in the Yeoman generator wizard:
- Solution Name: Hit enter to have default name (spfx-ooopropertypanes in this case) or type in any other name for your solution.
- Selected choice: Hit enter
- Target for component: Here we can select the target environment where we are planning to deploy the client webpart i.e. SharePoint Online or SharePoint OnPremise (SharePoint 2016 onwards).
- Selected choice: SharePoint Online only (latest)
- Place of files: We may choose to use the same folder or create a subfolder for our solution.
- Selected choice: Same folder
- Deployment option: Selecting Y will allow the app to deployed instantly to all sites and will be accessible everywhere.
- Selected choice: N (install on each site explicitly)
- Type of client-side component to create: We can choose to create client side webpart or an extension. Choose webpart option.
- Selected choice: WebPart
- Web part name: Hit enter to select the default name or type in any other name.
- Selected choice: SPFXPropertyPane
- Web part description: Hit enter to select the default description or type in any other value.
- Selected choice: Hit enter (default description)
- Framework to use: Select any JavaScript framework to develop the component. Available choices are (No JavaScript Framework, React, and Knockout)
- Selected choice: No JavaScript Framework
- Solution Name: Hit enter to have default name (spfx-ooopropertypanes in this case) or type in any other name for your solution.
-
Once Yeoman finishes generating the solution, on command prompt type “code .” to open the solution in code editor.
Property Pane Code
Open file SpfxPropertyPaneWebPart.ts located at “\src\webparts\spfxPropertyPane”.
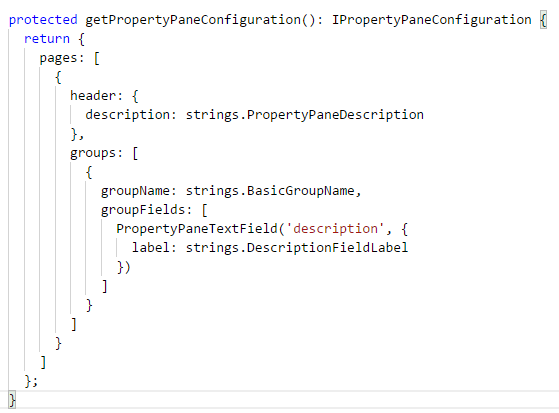
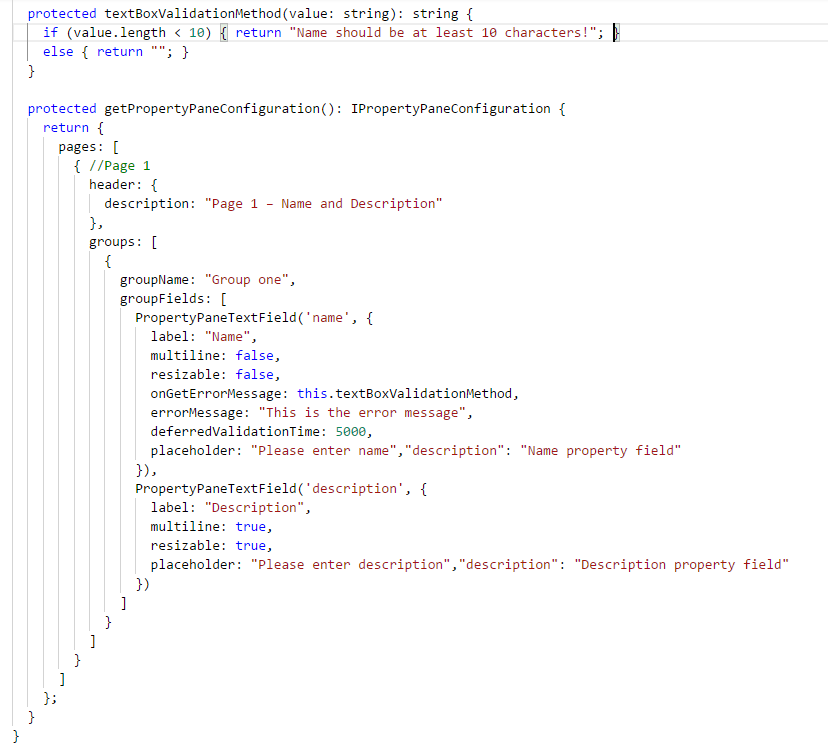
The method getPropertyPaneConfiguration() contains the configuration to build the property pane.
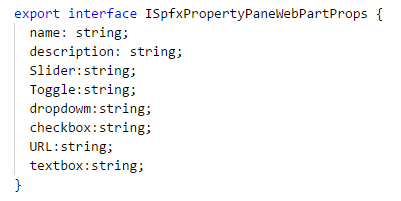
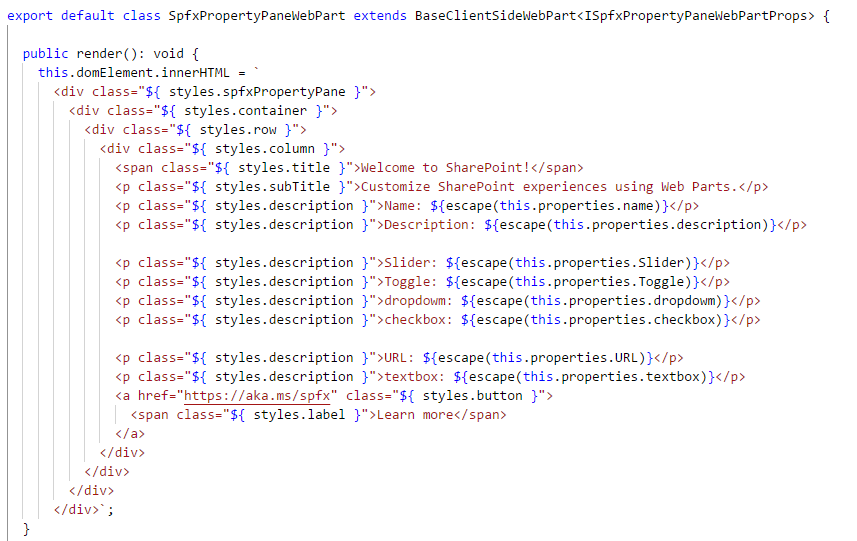
The default class “SpfxPropertyPaneWebPart” accepts property type of interface “ISpfxPropertyPaneWebPartProps”, which by default has description property of type string. The property can be used in render() method as below:
${escape(this.properties.description)}
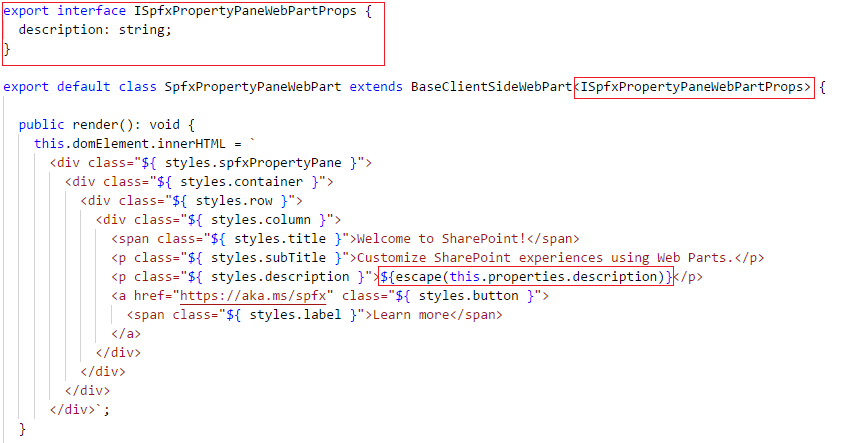
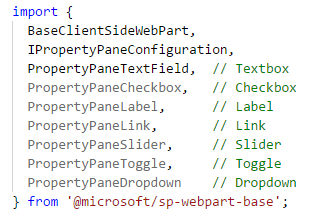
The import section has the property types defined.

Add Our Properties
To add new properties:
-
Import corresponding typed objects first
-
Add new properties. Map fields to typed objects.
-
Add new property pane fields and map to respective typed objects in getPropertyPaneConfiguration method.
-
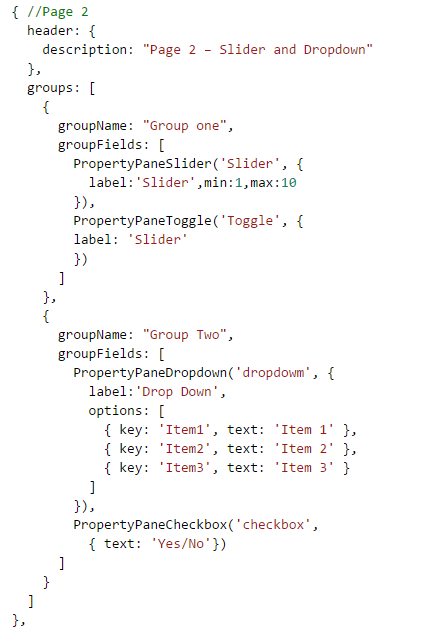
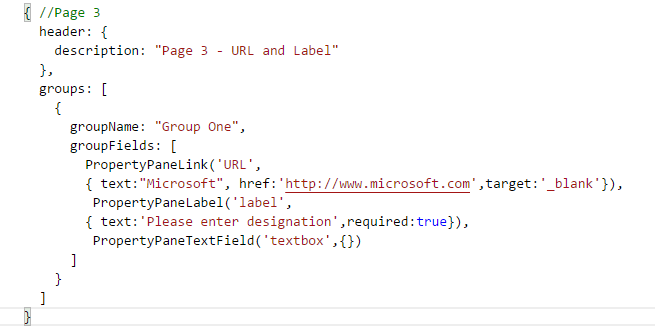
We can add multiple pages as below:
-
Setup one more page for remaining fields.
-
Modify render method to show selected field values.
Test the Property Pane
- On the command prompt type
gulp serve. -
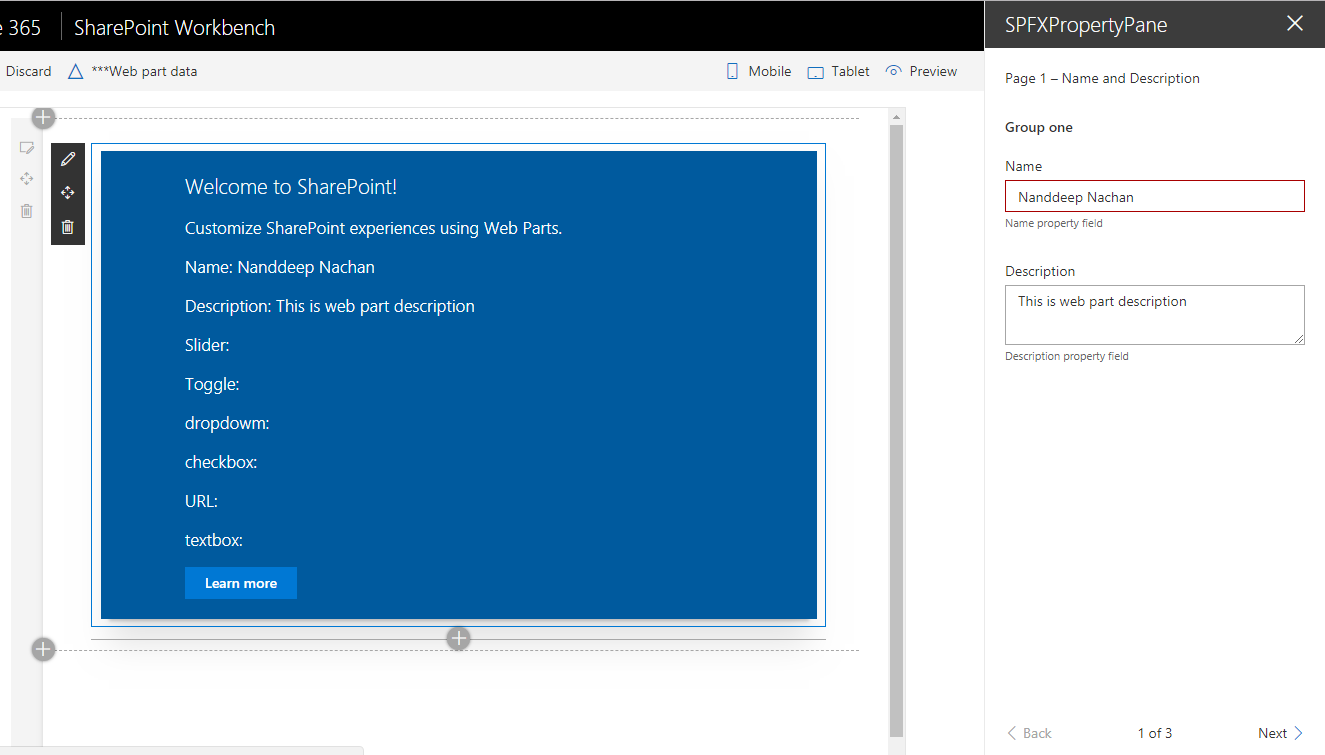
In SharePoint workbench, add our web part.
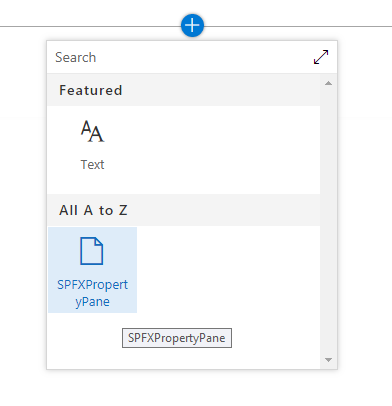
-
Edit web part to modify property fields.
-
Click Next to see next page of fields.
-
Click Next to see next page of fields.
Summary
Property panes allows easy configuration of SPFx client side web part. We can use predefined typed objects to create properties for web part. Properties can be grouped by pages.
This content was originally posted here.


Leave a comment