
Migrating content to SharePoint Online with SharePoint Migration Tool (SPMT)
Overview
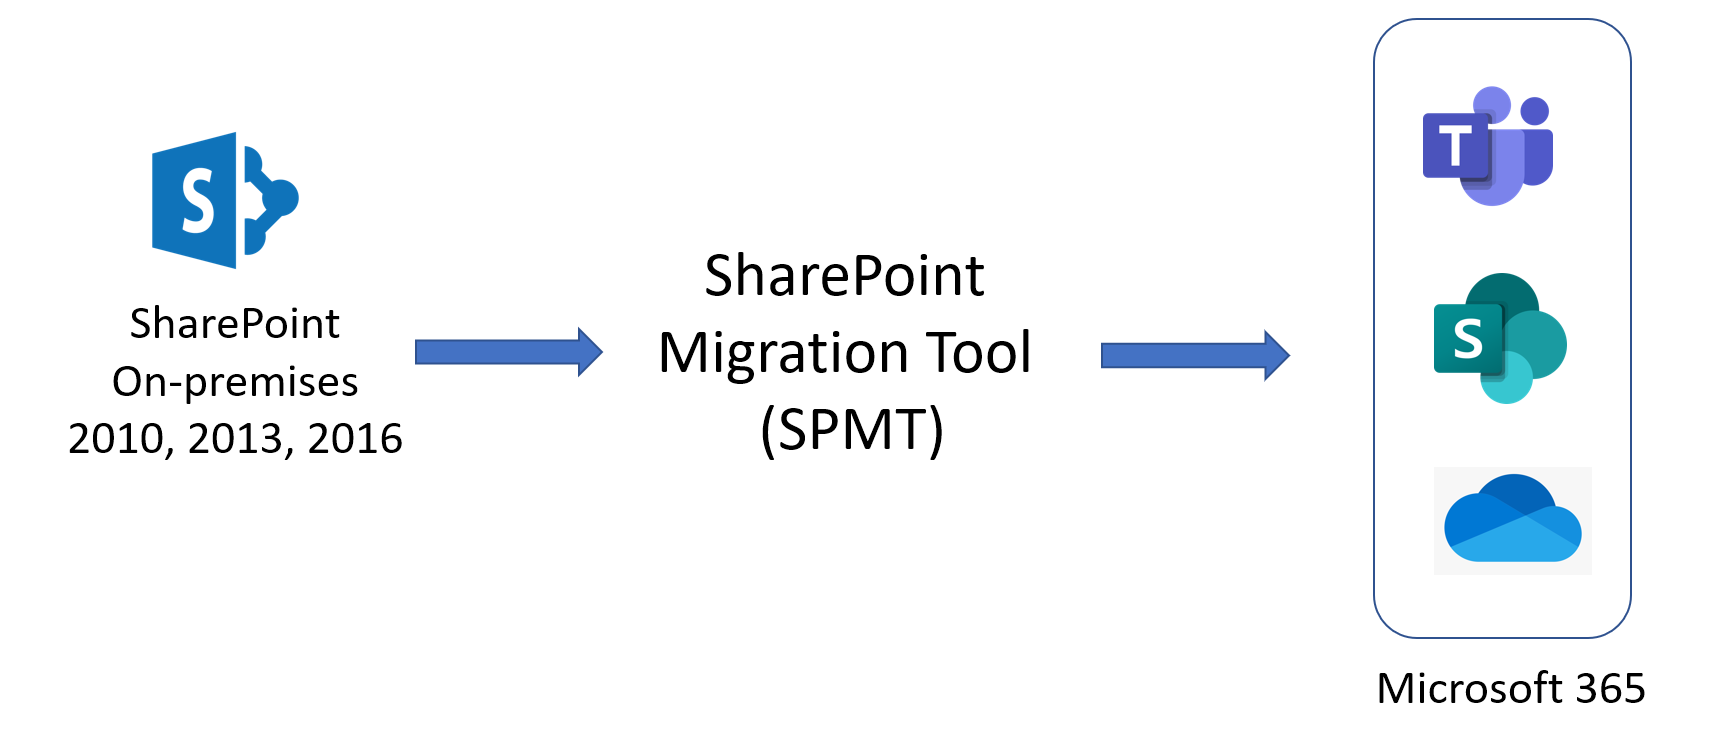
We have our data scattered across the on-premises network (e.g. SharePoint on-premises, file shares) or even on to other cloud stores. The new migration capabilities within Microsoft 365 allows you to migrate the content from various sources to Microsoft 365.
In this article, we will explore the migration capabilities to migrate your content from SharePoint on-premises sources to Microsoft 365.
Overview of SharePoint Migration Tool (SPMT)
When we plan to move to the cloud, there are two things to take care of - data and code. The SharePoint Migration Tool (SPMT) allows us to easily migrate our content to Microsoft 365 including SharePoint, OneDrive, and Microsoft Teams.
The migration from various SharePoint on-premises sources includes:
- SharePoint Server 2010
- SharePoint Server 2013
- SharePoint Server 2016
Set up SharePoint Migration Tool (SPMT)
Follow the below steps to set up the SharePoint migration tool:
- Open SharePoint admin center (https://[tenant]-admin.sharepoint.com/)
- From the left menu, click Migration.
-
Under Other migration solutions , we have SharePoint Migration Tool (SPMT).

- Click Download SharePoint Migration Tool. It will download an exe named spmtsetup.exe
- Double-click the executable to start the installation.
- The installation will prompt you to log in to the M365 tenant.
-
Once installed, the SPMT should be ready for migration.
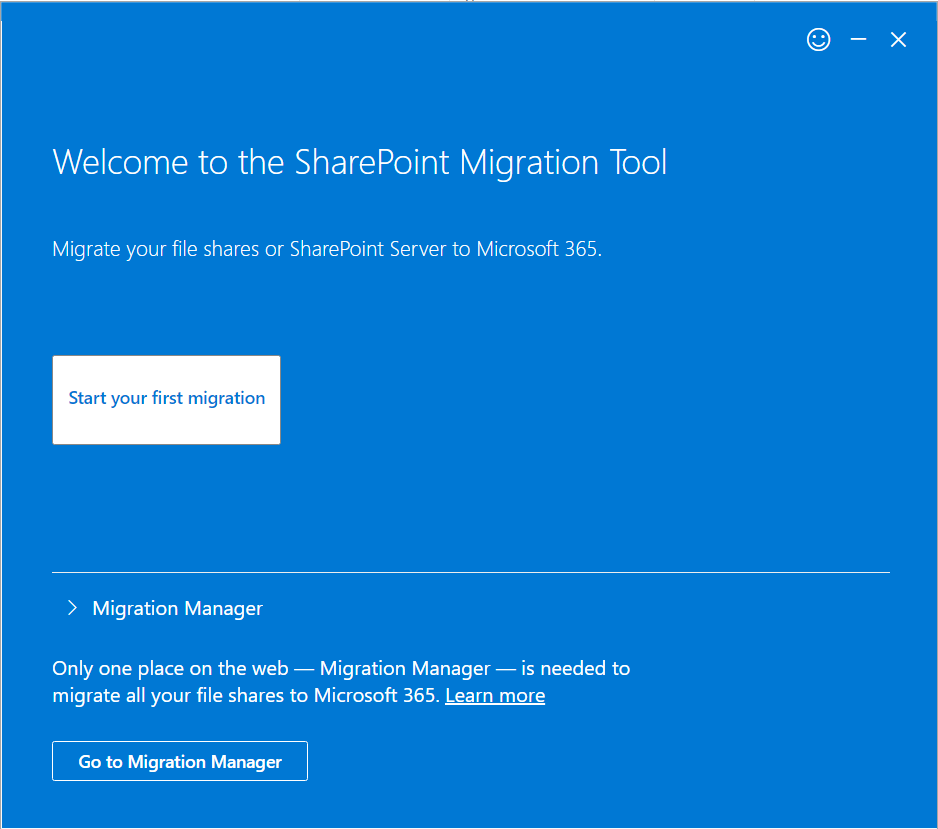
Start the migration
Now that we have SPMT ready, let us go ahead and start the migration!
Select the migration source
Click Start your first migration. From here, we can select the content to migrate from (source type).
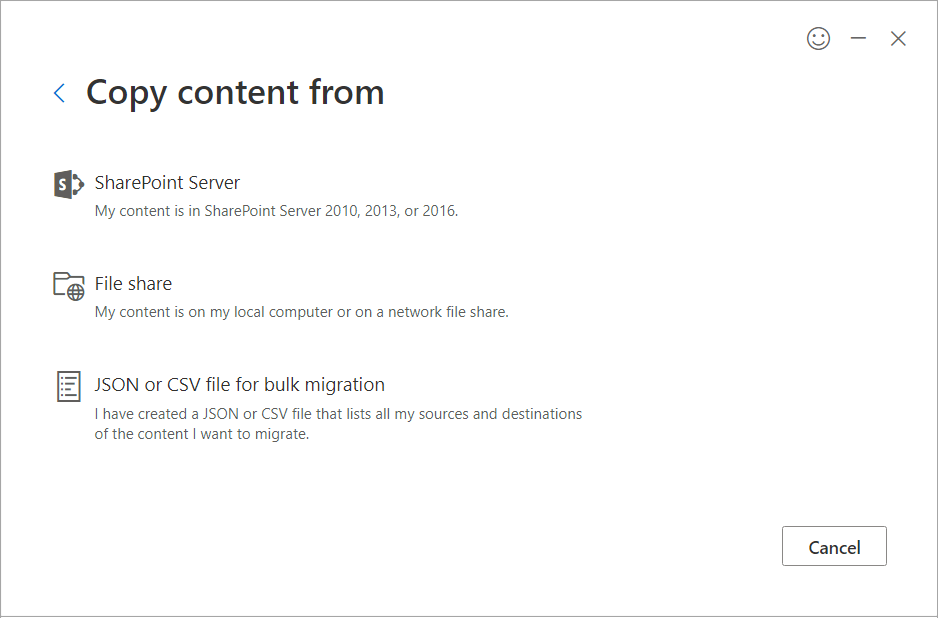
The source options we have are SharePoint Server (including SharePoint 2010, 2013, or 2016) and File share (including content on a local computer and network file share). The bulk migration option allows us to specify a list of all sources and destinations to migrate the content.
Let us select the first option, SharePoint Server. We will migrate the content from SharePoint Server 2016 on-premises to SharePoint online using SPMT.
Specify the SharePoint on-premises site URL to migrate. When prompted by SPMT, specify the site collection administrator credentials.
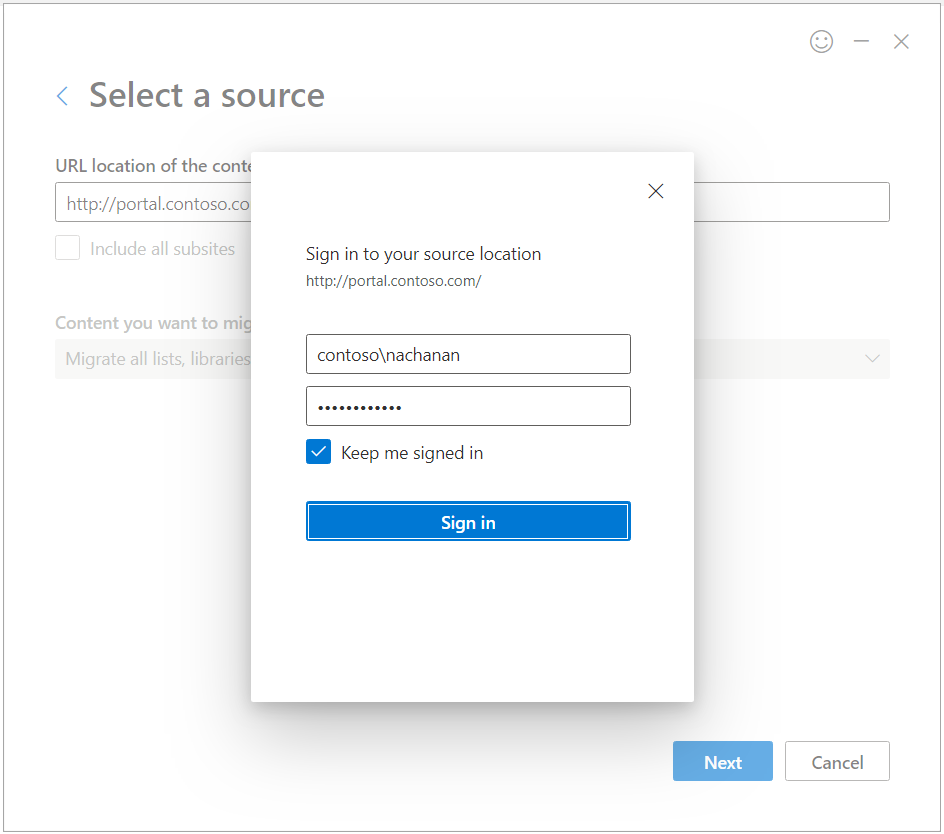
In the next screen, we can choose to include all subsites for migration.
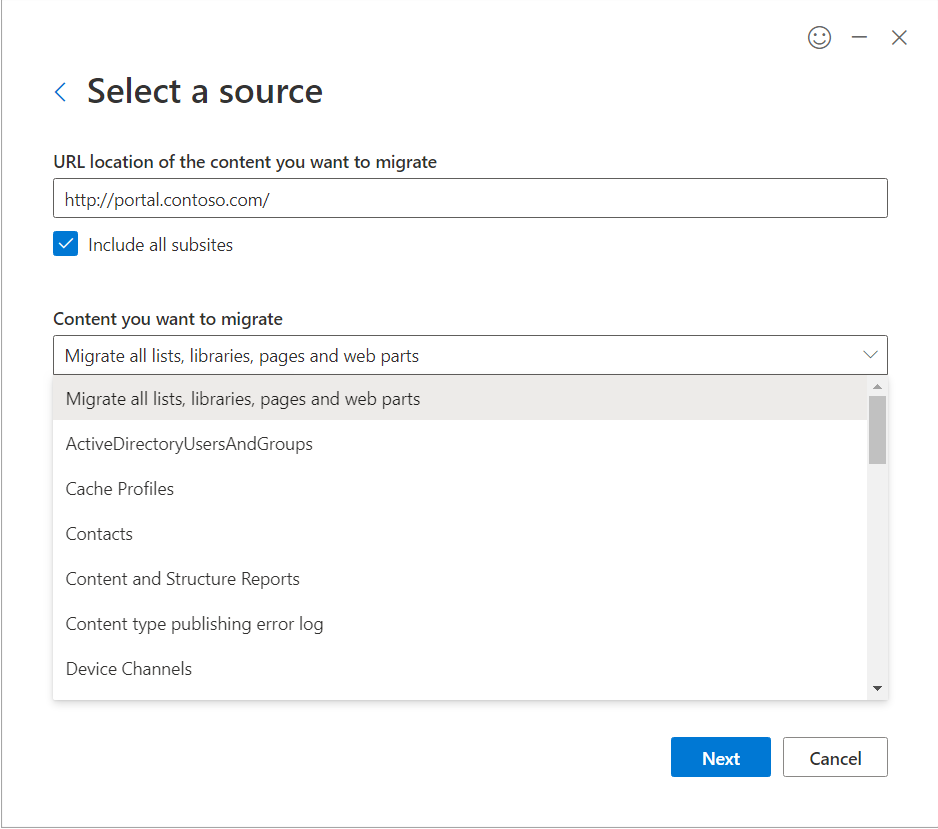
We can also specify the specific content to migrate including below:
- All lists, libraries, pages, and web parts
- Active directory users and groups
- A specific list or library
Probably, the option we are missing here is multiple selections.
In the next screen, we can select where to copy the content including Microsoft Teams and SharePoint.
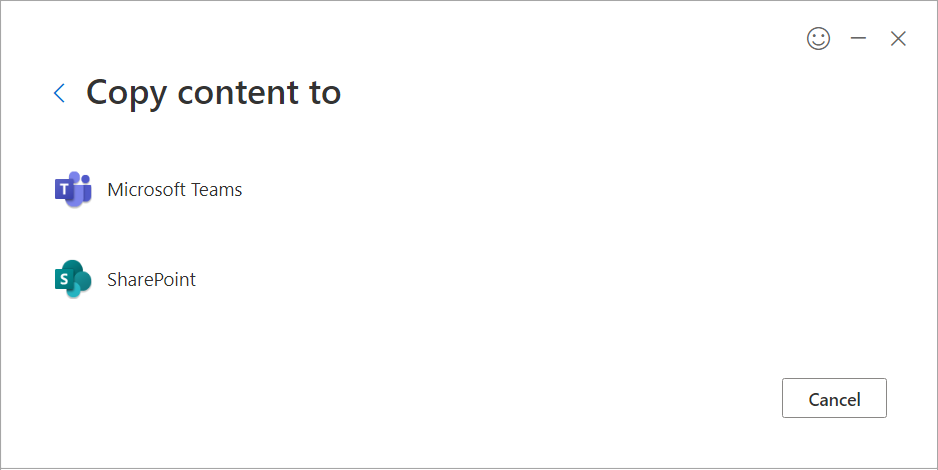
Migration to Microsoft Teams
If we select the option as Microsoft Teams, we can choose the Microsoft Teams team to migrate the content to.

Migration to SharePoint Online
If we select the option as SharePoint, we can mention the SharePoint Online URL to migrate the content to.
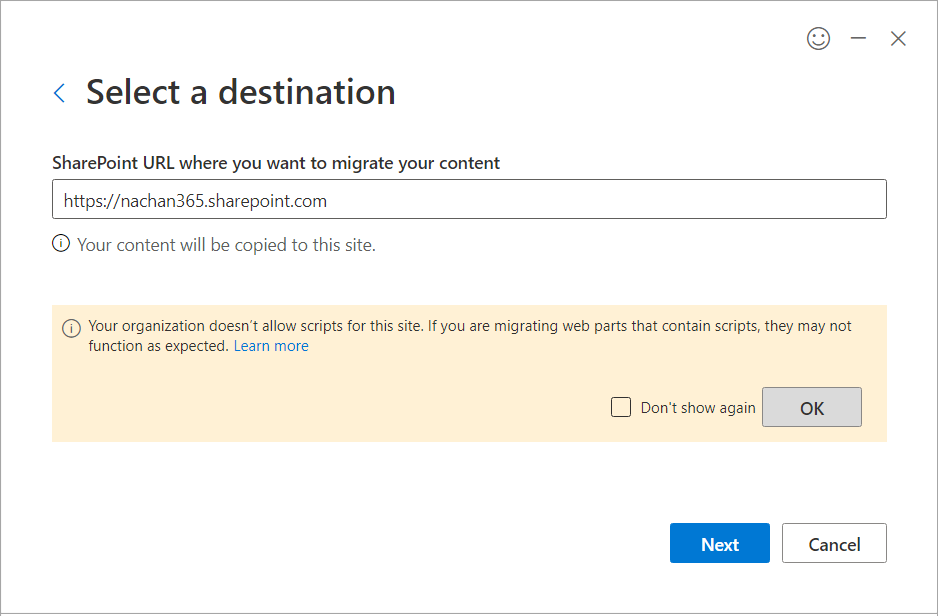
If the destination site in SharePoint Online does not exist, the SMPT tool will create it. Since I have few content editor web parts on my SharePoint 2016 source site, we see the warning being generated for it.
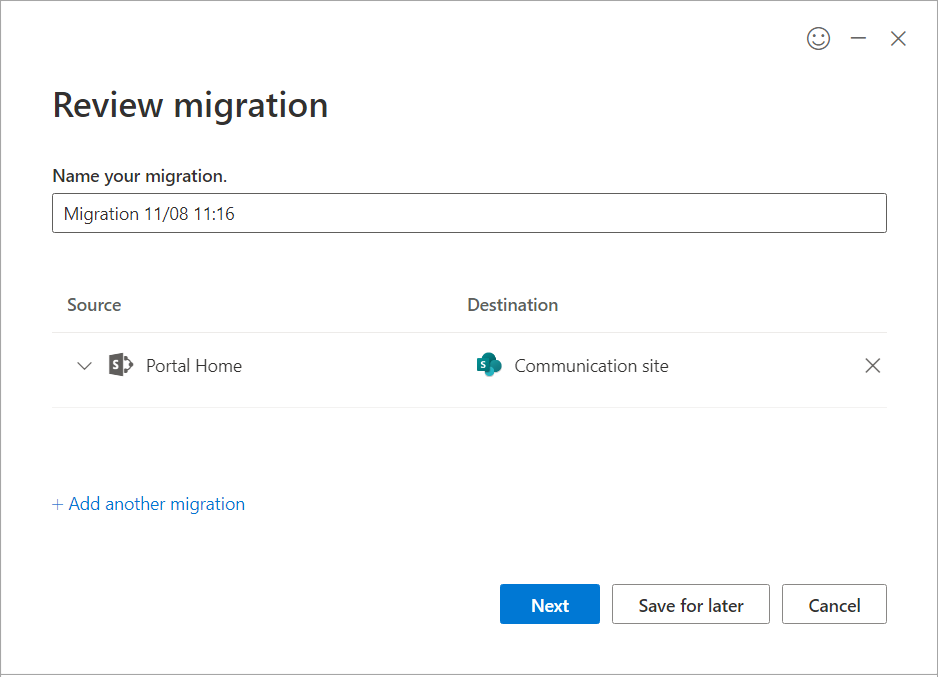
In the next screen, we can review, name, and add another migration.
In the last screen, we can choose the settings to perform the migration.
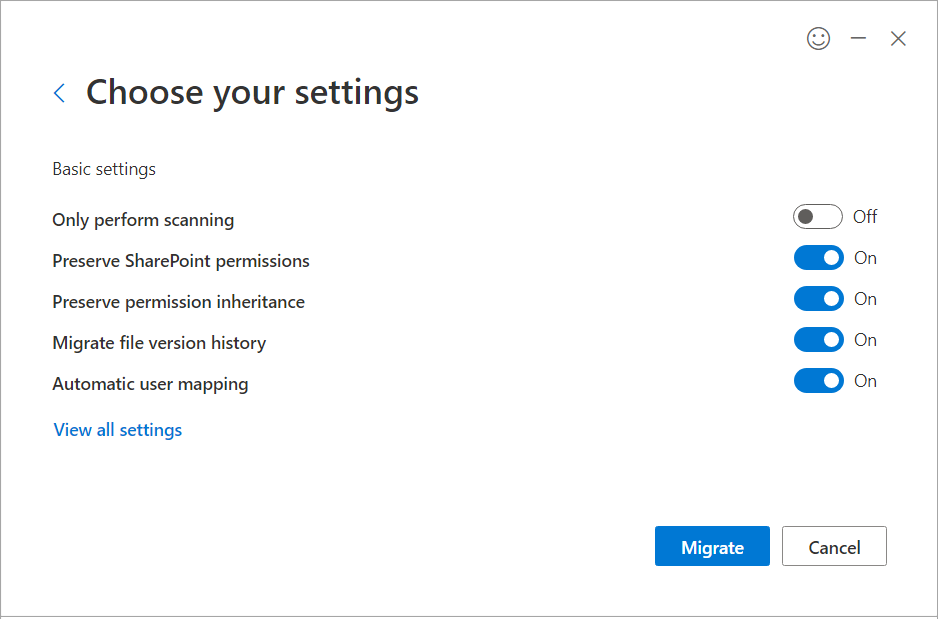
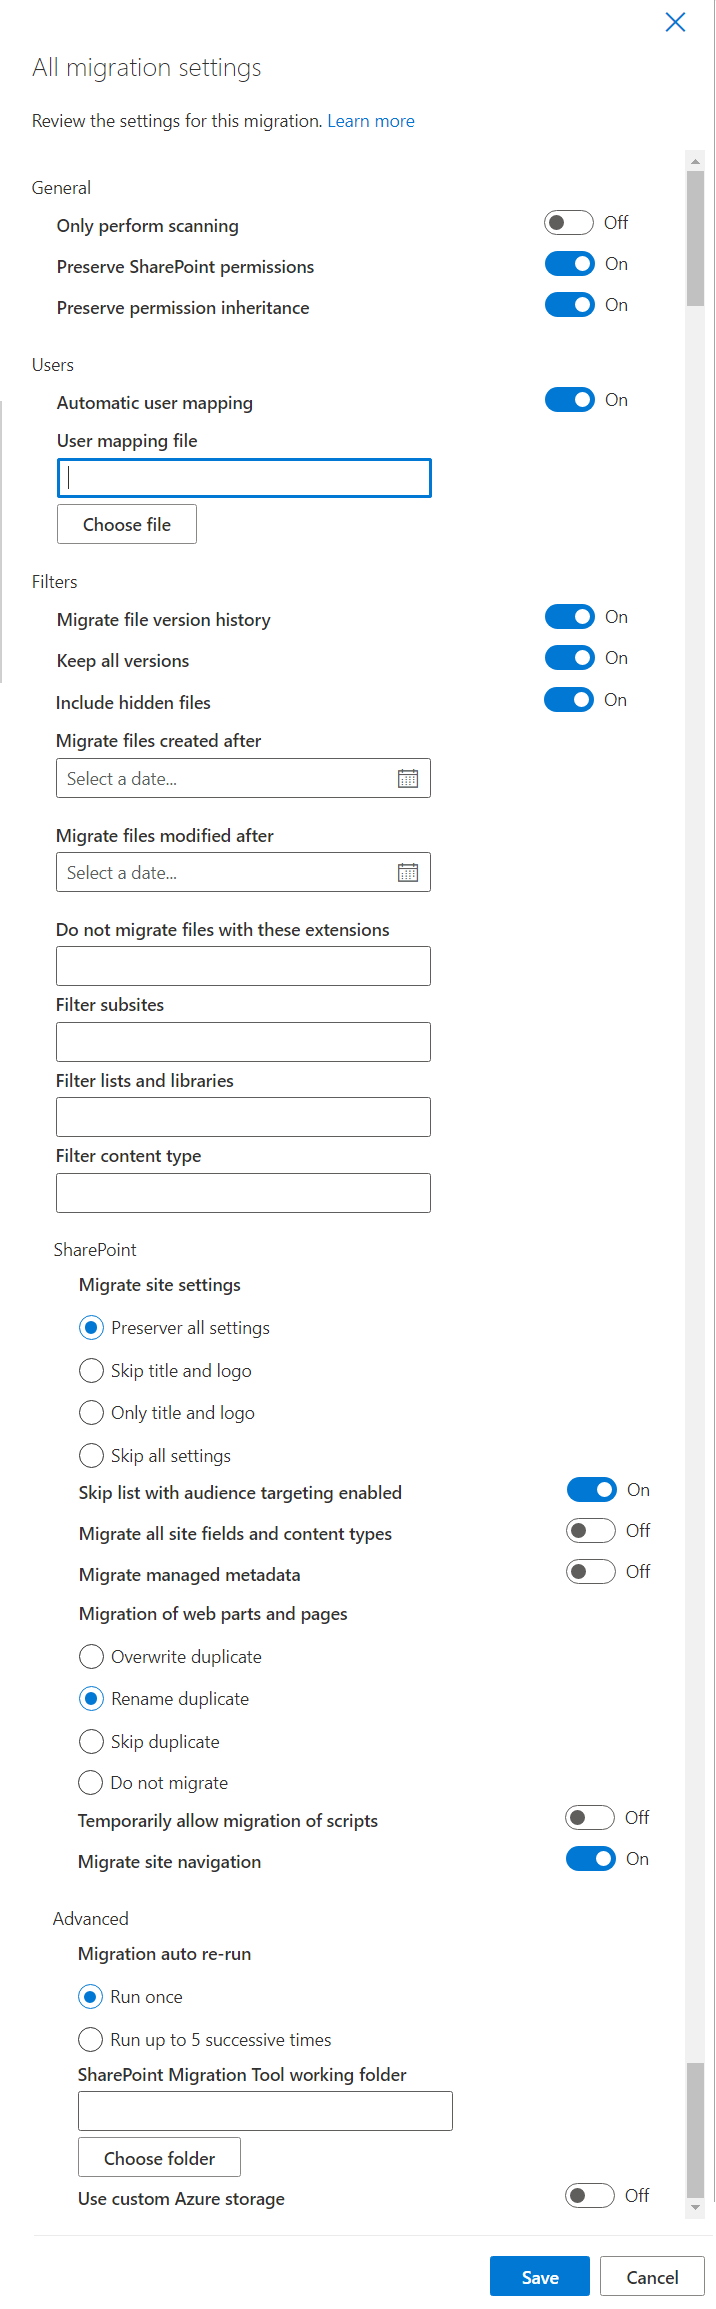
The View all settings option will present more control options over the migration.
Summary
SharePoint Migration Tool (SPMT) offers an easy way to migrate the content from SharePoint on-premises sources to M365 including SharePoint Online, MS Teams, and OneDrive for business.


Leave a comment