
Content Assembly in Microsoft Syntex
Overview
Generating a large set of documents with the same content but targeted for different entities is a time-consuming and error-prone task. E.g., generating a contract renewal document for multiple vendors with the same content but just changing the vendor’s name and a piece of specific information at certain places in the document.
In this article, we will explore the feature of Microsoft Syntex called Content Assembly that helps to automatically generate repetitive business documents. E.g., contracts, statements of work, and service agreements.
Content assembly overview
The content assembly feature of Microsoft Syntex helps to automatically generate repetitive business documents by creating modern templates and using those templates to generate documents.
It is a 4-step process as follows:
- Create a modern template from a file uploaded to SharePoint, OneDrive, or your local storage.
- Associate fields in the template
- Publish modern template
- Create documents from a modern template
Business case
Let us consider a business case to address with content assembly. Consider you are working for Contoso, an organization that works with multiple vendors as consultants who works as an expert in a specific area to advise Contoso. Consulting agreement is a contract between the Consultant (i.e., vendor) and Client (i.e., Contoso) which layouts the terms of the agreement.
The consulting agreement needs to be renewed for each vendor every year. Contoso spends a significant amount of time generating Consulting agreements which is time-consuming and error-prone work. Contoso is looking for automating this work.
For this article, I am using one such example of consulting agreement from LegalContract.com. You can download the same from here.
The document has the below placeholders
| Placeholder | Description |
|---|---|
| <CONTRACT DATE> | Date of renewal for the contract. |
| <CLIENT NAME> | Name of client. E.g., the department at Contoso. |
| <CONTACTOR NAME> | Name of the contractor whose services are used by Contoso. |
| <SERVIES PROVIDED> | Services of the Contractor being used by the Client. |
| <COMPENSATION> | Compensation from Client to Contractor for the contract. |
Let us follow the below steps to help Contoso automate its renewal process.
Step 1: Create a modern template
Create a modern template by below steps:
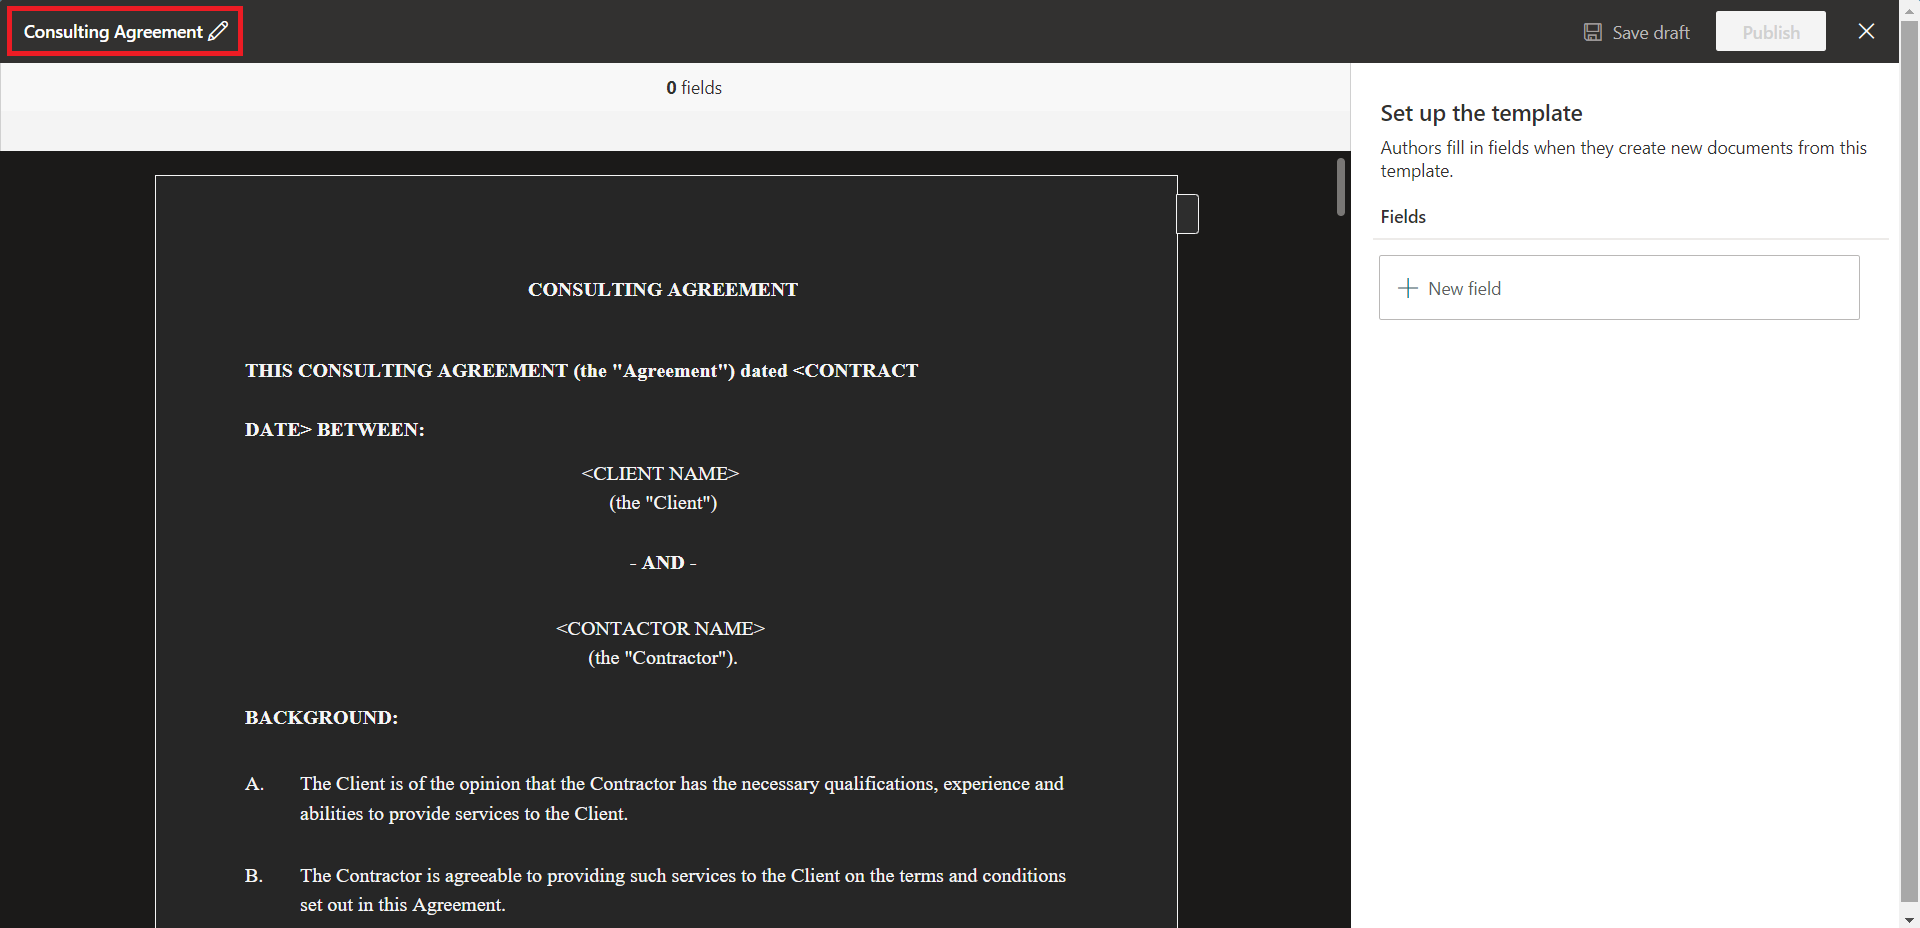
- Open any document library from any SharePoint site.
-
Click New > Create a modern template.
- Select a word document to be used as a template from SharePoint, OneDrive, or your local device.
-
After uploading, the document will be displayed in the template studio. We need to add fields to this document to create a template out of it.
- You can rename the template by clicking the pencil icon on the top left corner. By default, it takes the file name as a template name.
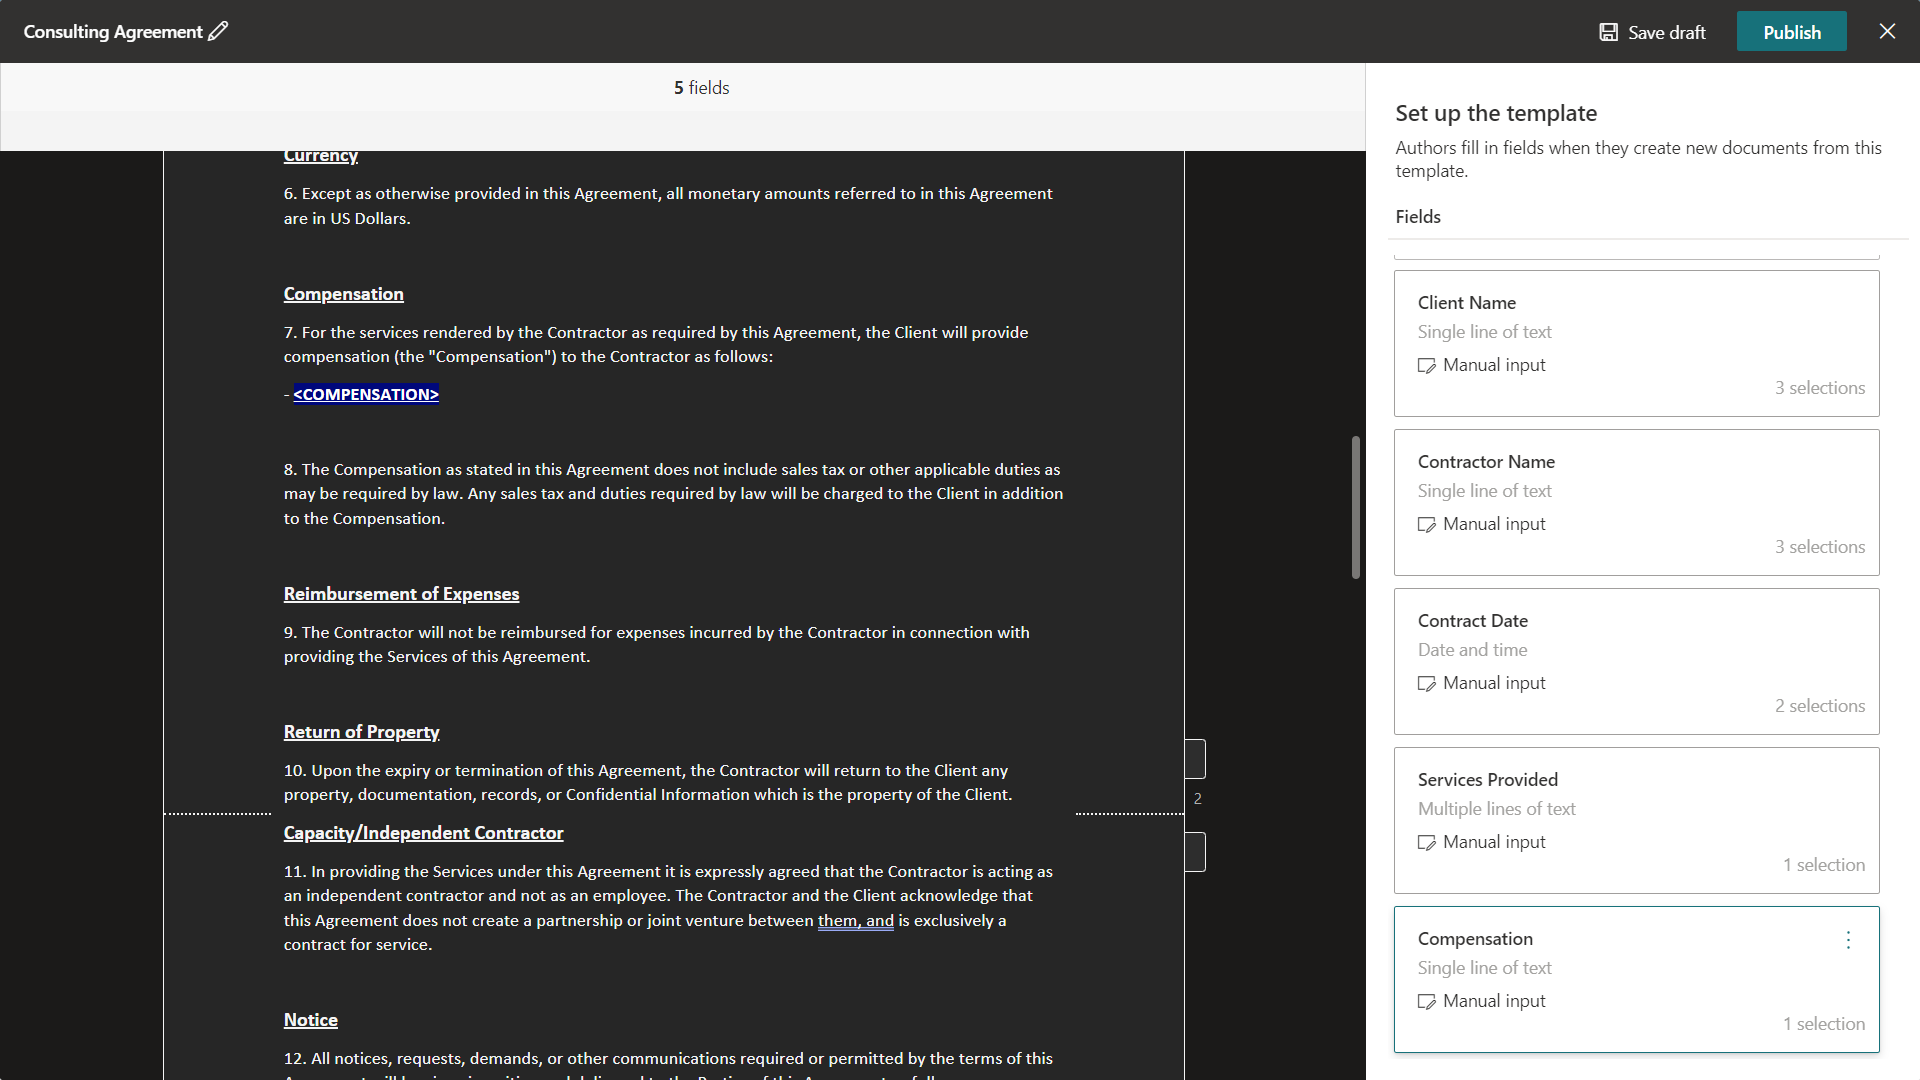
Create fields
After having a modern template, we need to define multiple fields that can be mapped at multiple occurrences in the template. E.g., <CLIENT NAME> appears at multiple places in the document (aka modern template).
Follow the below steps to create a field.
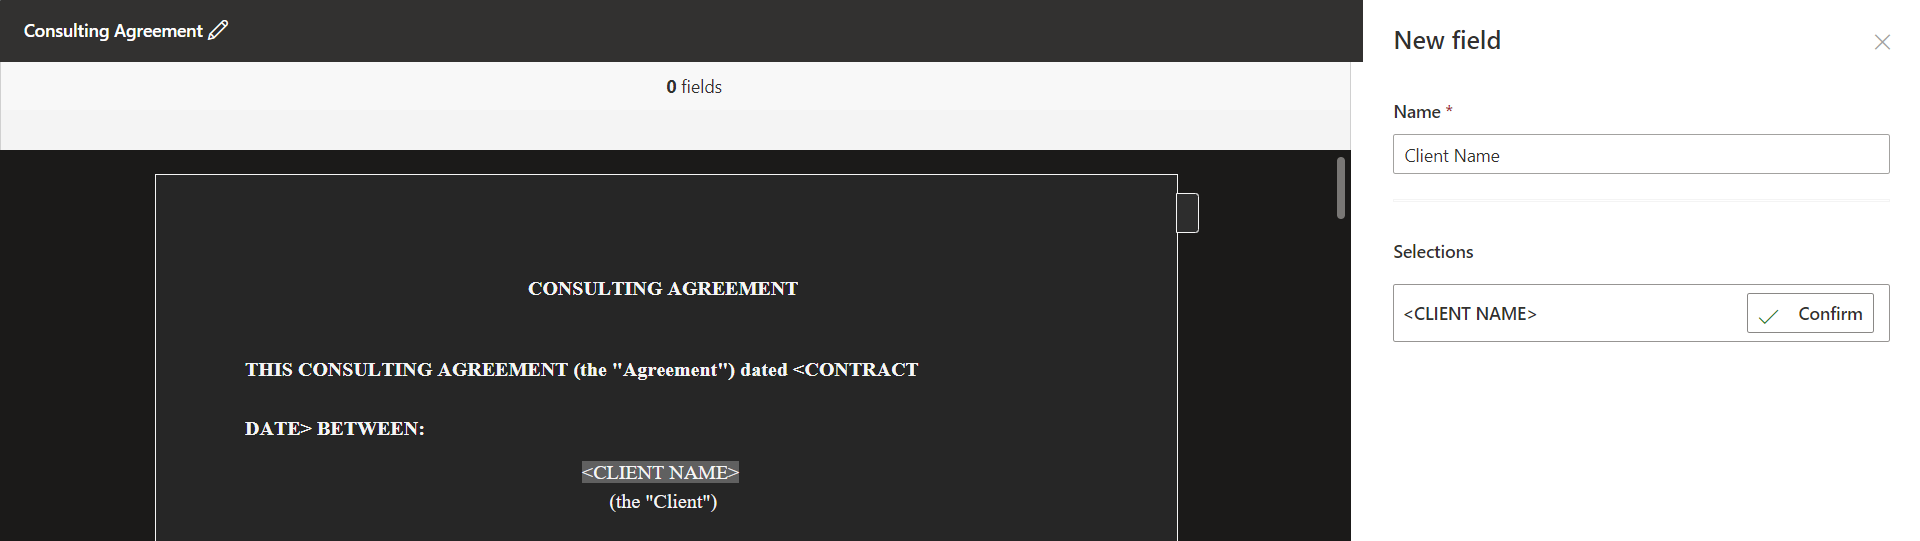
- Click + New field.
- Name the field.
-
Select the content in a modern template.
- Click Next.
-
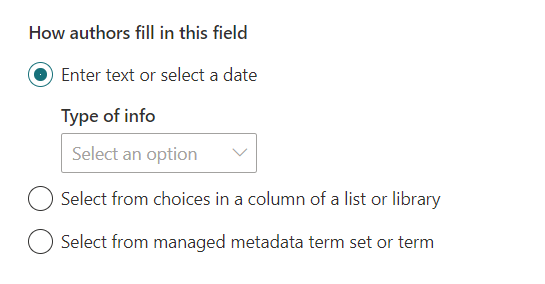
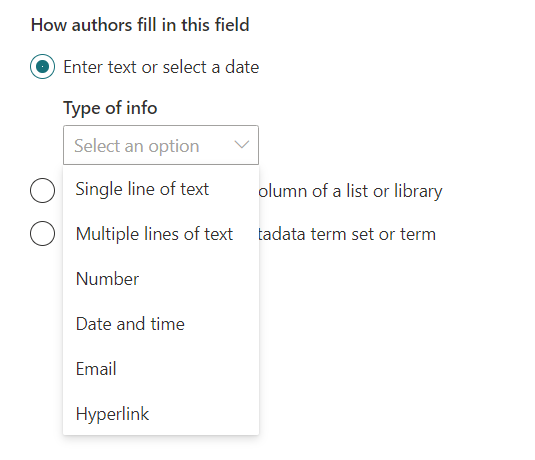
In the How authors fill this field section, define how the authors will be able to fill in this field.
-
If you select the authors to enter text or select a date (i.e., option 1), you will get the below options to configure.
Follow the steps through this section to define all fields on the modern template, as shown below:
Publish a modern template
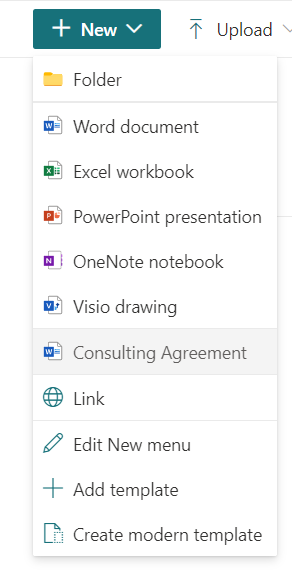
Click Publish to make the modern template available for everyone to create documents based on it. The modern template (Consulting Agreement) should be now visible under the New menu.
Create a document from a modern template
A modern template can be used to create similar documents. Follow the below steps to create a document from the modern template.
- From the SharePoint document library, select New.
- Select Consulting Agreement.
-
Fill in the needed fields.
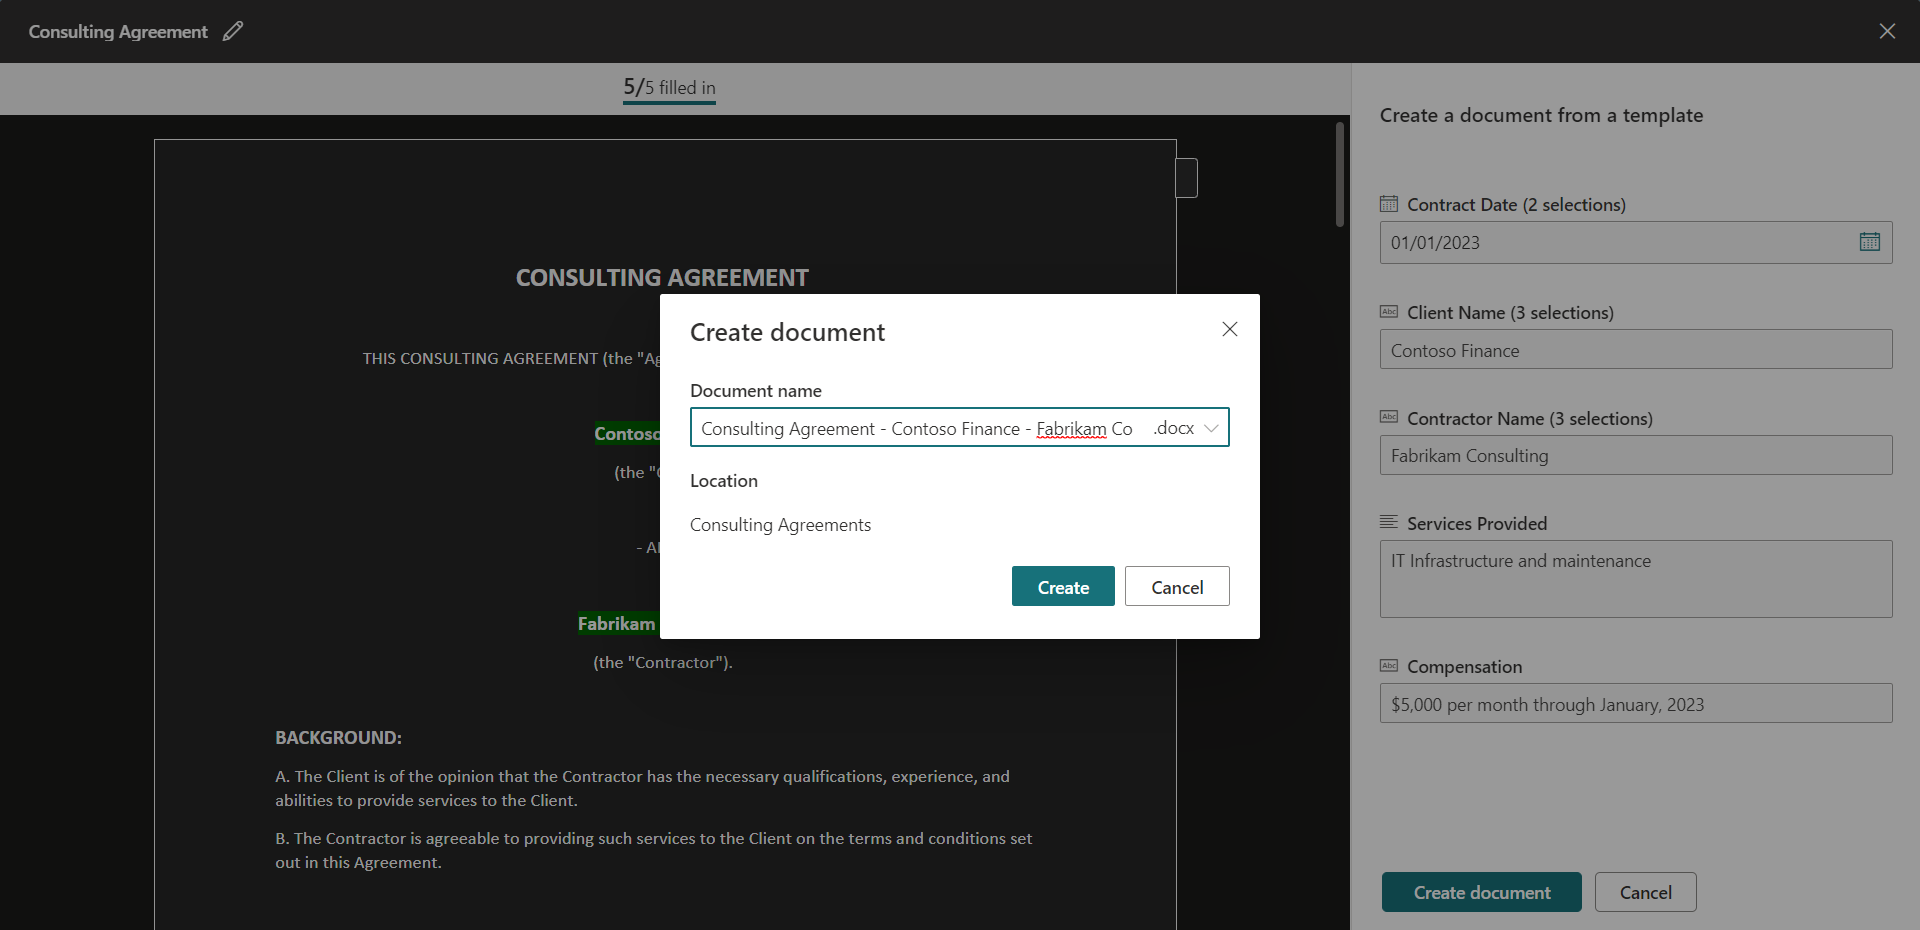
- Click Create document. Name it and your document is ready to use.
Edit modern template
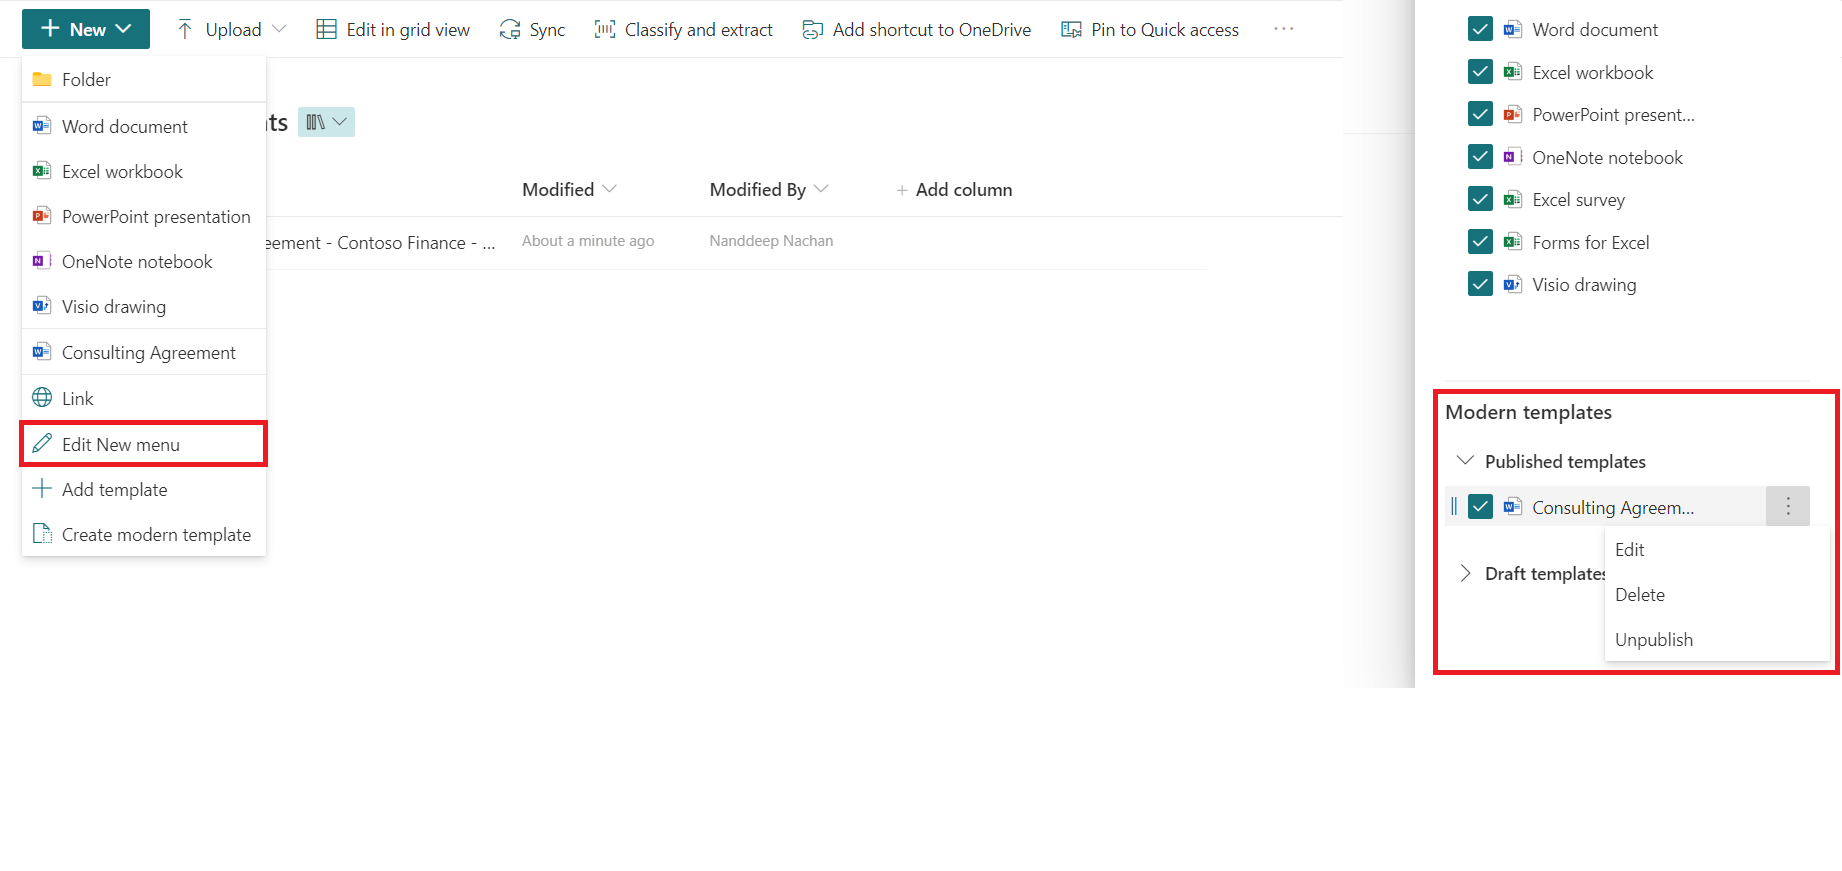
To edit the modern template, follow the below steps:
- From the SharePoint document library, select New > Edit New menu.
-
Under the modern templates section, select the template to edit, delete, or unpublish.
Limitations
Below are the limitations to note:
- Word documents should not have any comments or track changes enabled.
- Images should not be text-wrapped.
- A template is associated with a library where it is created.
- Once a document is created from a template, it’s not associated with the template.
Summary
Generating a large set of documents with the same content but targeted for different entities is a time-consuming and error-prone task. The content assembly feature of Microsoft Syntex helps to automatically generate repetitive business documents by creating modern templates and using those templates to generate documents.


Leave a comment